Chats
Chats
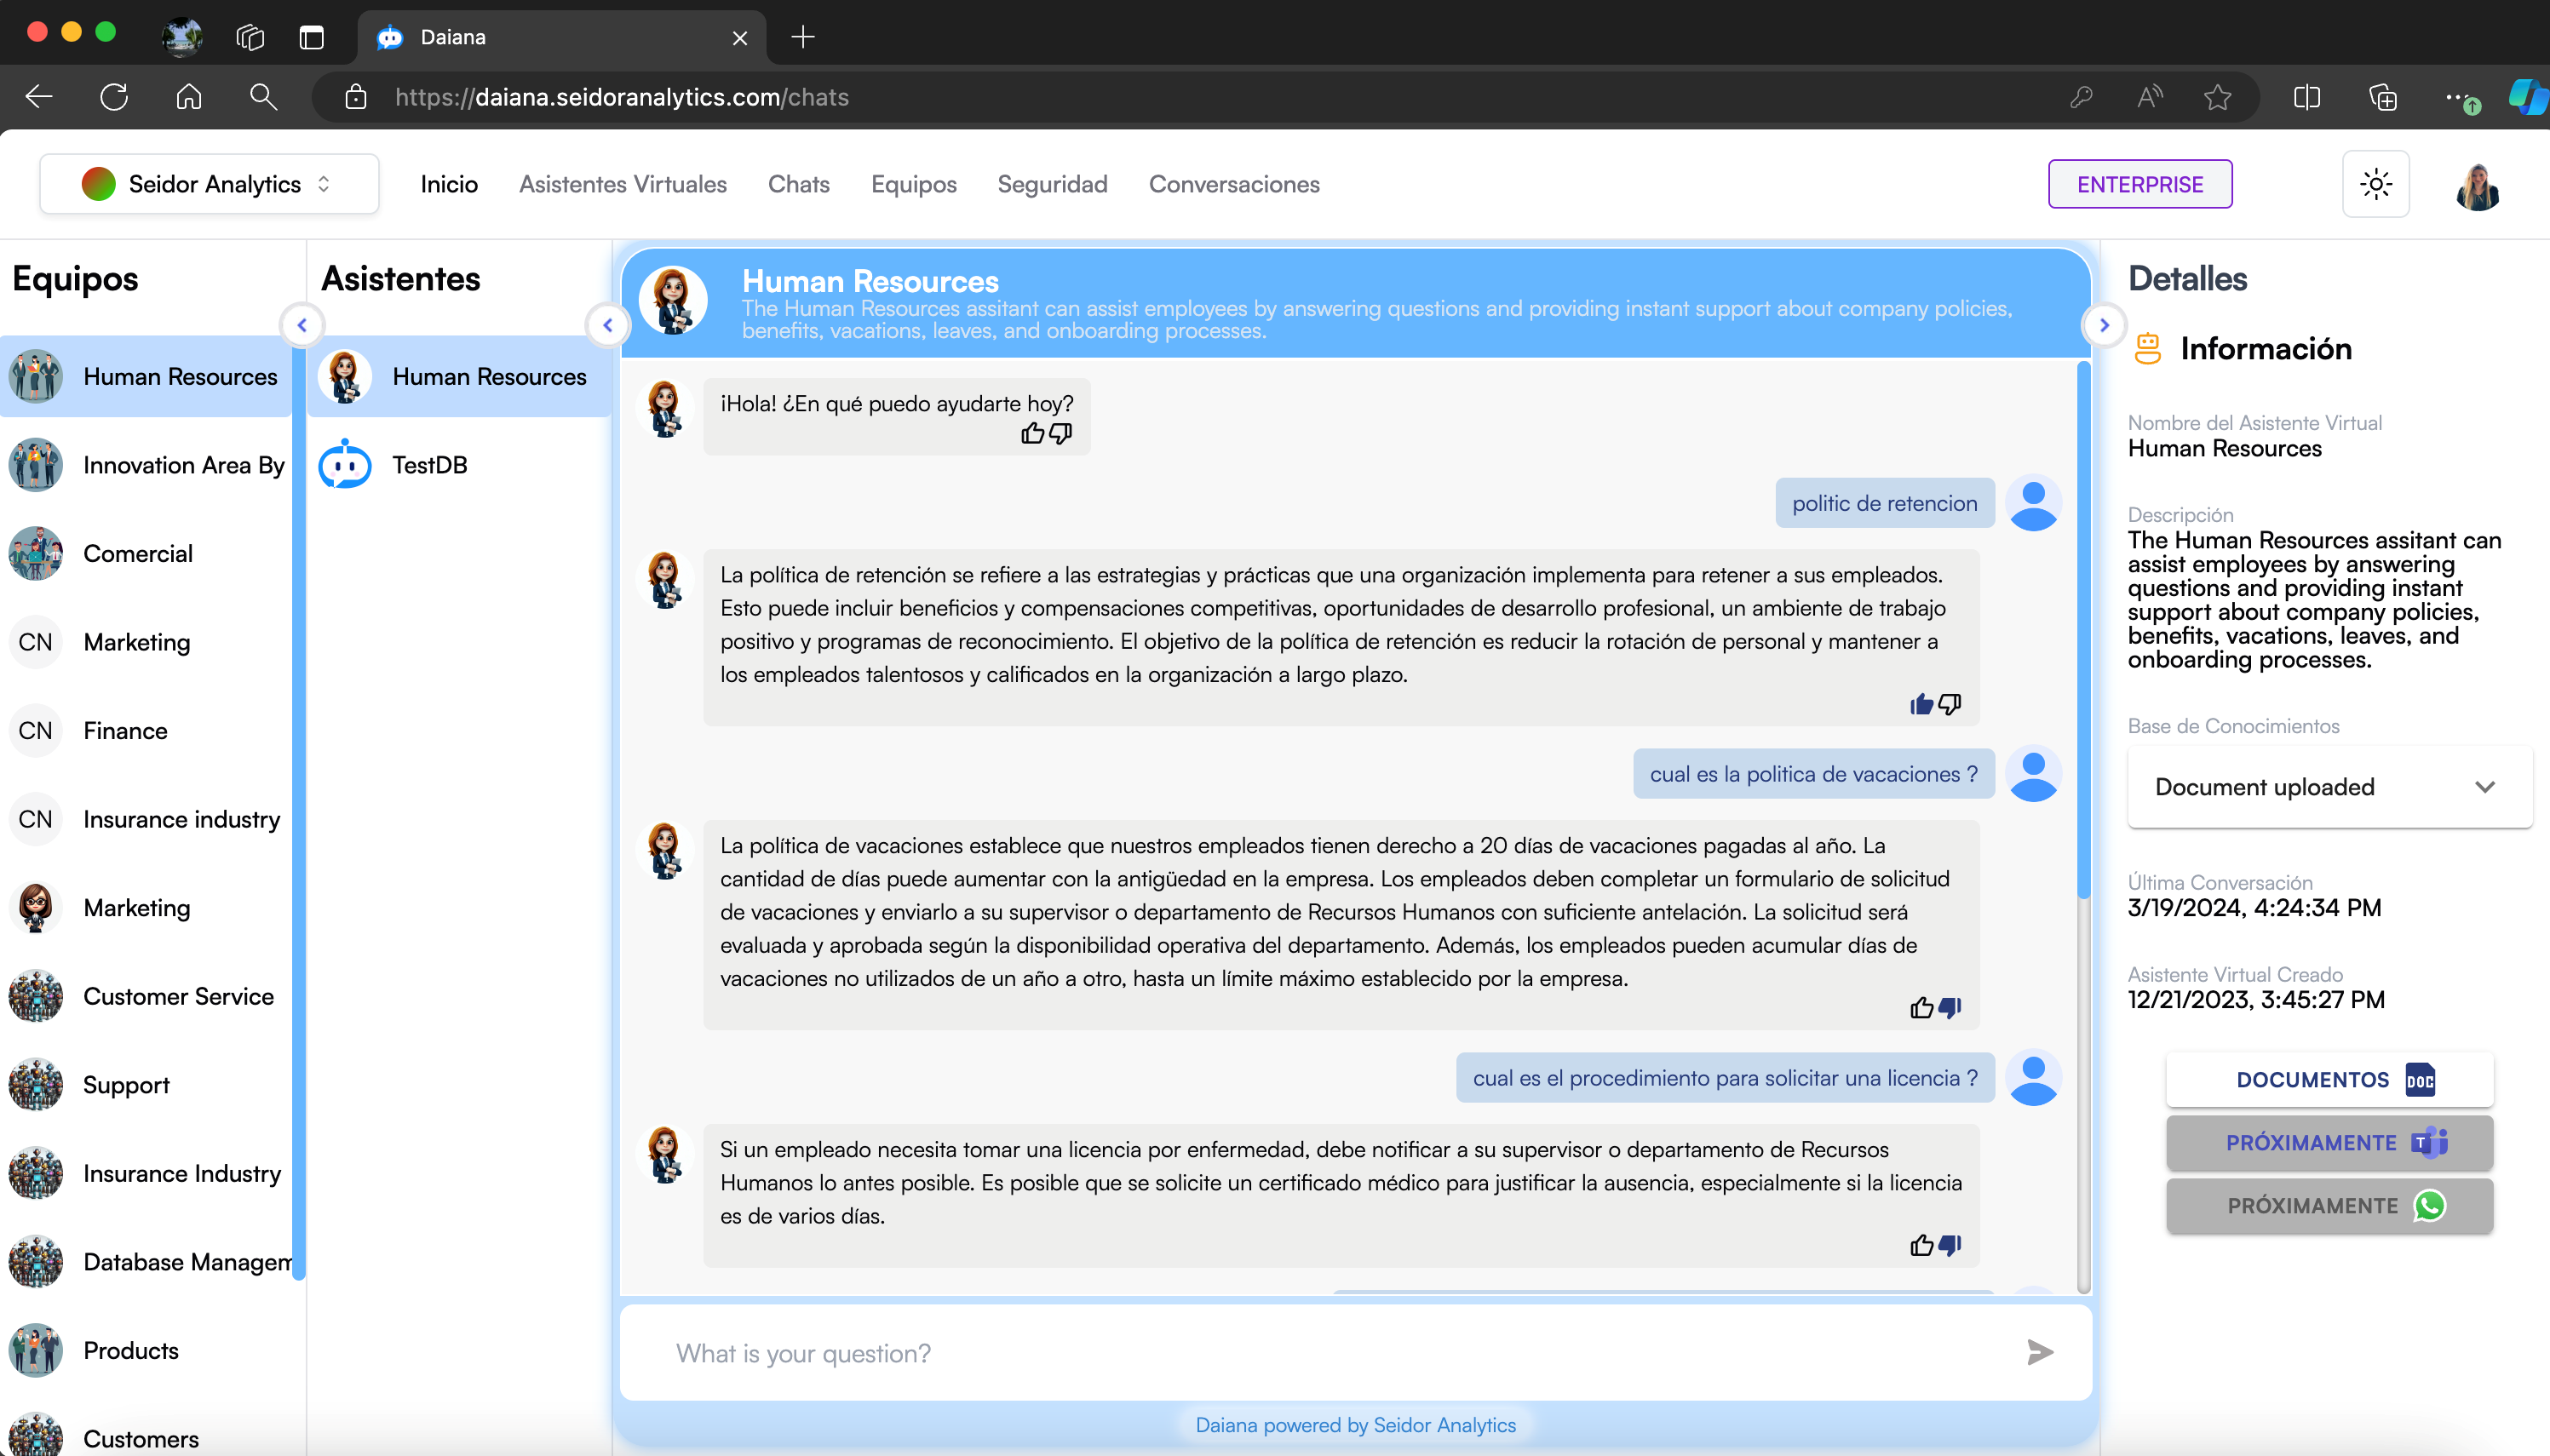
The Virtual Assistant Chat screen in Daiana allows users to interact with specific virtual assistants to obtain instant answers and support on various company policies and procedures. This interface is organized into sections that facilitate navigation and efficient use of assistants.
Screen Components
1) Top Navigation Bar:
- Tenant: Identification of the Tenant associated with the logged-in user.
- Navigation Menu: Includes the Home, Virtual Assistants, Chats, Teams, Security, and Conversations sections.
- Plan Indicator: Shows the user's current plan (e.g., Enterprise).
- Theme Icon: Access to platform theme types (e.g., Dark).
- User Profile: Access to profile settings and user options.
2) Teams Panel:
- Teams List: Located on the left, shows the different teams available on the platform. Each team contains one or more virtual assistants.
3) Assistants Panel:
- Assistants List: Shows the virtual assistants available within the selected team. Users can select an assistant to start a conversation.
4) Chat Panel:
- Assistant Header: Includes the name and description of the selected virtual assistant.
- Conversation Window: Main area where interactions with the virtual assistant are displayed.
- Message Input Field: Text box at the bottom where users can type their questions or requests.
5) Details Panel:
- Assistant Information: Provides additional details about the selected virtual assistant, such as name, description, knowledge base, last conversation, and creation date.
- Access to Documents and Additional Functions: Quick links to access related documents and upcoming features.
Procedures and Functionalities
1) Select a Team:
- In the teams panel on the left, click on the name of the team you wish to interact with. This will update the list of available assistants in the assistants panel.
2) Select a Virtual Assistant:
- In the assistants panel, click on the virtual assistant you wish to interact with. The conversation window will update to show the interaction with that assistant.
3) Send a Question or Request:
- Type your question or request in the message input field at the bottom of the conversation window.
- Press the Enter key or click the send icon to send your message to the virtual assistant.
4) Review Assistant Response:
- Virtual assistant responses will appear in the conversation window. You can view the interaction history in this area for reference.
5) Consult Assistant Details:
- In the details panel on the right, review information about the selected virtual assistant, including its knowledge base and associated documents.
6) Access Related Documents:
- Click on available links in the details panel to access specific documents that may be useful for your query.