Teams
Teams
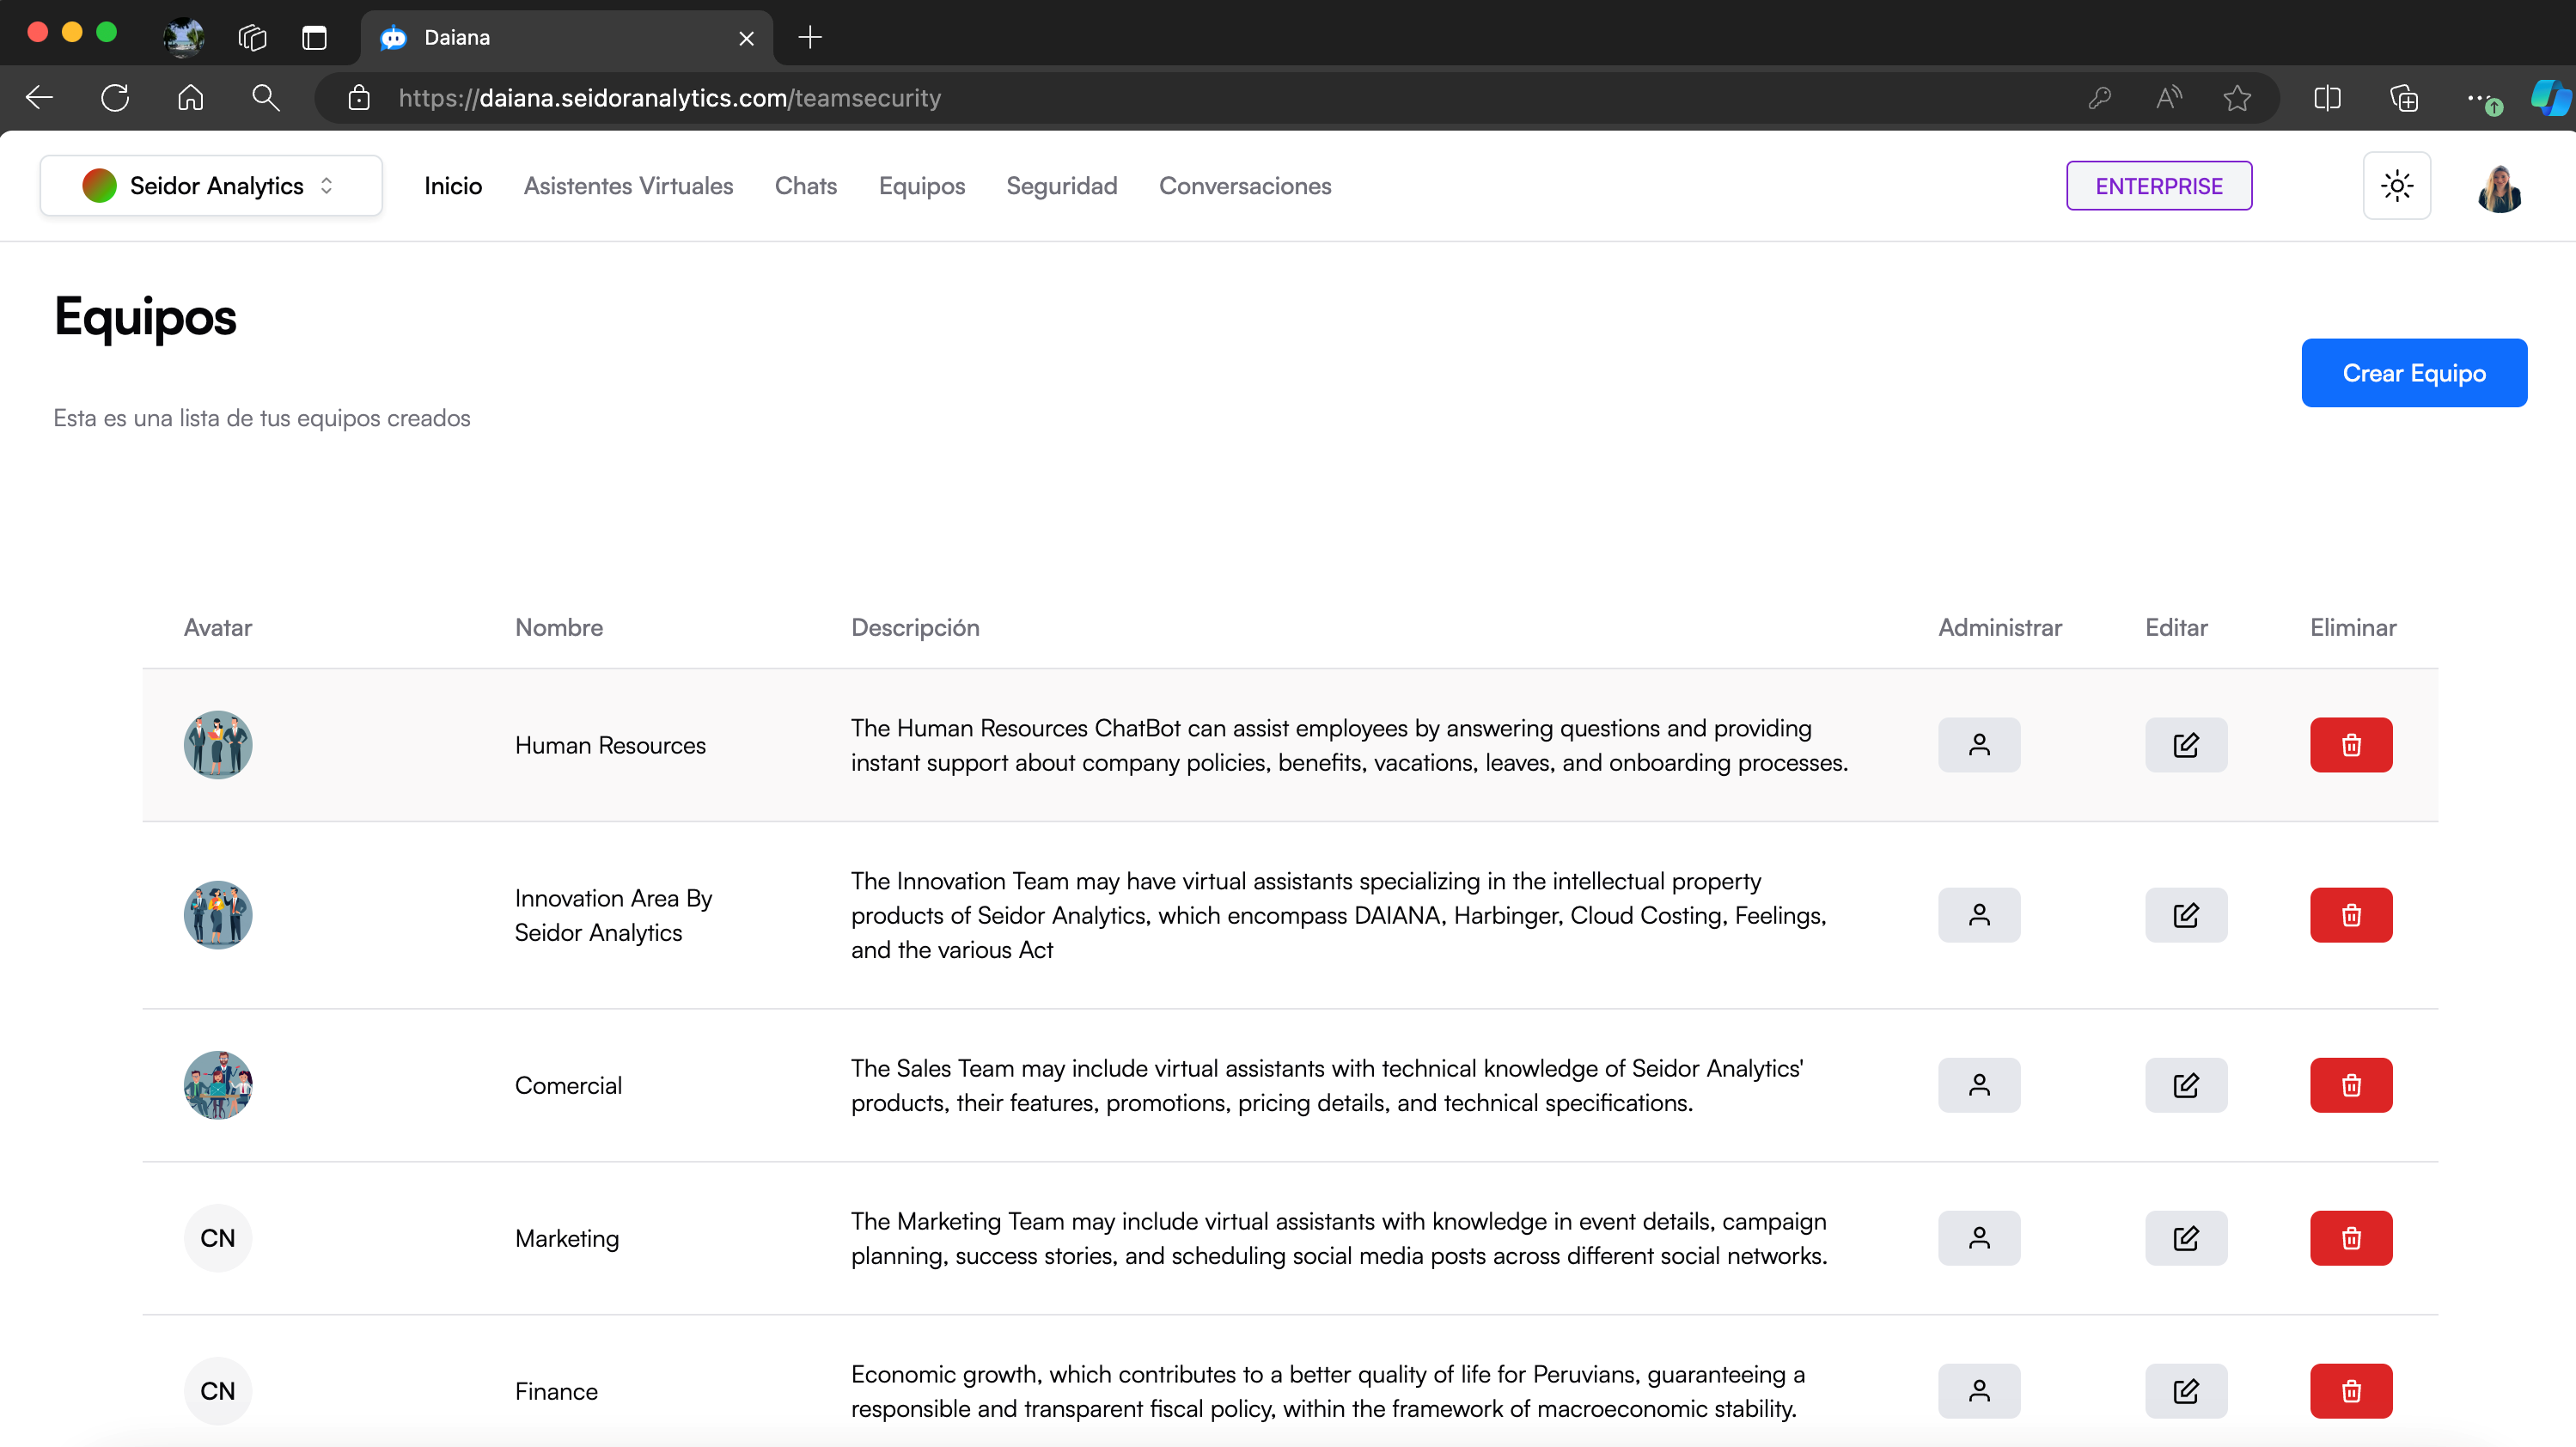
The Teams screen in Daiana allows users to view, manage, and create teams that group virtual assistants by specific areas or departments. This view offers a clear and organized list of all created teams, with options to manage, edit, or delete each team.
Screen Components
1) Top Navigation Bar:
- Tenant: Identification of the Tenant associated with the logged-in user.
- Navigation Menu: Includes the Home, Virtual Assistants, Chats, Teams, Security, and Conversations sections.
- Plan Indicator: Shows the user's current plan (e.g., Enterprise).
- Theme Icon: Access to platform theme types (e.g., Dark).
- User Profile: Access to profile settings and user options.
2) Teams Header:
- Title: “Teams” indicates the current section of the platform.
- “Create Team” Button: Blue button on the right allowing the creation of a new team.
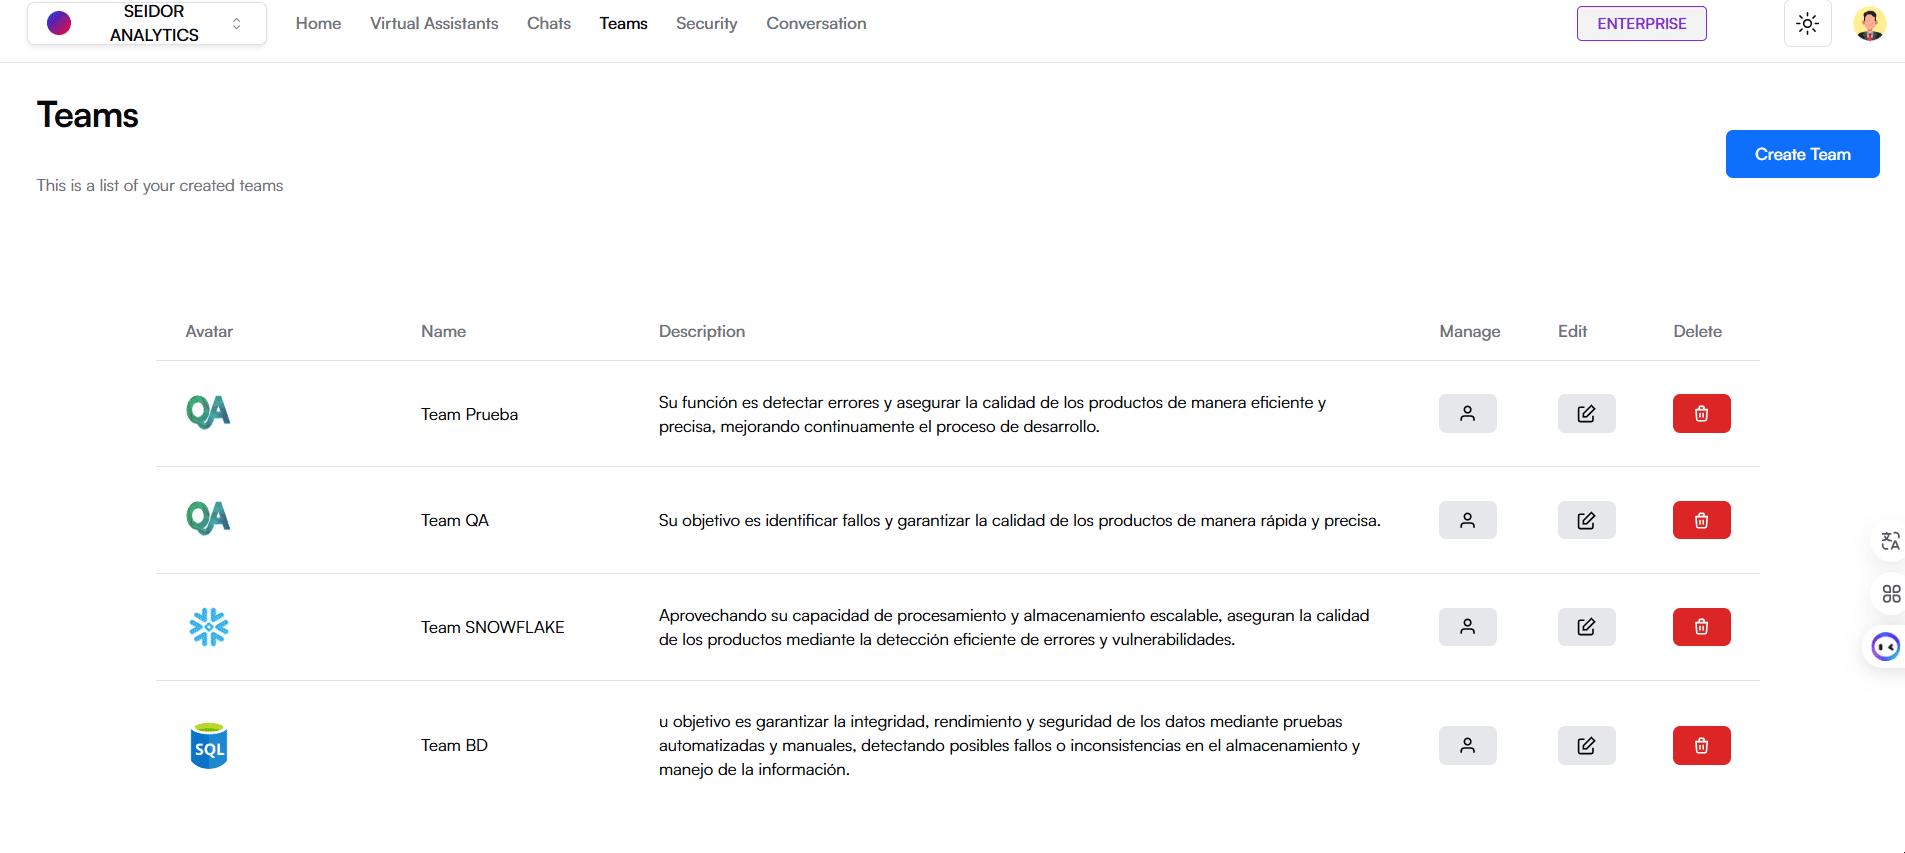
3) Teams List:
Columns:
- Avatar: Icon representing the team.
- Name: Team name.
- Description: Brief description of the team and its functions.
- Manage: Person icon to manage team members.
- Edit: Pencil icon to edit team information.
- Delete: Trash icon to delete the team.
Procedures and Functionalities
1) Create a New Team:
- Click the “Create Team” button.
- Complete the form with the team name, description, and other required details.
- Click “Save” to create the team.
2) Manage a Team:
- In the “Manage” column, click the person icon next to the team you wish to manage.
- This action will take you to a view where you can add or remove team members and adjust their roles.
3) Edit a Team:
- In the “Edit” column, click the pencil icon next to the team you wish to edit.
- Modify the necessary information in the displayed form and click “Save” to update team details.
4) Delete a Team:
- In the “Delete” column, click the trash icon next to the team you wish to delete.
- Confirm the action in the confirmation dialog to permanently delete the team.
Procedure to create a new team
A) Access the Teams Section
- From the top navigation bar, select “Teams”.
B) Create a New Team:
- Click the “Create Team” button.
C) Configure the Team
- Team Name: Enter a unique name for the team in the corresponding field.
- Description: Provide a brief description of the team's functions.
- Team Avatar: Click “Select file” to upload an image representing the team (allowed formats: JPG, PNG, WEBP, SVG, max size 5 MB).
D) Create the Team:
- Click the “Create Team” button to save the configuration and create the new Team.
Procedure to manage a team
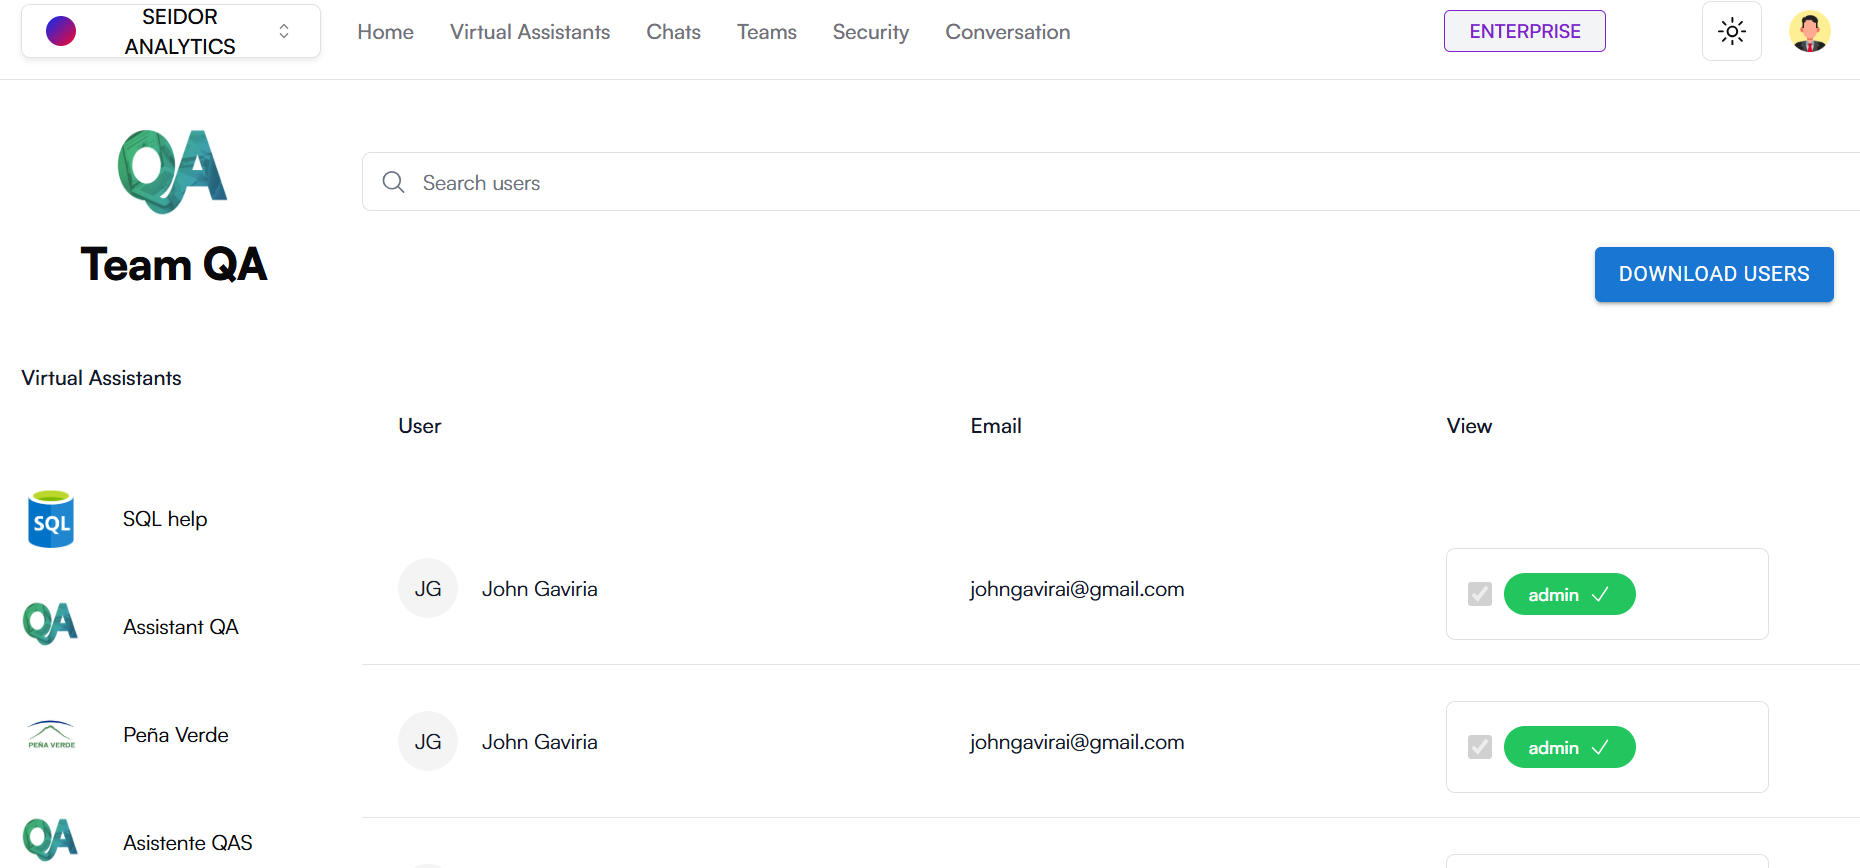
A) Access the Teams Section
- From the top navigation bar, select “Teams”.
B) Manage a Team:
- click the person icon next to the team you wish to manage.
C) Configure the Team:
Search Bar: enter terms to search for specific virtual assistants.
Download Users: Clicking the “Download Users” button will download the list of users in the team in XLSX format.
View: If the user role is user, the checkbox will be enabled; activating it adds the user to the team. If the user role is admin, the checkbox will be disabled.
Procedure to edit a team
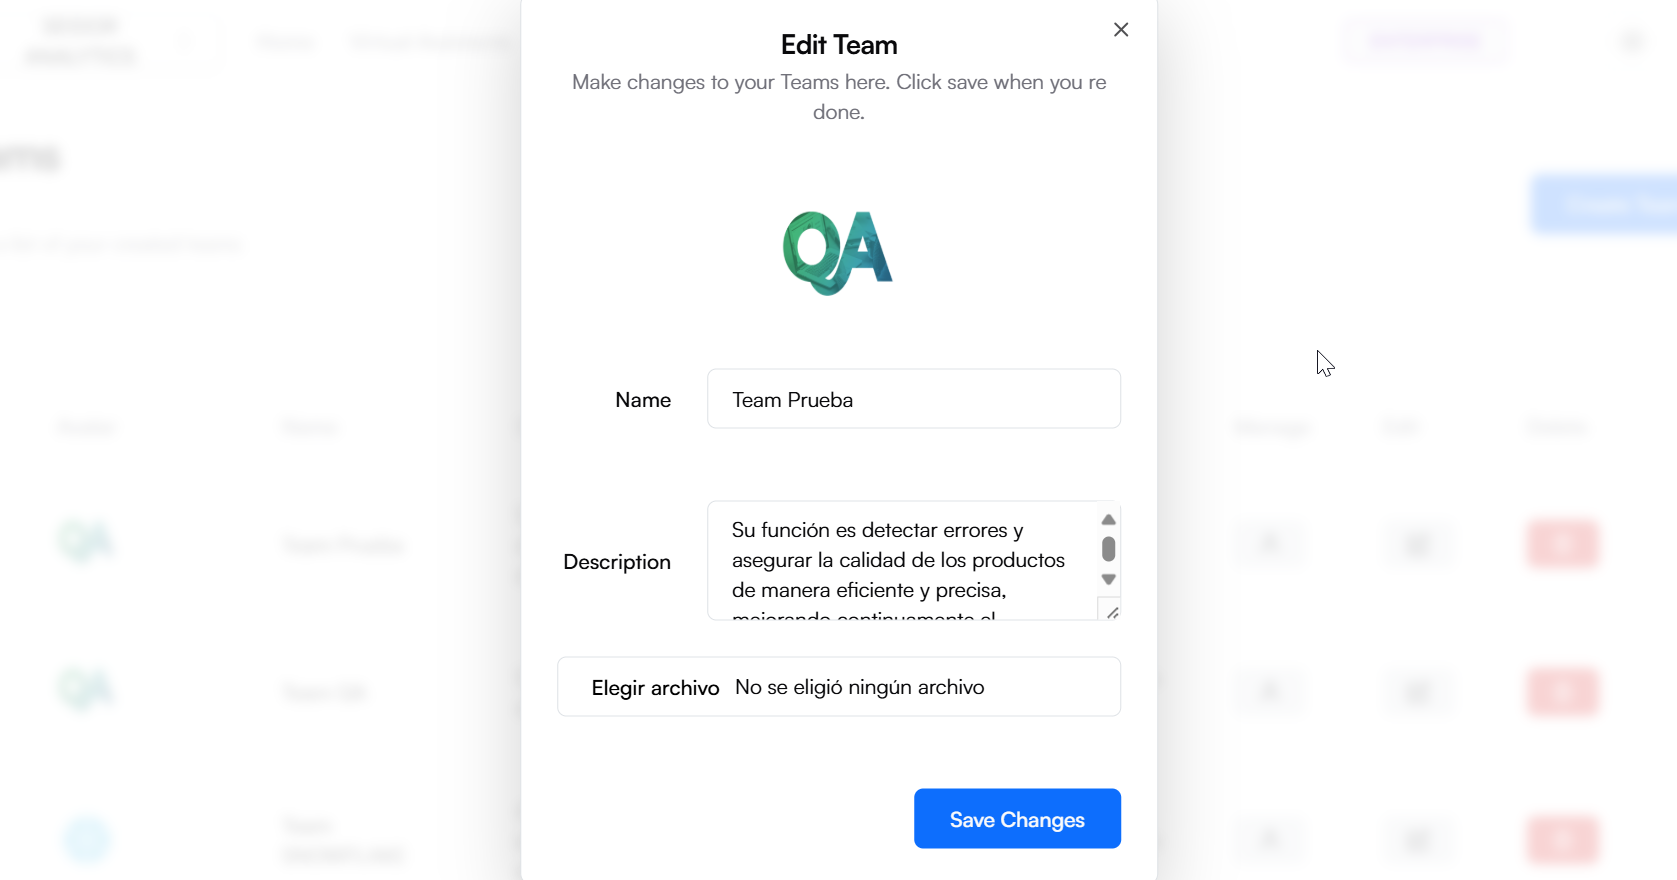
A) Access the Teams Section
- From the top navigation bar, select “Teams”.
B) Edit a Team:
- click the pencil icon next to the team you wish to manage.
C) Configure the Team:
- Team Name: Enter a unique name for the team in the corresponding field.
- Description: Provide a brief description of the team's functions.
- Team Avatar: Click “Select file” to upload an image representing the team (allowed formats: JPG, PNG, WEBP, SVG, max size 5 MB).
D) Edit the Team:
- Click the “Edit Team” button to save the configuration and edit the Team.
Procedure to delete a team

A) Access the Teams Section
- From the top navigation bar, select “Teams”.
B) Delete a Team:
- click the trash icon next to the team you wish to delete.
- To confirm, click the “Delete” button.