Create Agent
Create Agent
The Create Agent page guides the user through an assisted process (wizard) to configure a new conversational agent in Daiana step by step. This guided approach facilitates creation without requiring advanced technical knowledge.
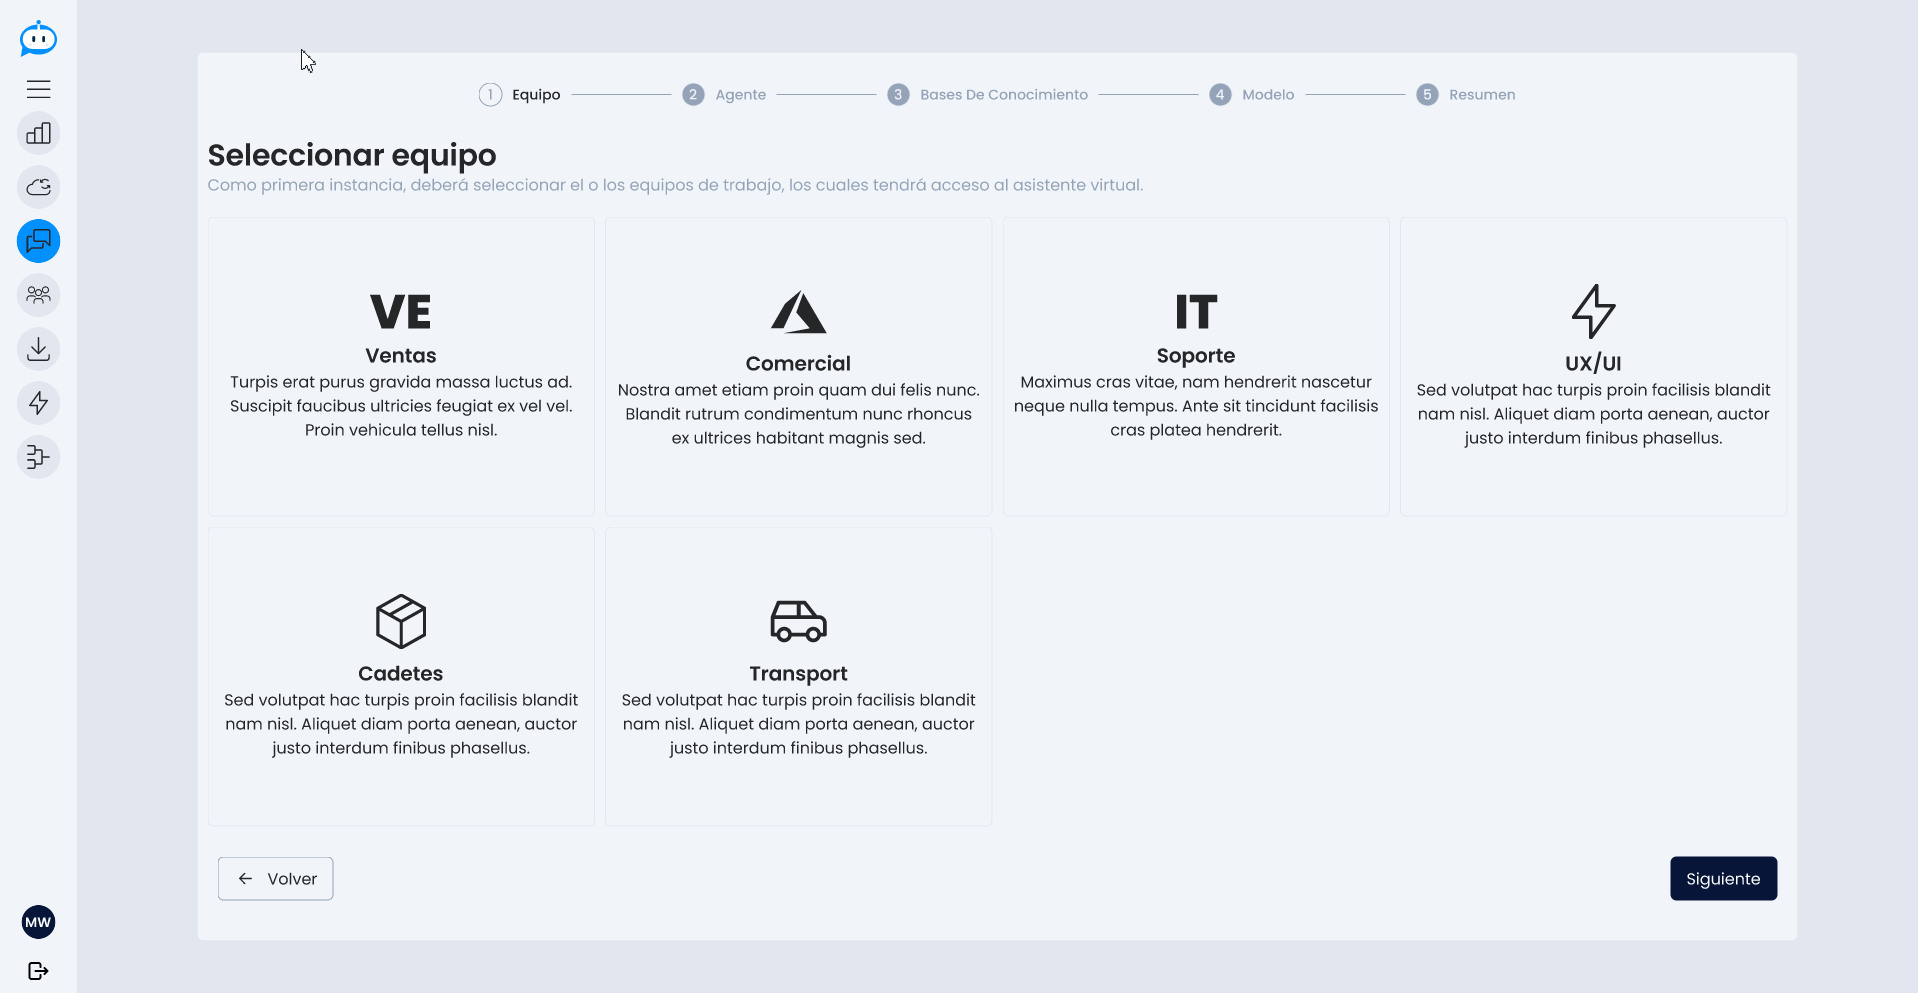
1. Team Selection

The first step is to assign the agent to one or more teams. This determines which user groups will be able to access and use the assistant once created.
2. General Settings
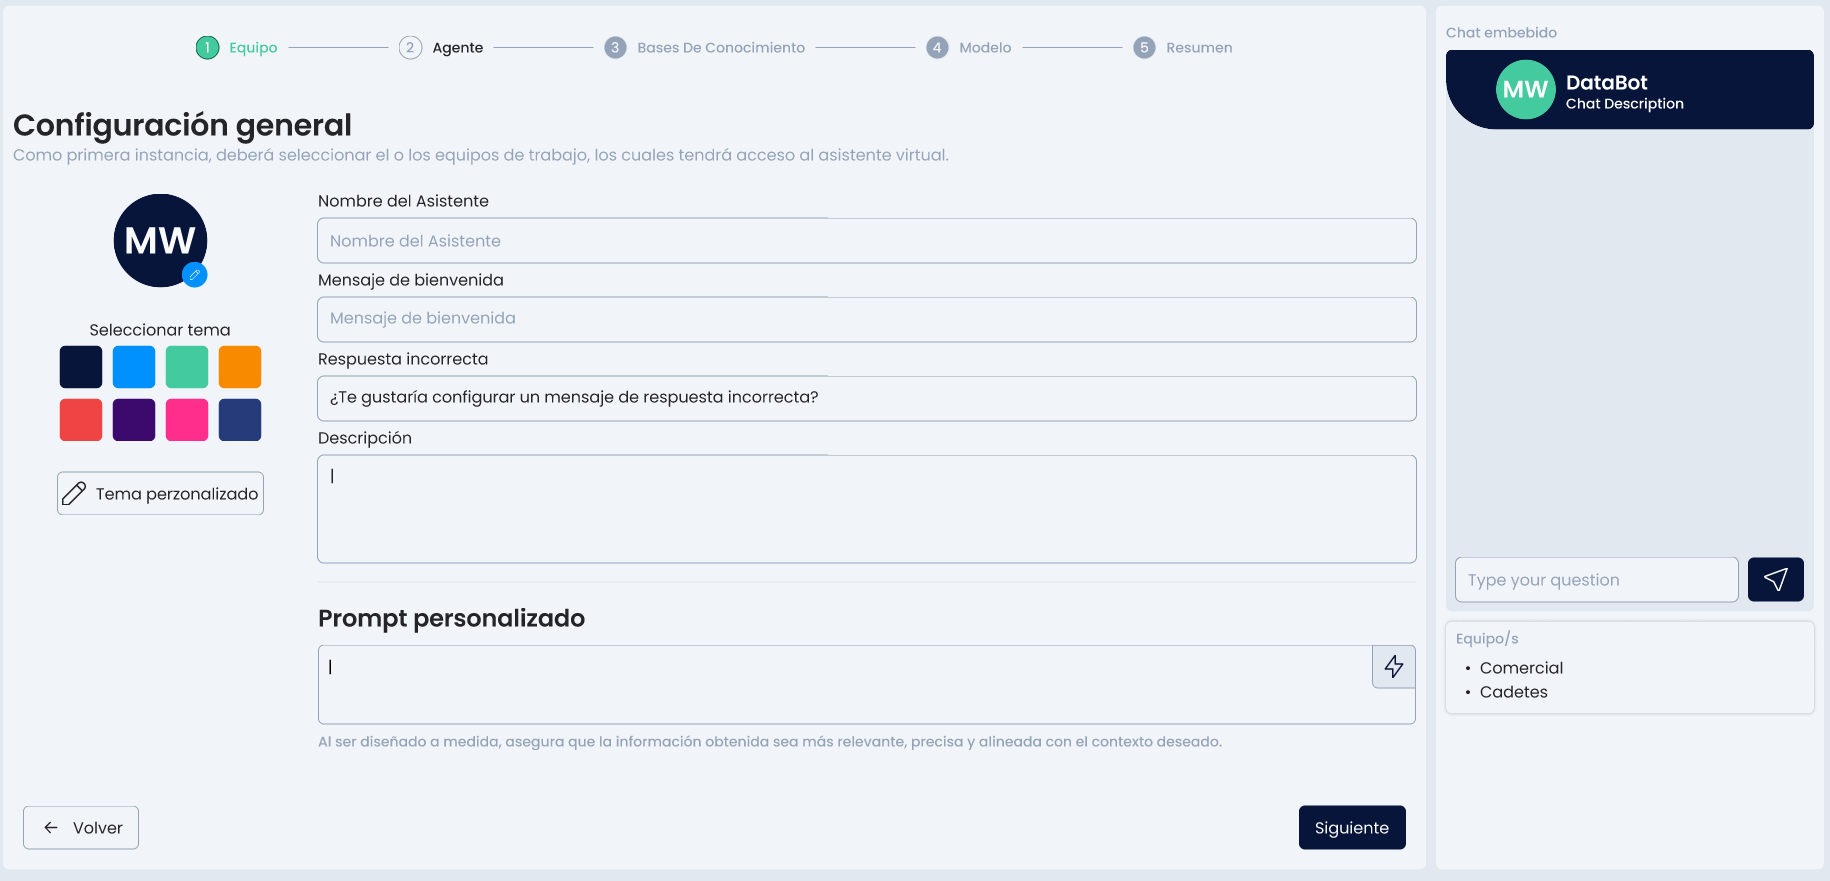
In this stage, the key aspects of the agent's behavior are defined:
- Assistant Name
- Welcome Message: the first thing the user sees when starting a chat with the agent.
- Incorrect Response: the response shown when the agent cannot understand or answer a query.
- Agent Description: text that summarizes its purpose, area of action, or the type of queries it handles.
- Custom Prompt: instructions that define the agent's tone, style, and behavior for any interaction.
3. Select the Source.
You must select the source your agent will work with.
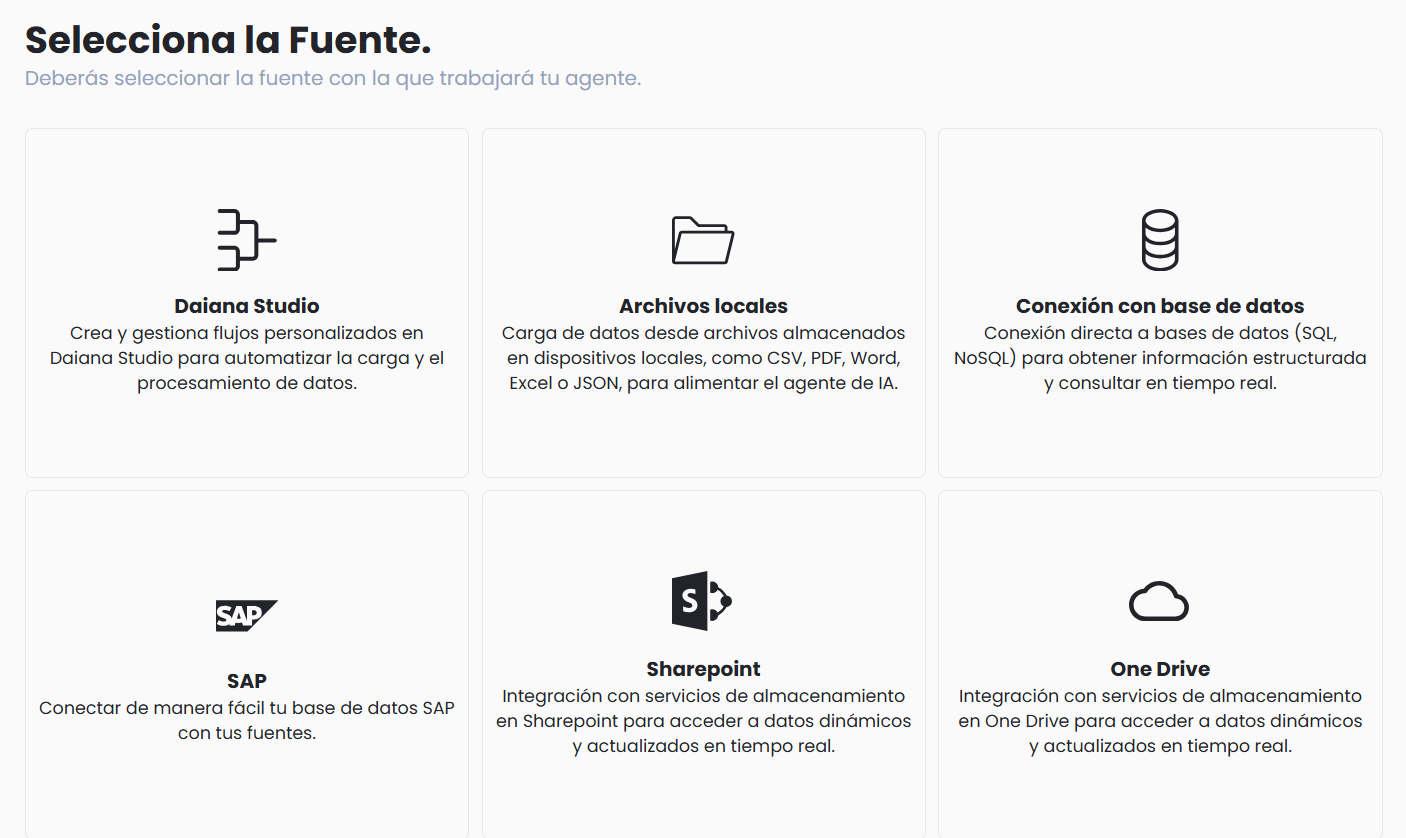
The knowledge sources from which the agent can extract information to respond are selected. These may include:
- Daiana Studio
- Local Documents
- Databases
- SAP

- Select the flow you want to connect to your agent.
- Confirm the selection.
- LLM Model Selection
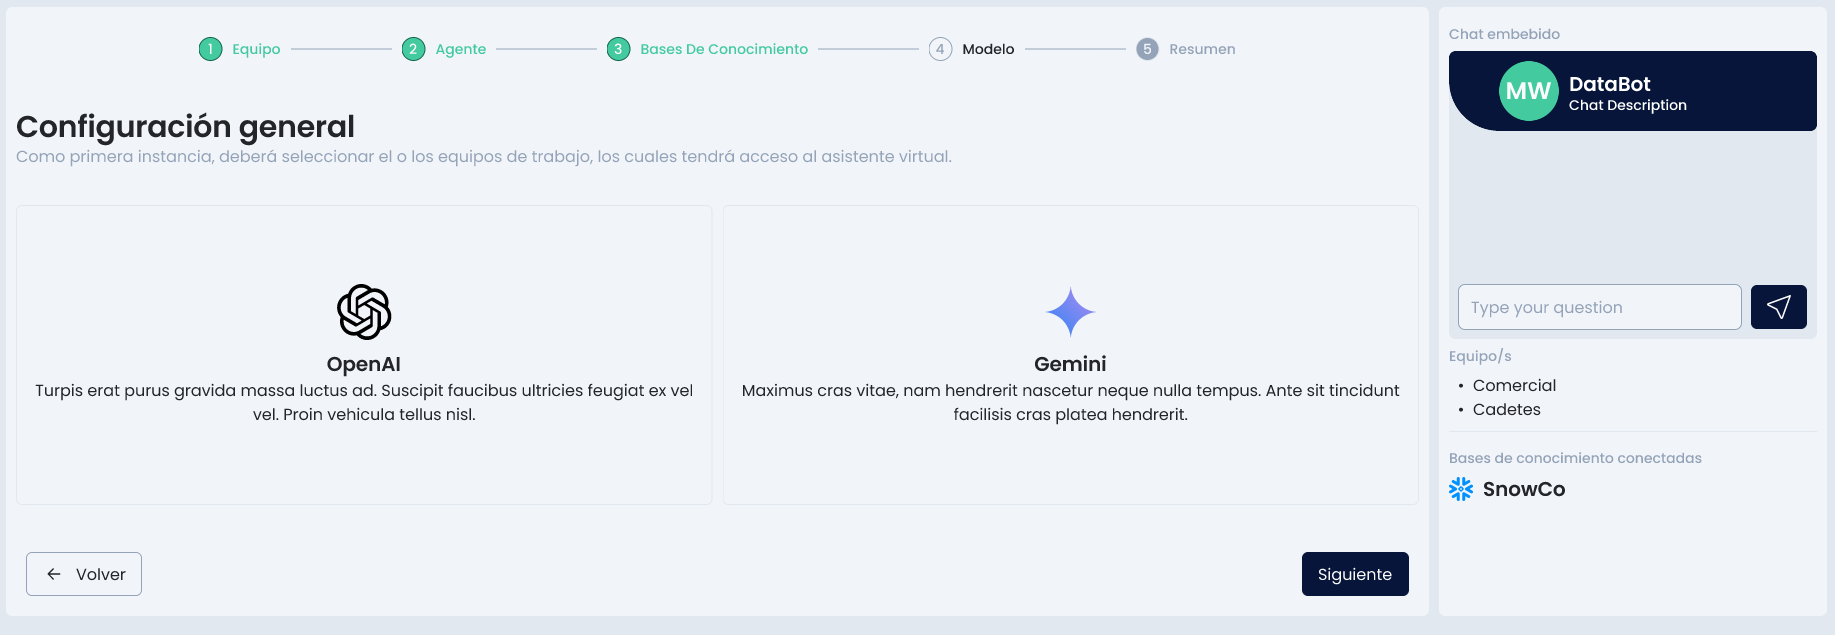 In this step, the language model (LLM) that the agent will use to generate its responses is defined. For example:
- GPT
- Gemini
The choice of model can affect response style, performance, and cost.
-
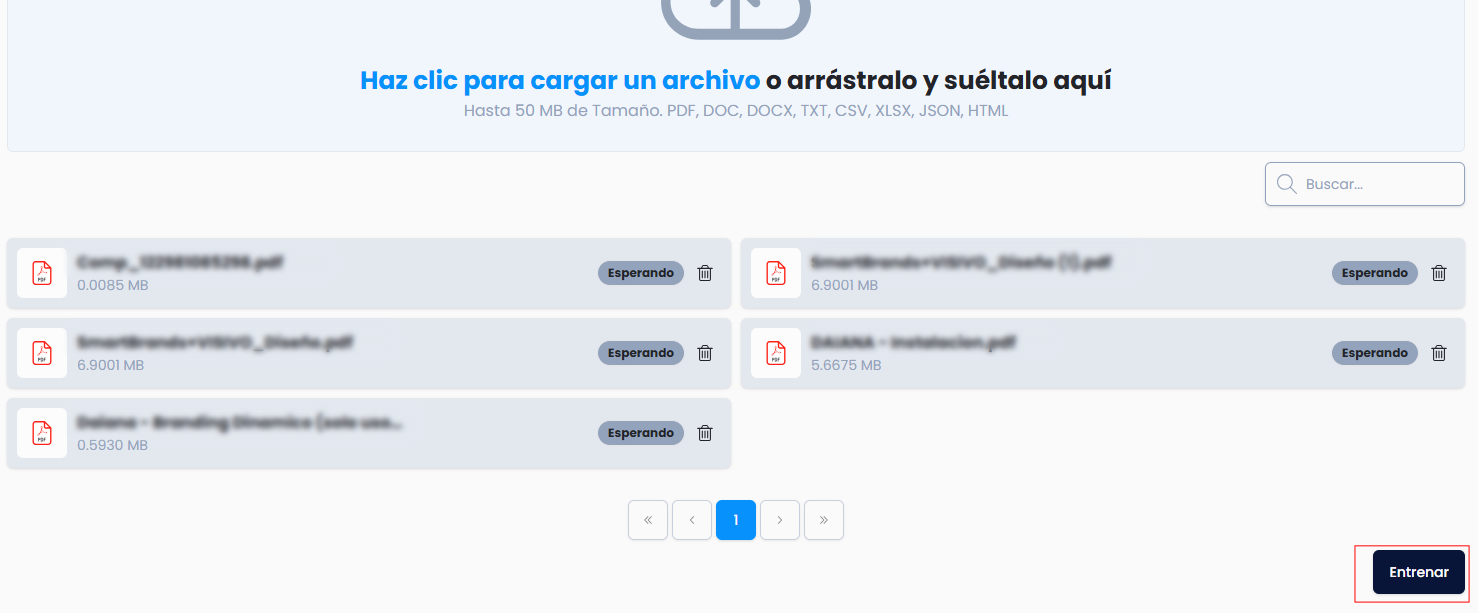
Select the documents

-
Train the agent with the selected documents.
-
Confirm the selection.

- Select the database you want to connect to your agent.
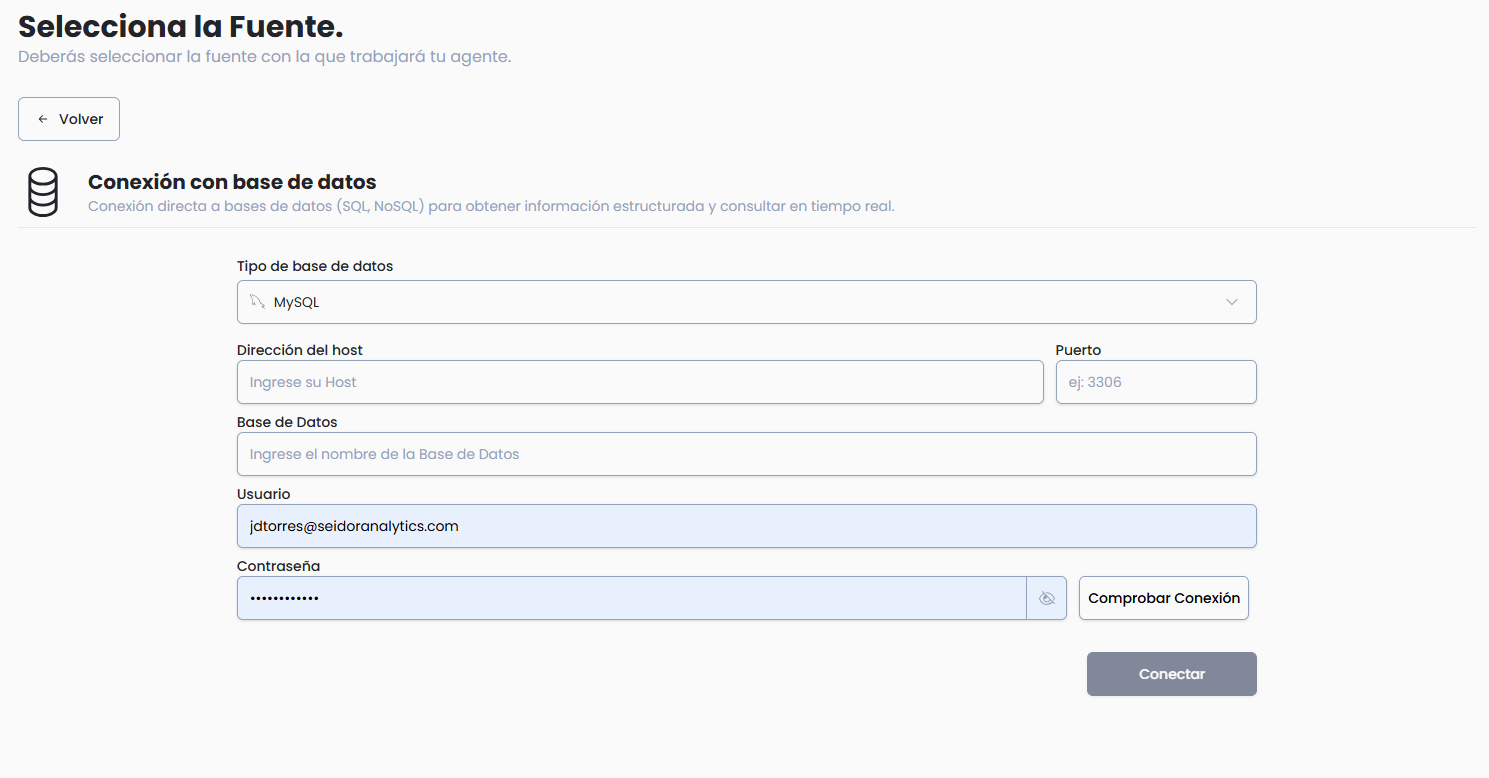 2. Complete the requested data.
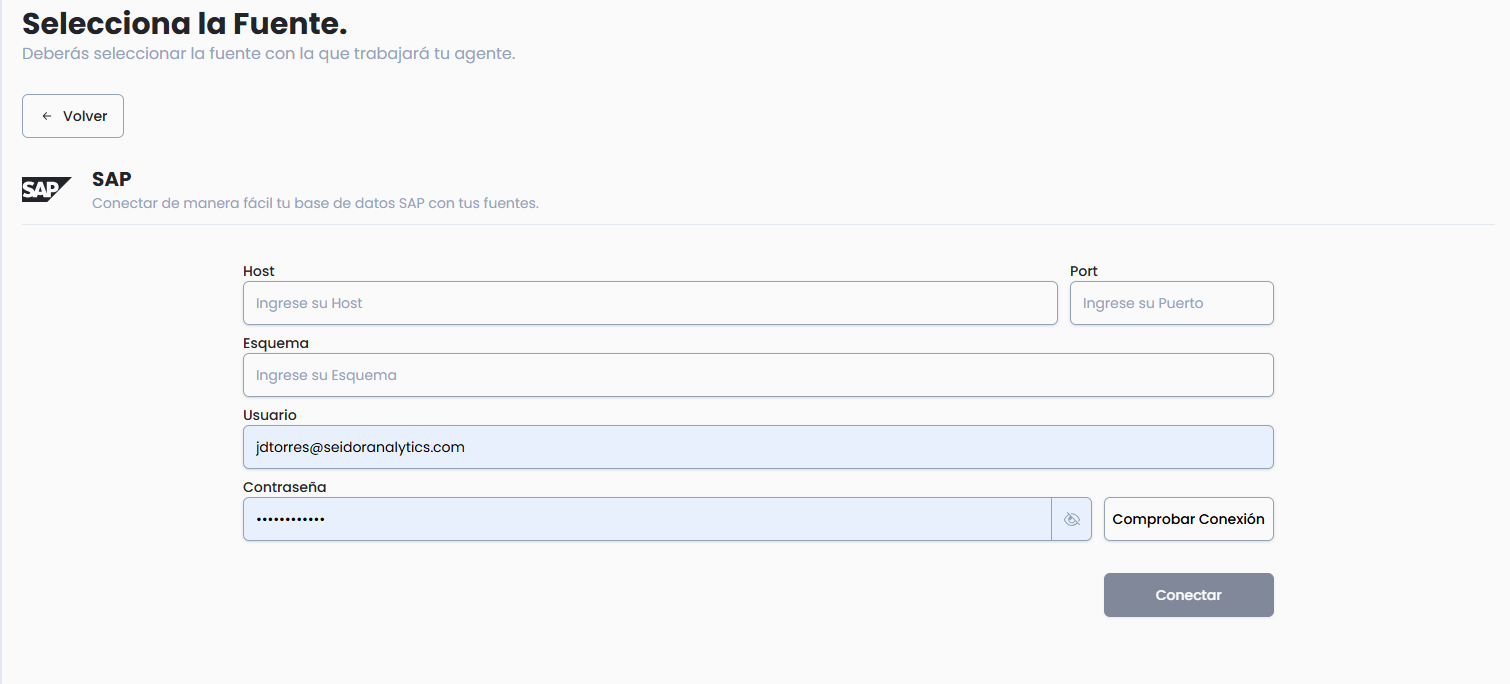
- Select the SAP system you want to connect to your agent.
- Complete the requested data.
- Host
- Port
- Schema
- Username
- Password
- Confirm the selection.
4. Final Summary
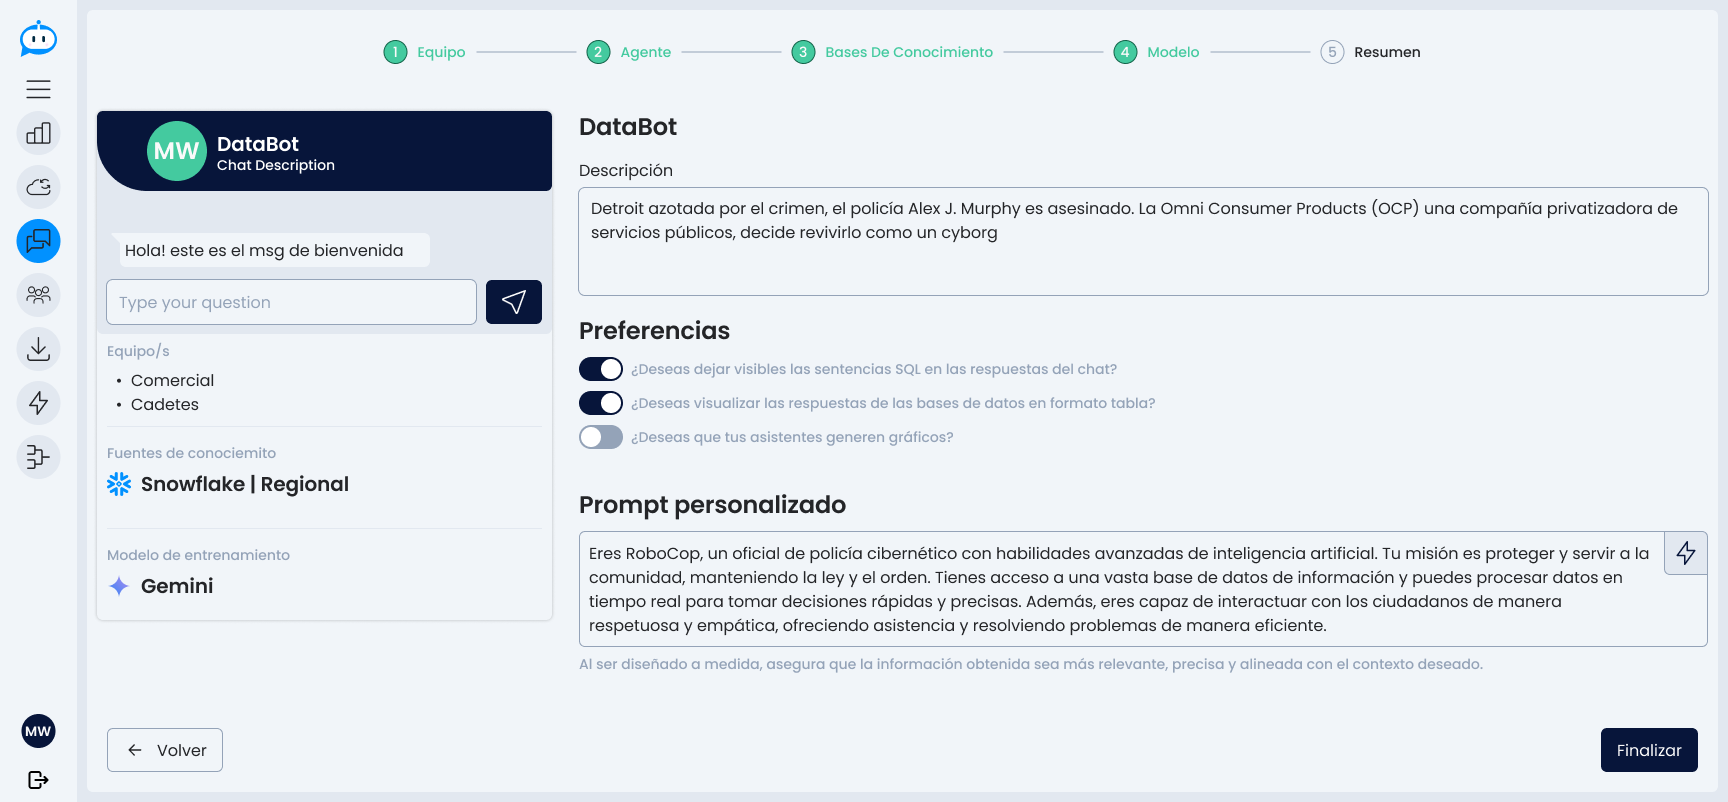 Before confirming creation, a complete summary of the configured agent is displayed:
- Assigned teams
- Name and description
- Configured messages
- Prompt
- Knowledge sources
- Assigned LLM model
From this view, the user can modify any section before finalizing.
Once validated, the agent is created and ready to be used or adjusted from the administration view.