Introduction
A webhook is a mechanism that allows automatic notifications to be received on a server when certain events occur on an external platform. In this case, we will create a webhook for WhatsApp that will receive incoming messages and events from the Meta WhatsApp Cloud API.
This guide covers the following aspects:
- Webhook creation and configuration
Prerequisites
Before you begin, make sure you have:
- A Meta for Developers account, more instructions here
- A Meta Business Suite account to configure the webhook link
- A new phone line or one that has not been used on WhatsApp.
Webhook Configuration in Meta
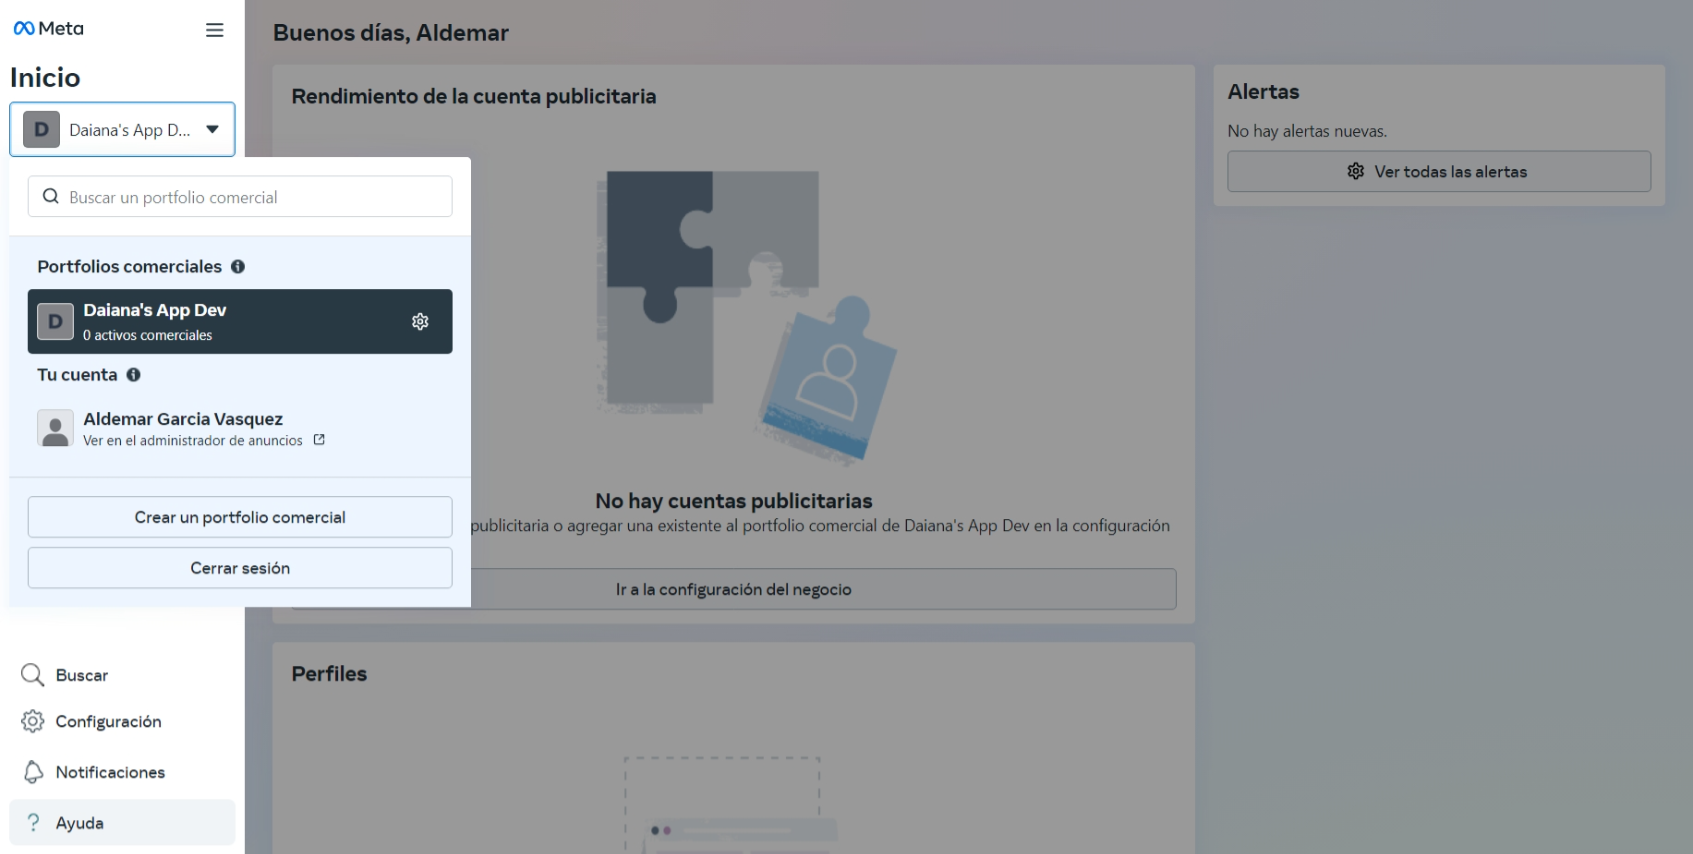
Creating a Business Portfolio
- Go to Meta Business Suite
- Follow the instructions to create one. If you want to create a new one, follow these steps:
a. Click on the box below "Home" and then on Create a business portfolio.
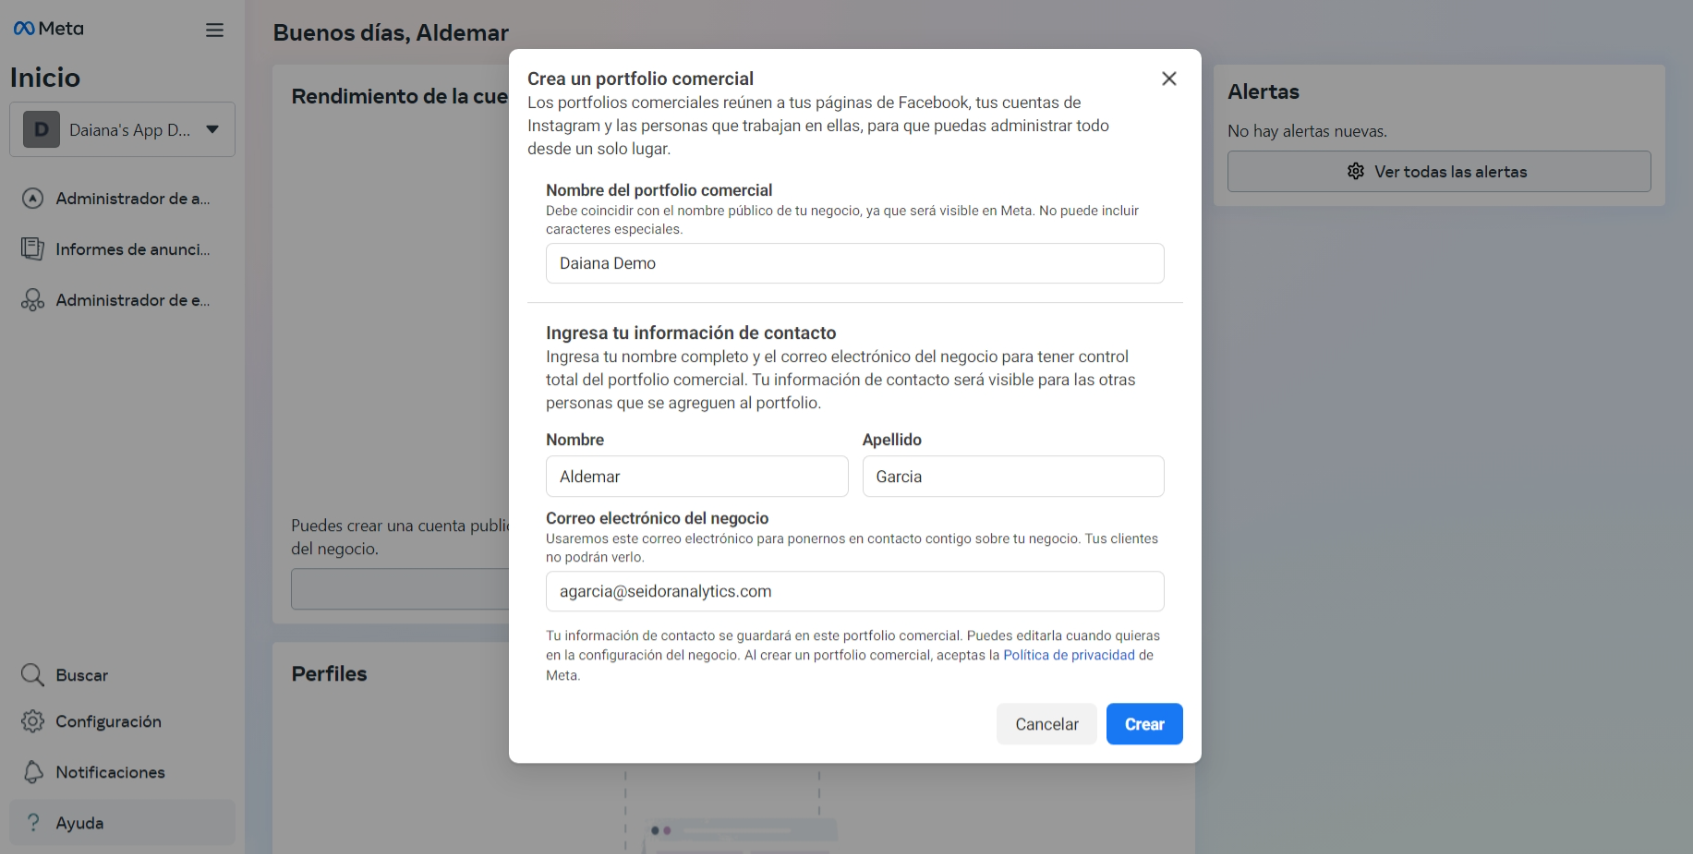
 b. Fill in the requested data in the form and click "Create".
 c. Click Next.
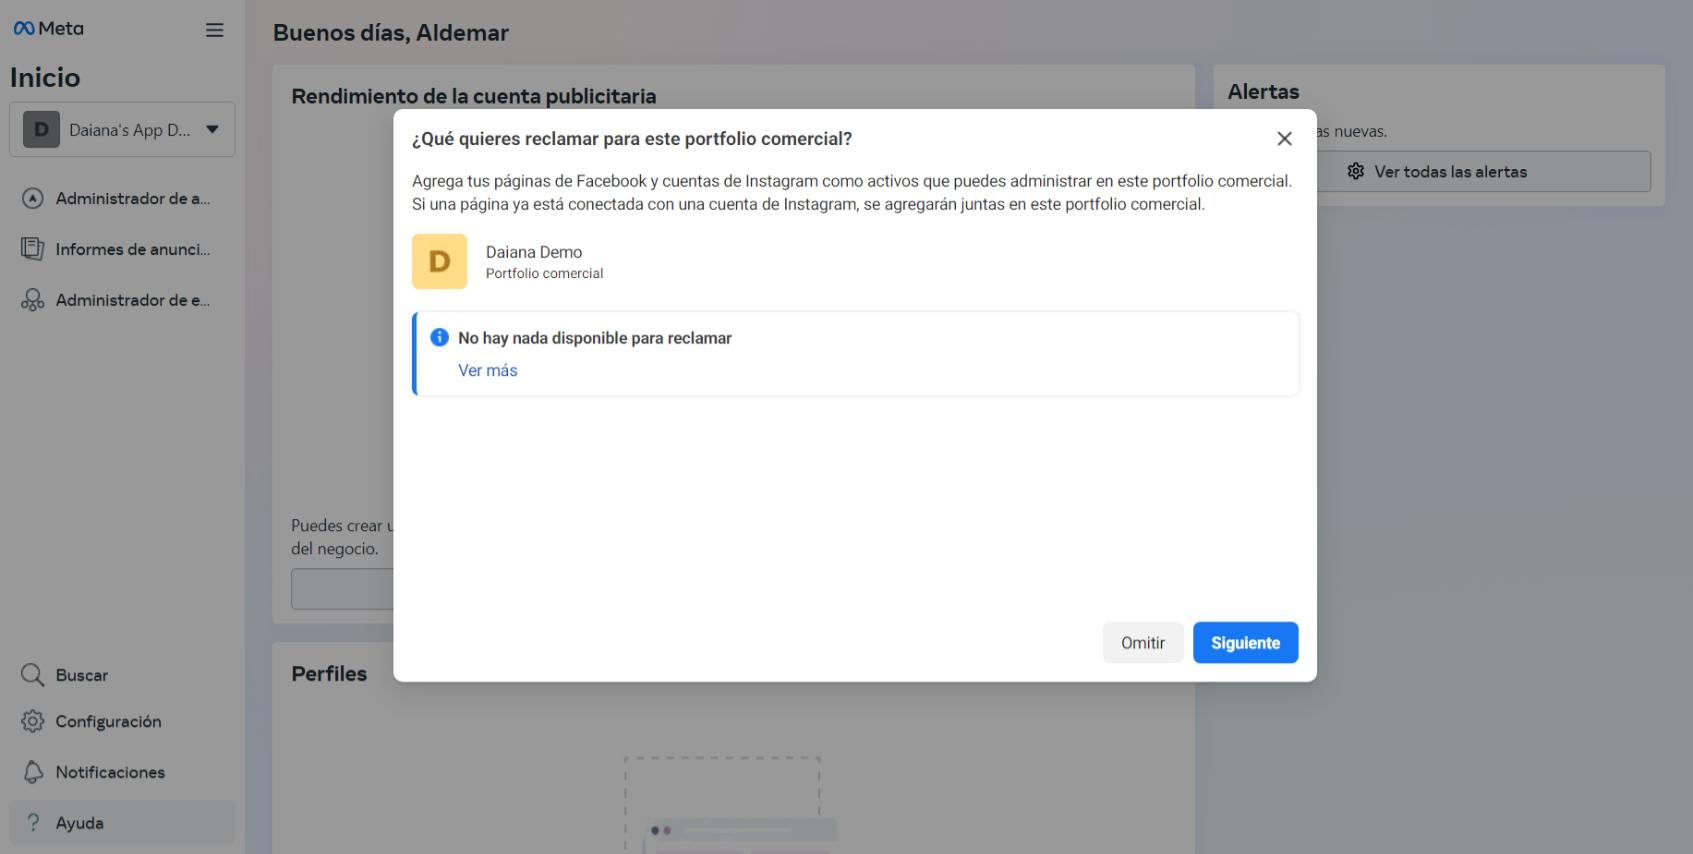 d. Click Next.
 e. Click Confirm.

Creating an App in Meta Developers
-
Go to Meta for Developers
-
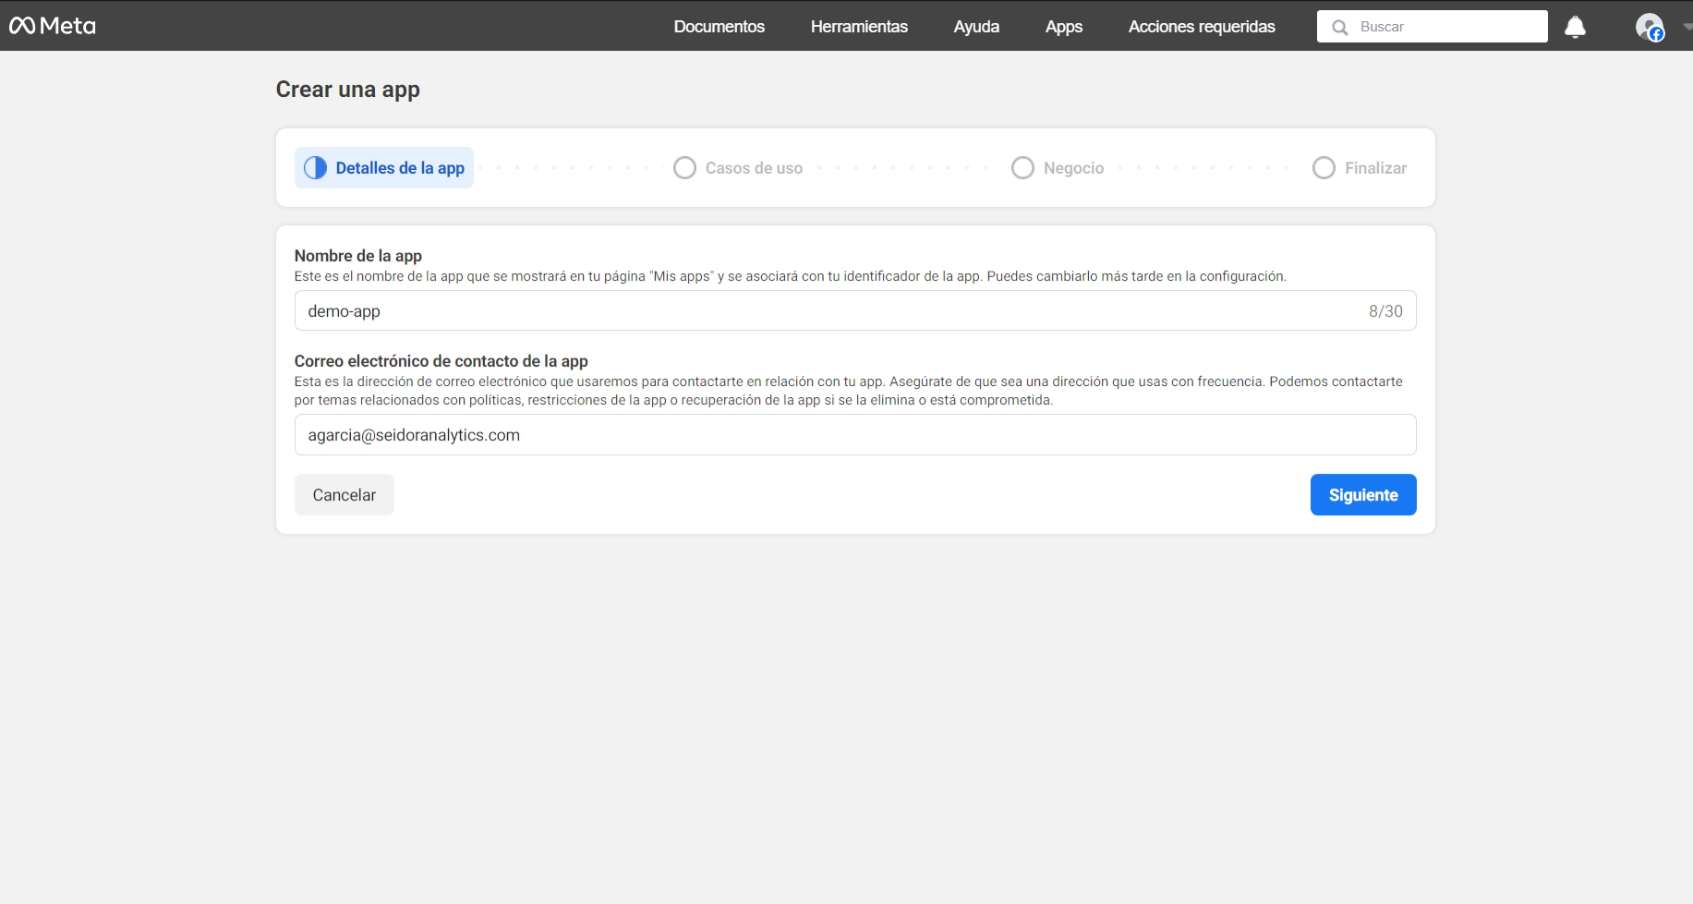
Select "My Apps" and then "Create App".
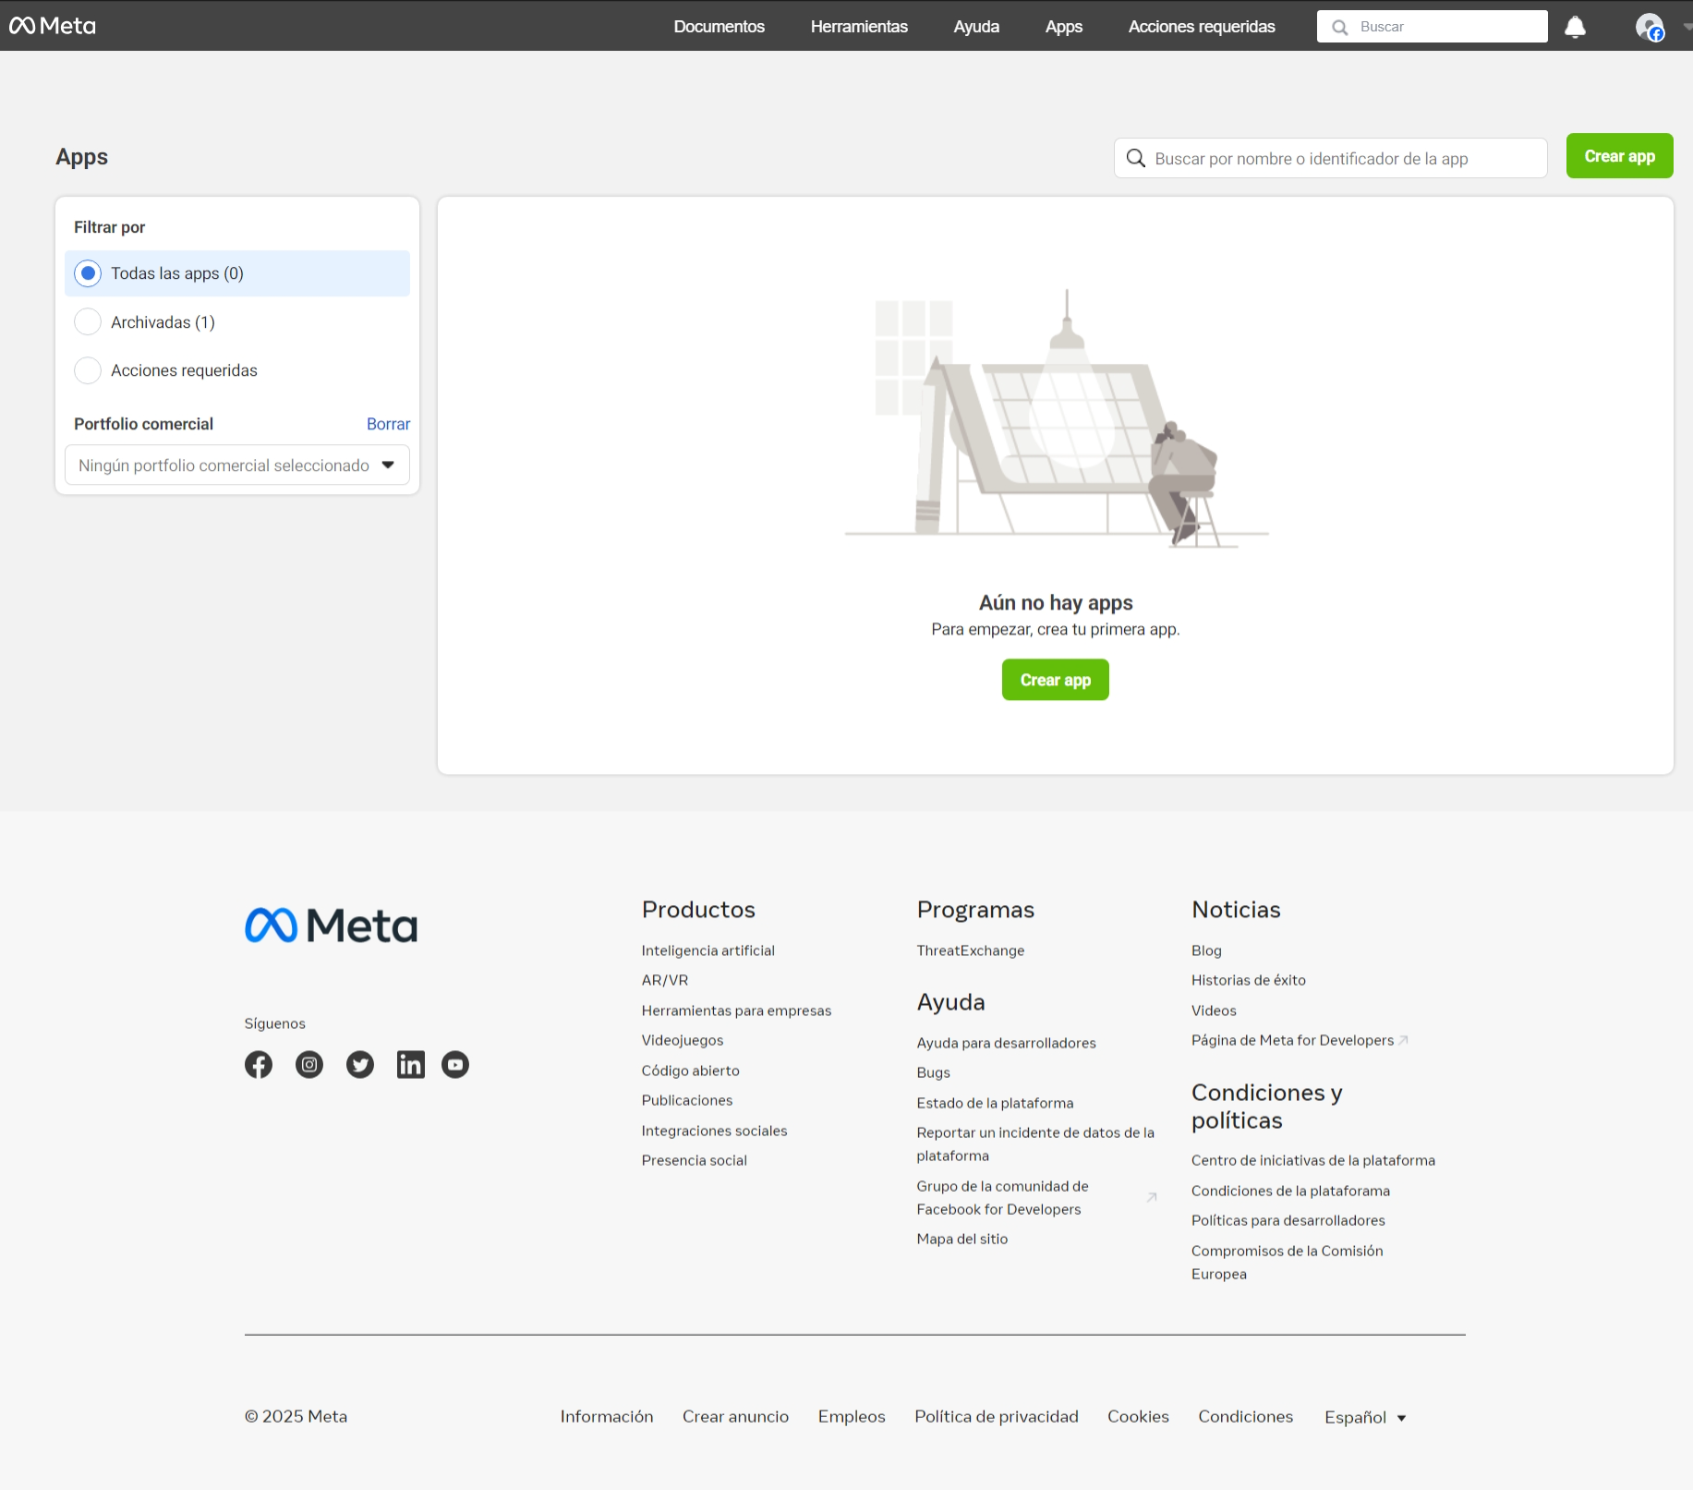
-
Follow the step-by-step guide a. Give the application a name
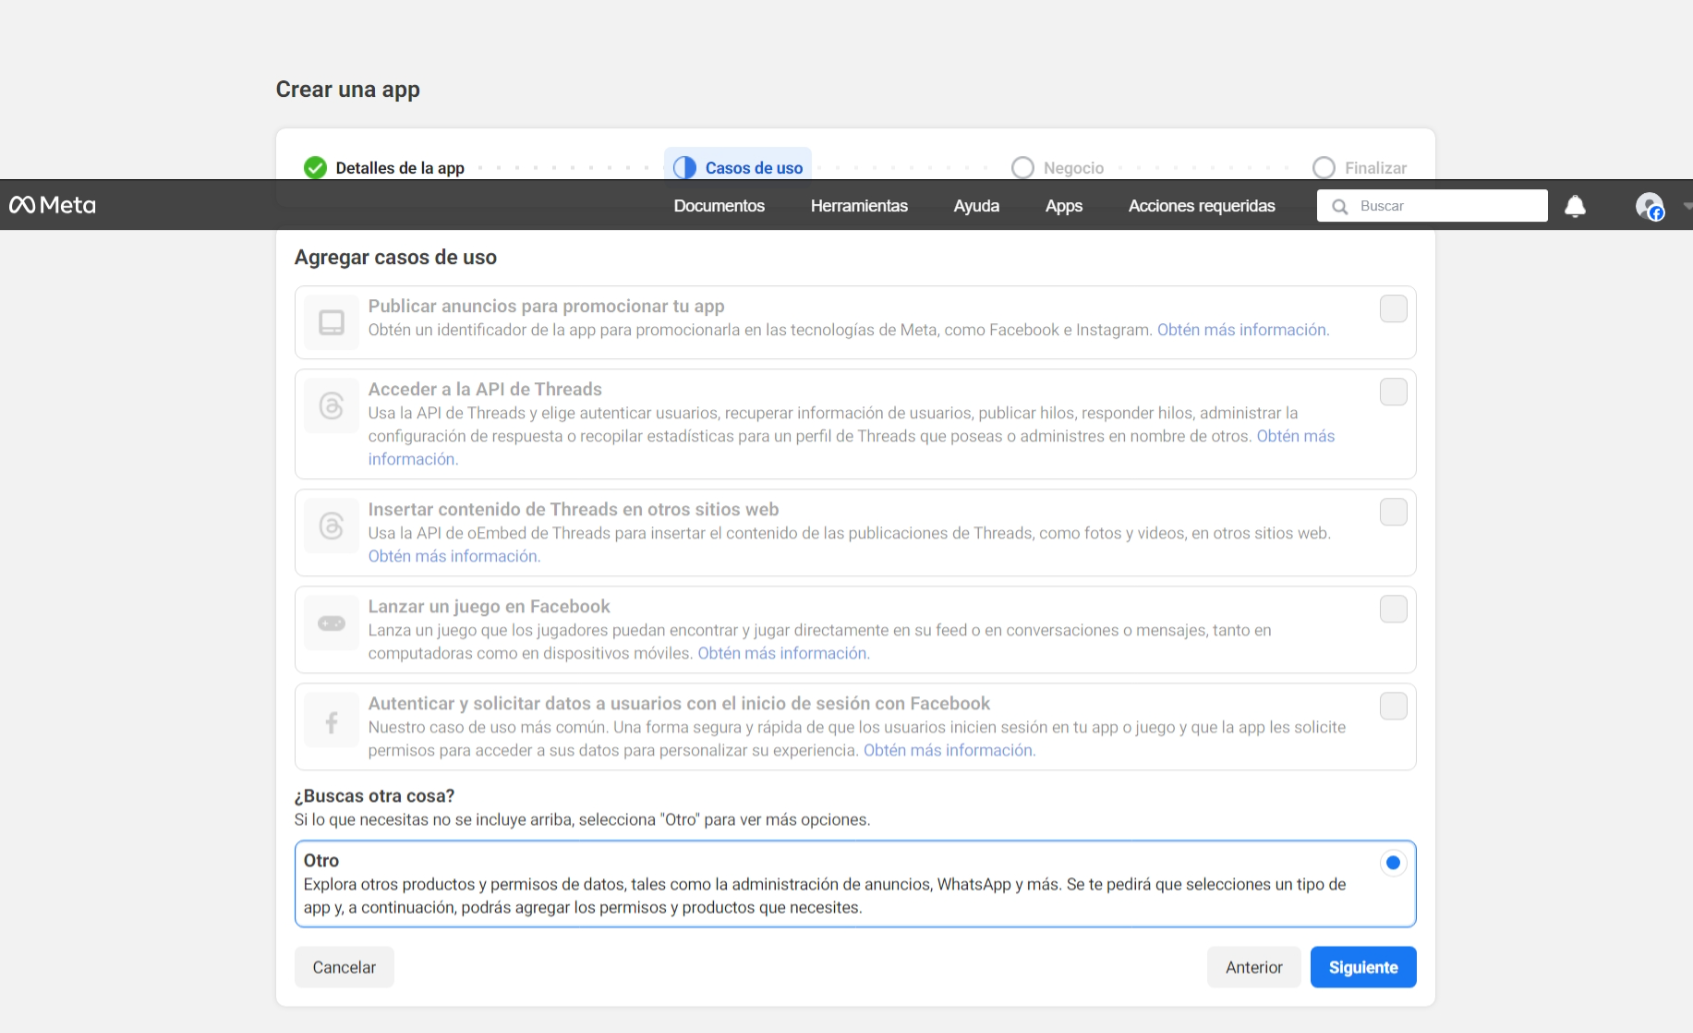
 b. Select "Other" for use cases
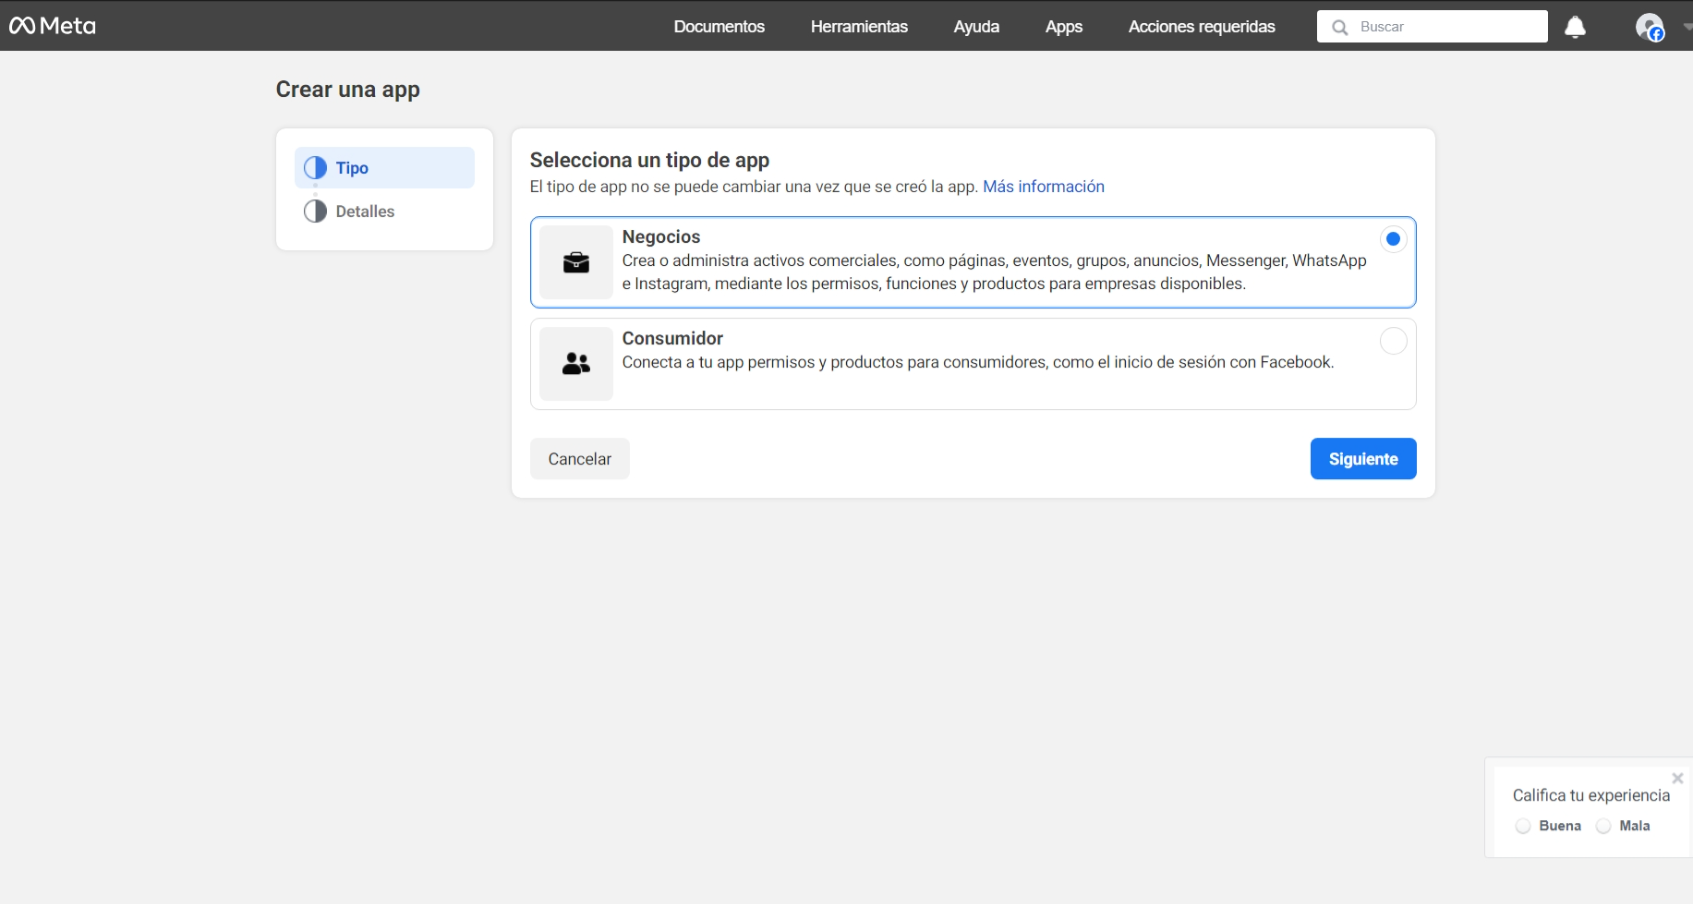
 c. Select Business
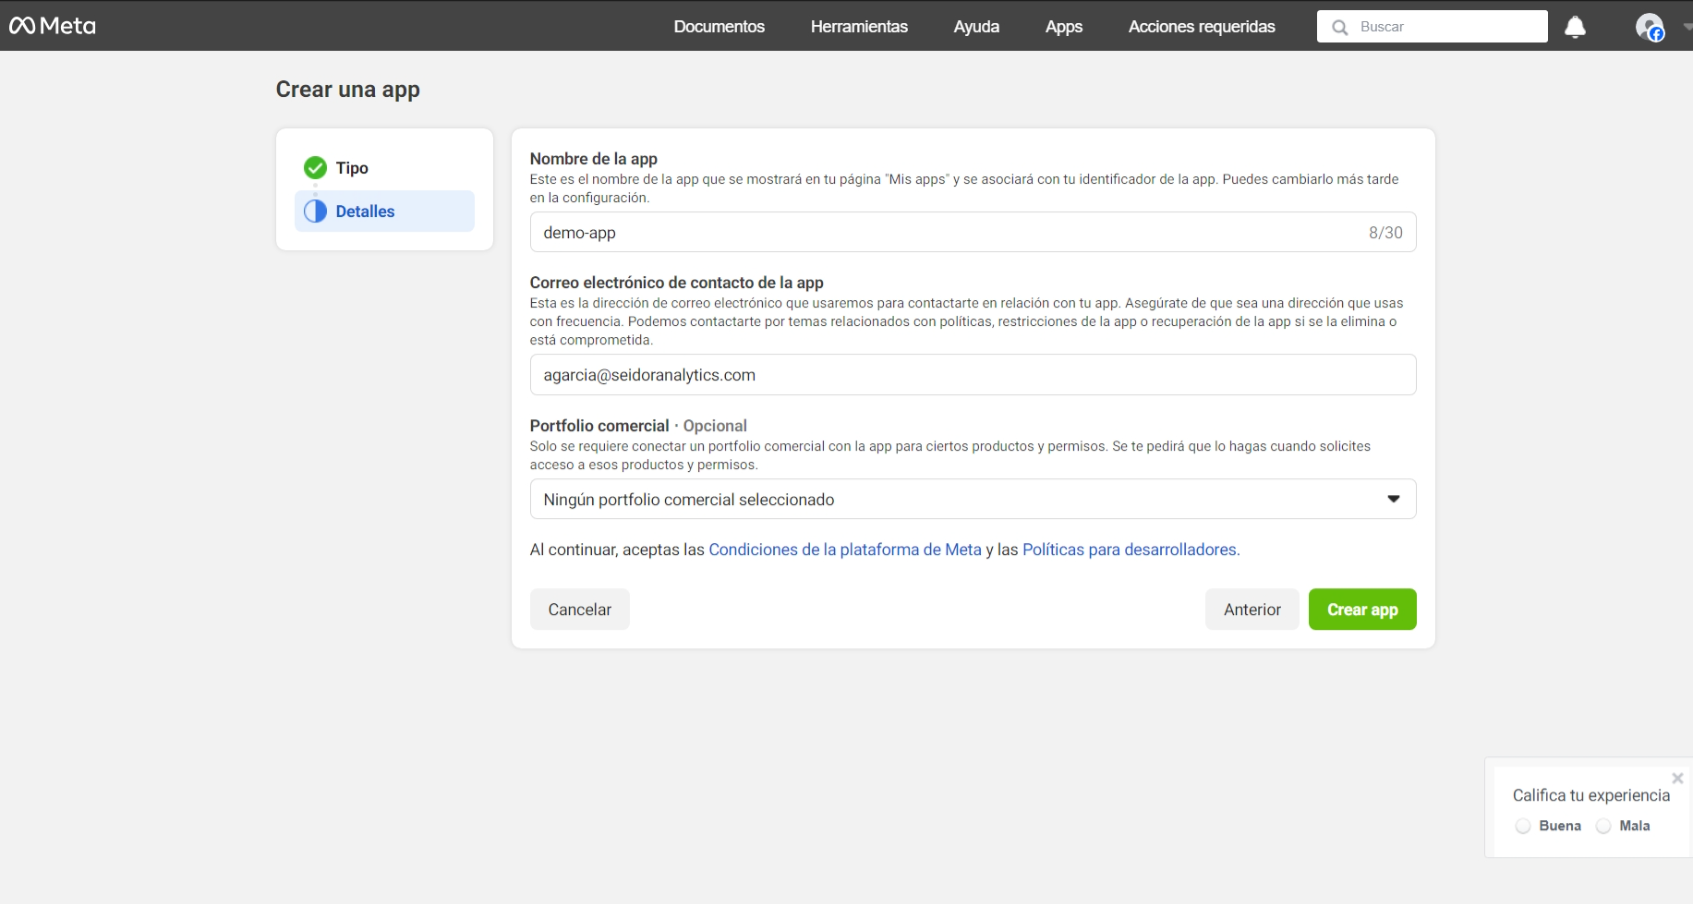
 d. Here you must select the business portfolio created previously. Click "Create App".
-
Go to the WhatsApp section a. WhatsApp click "Set up"
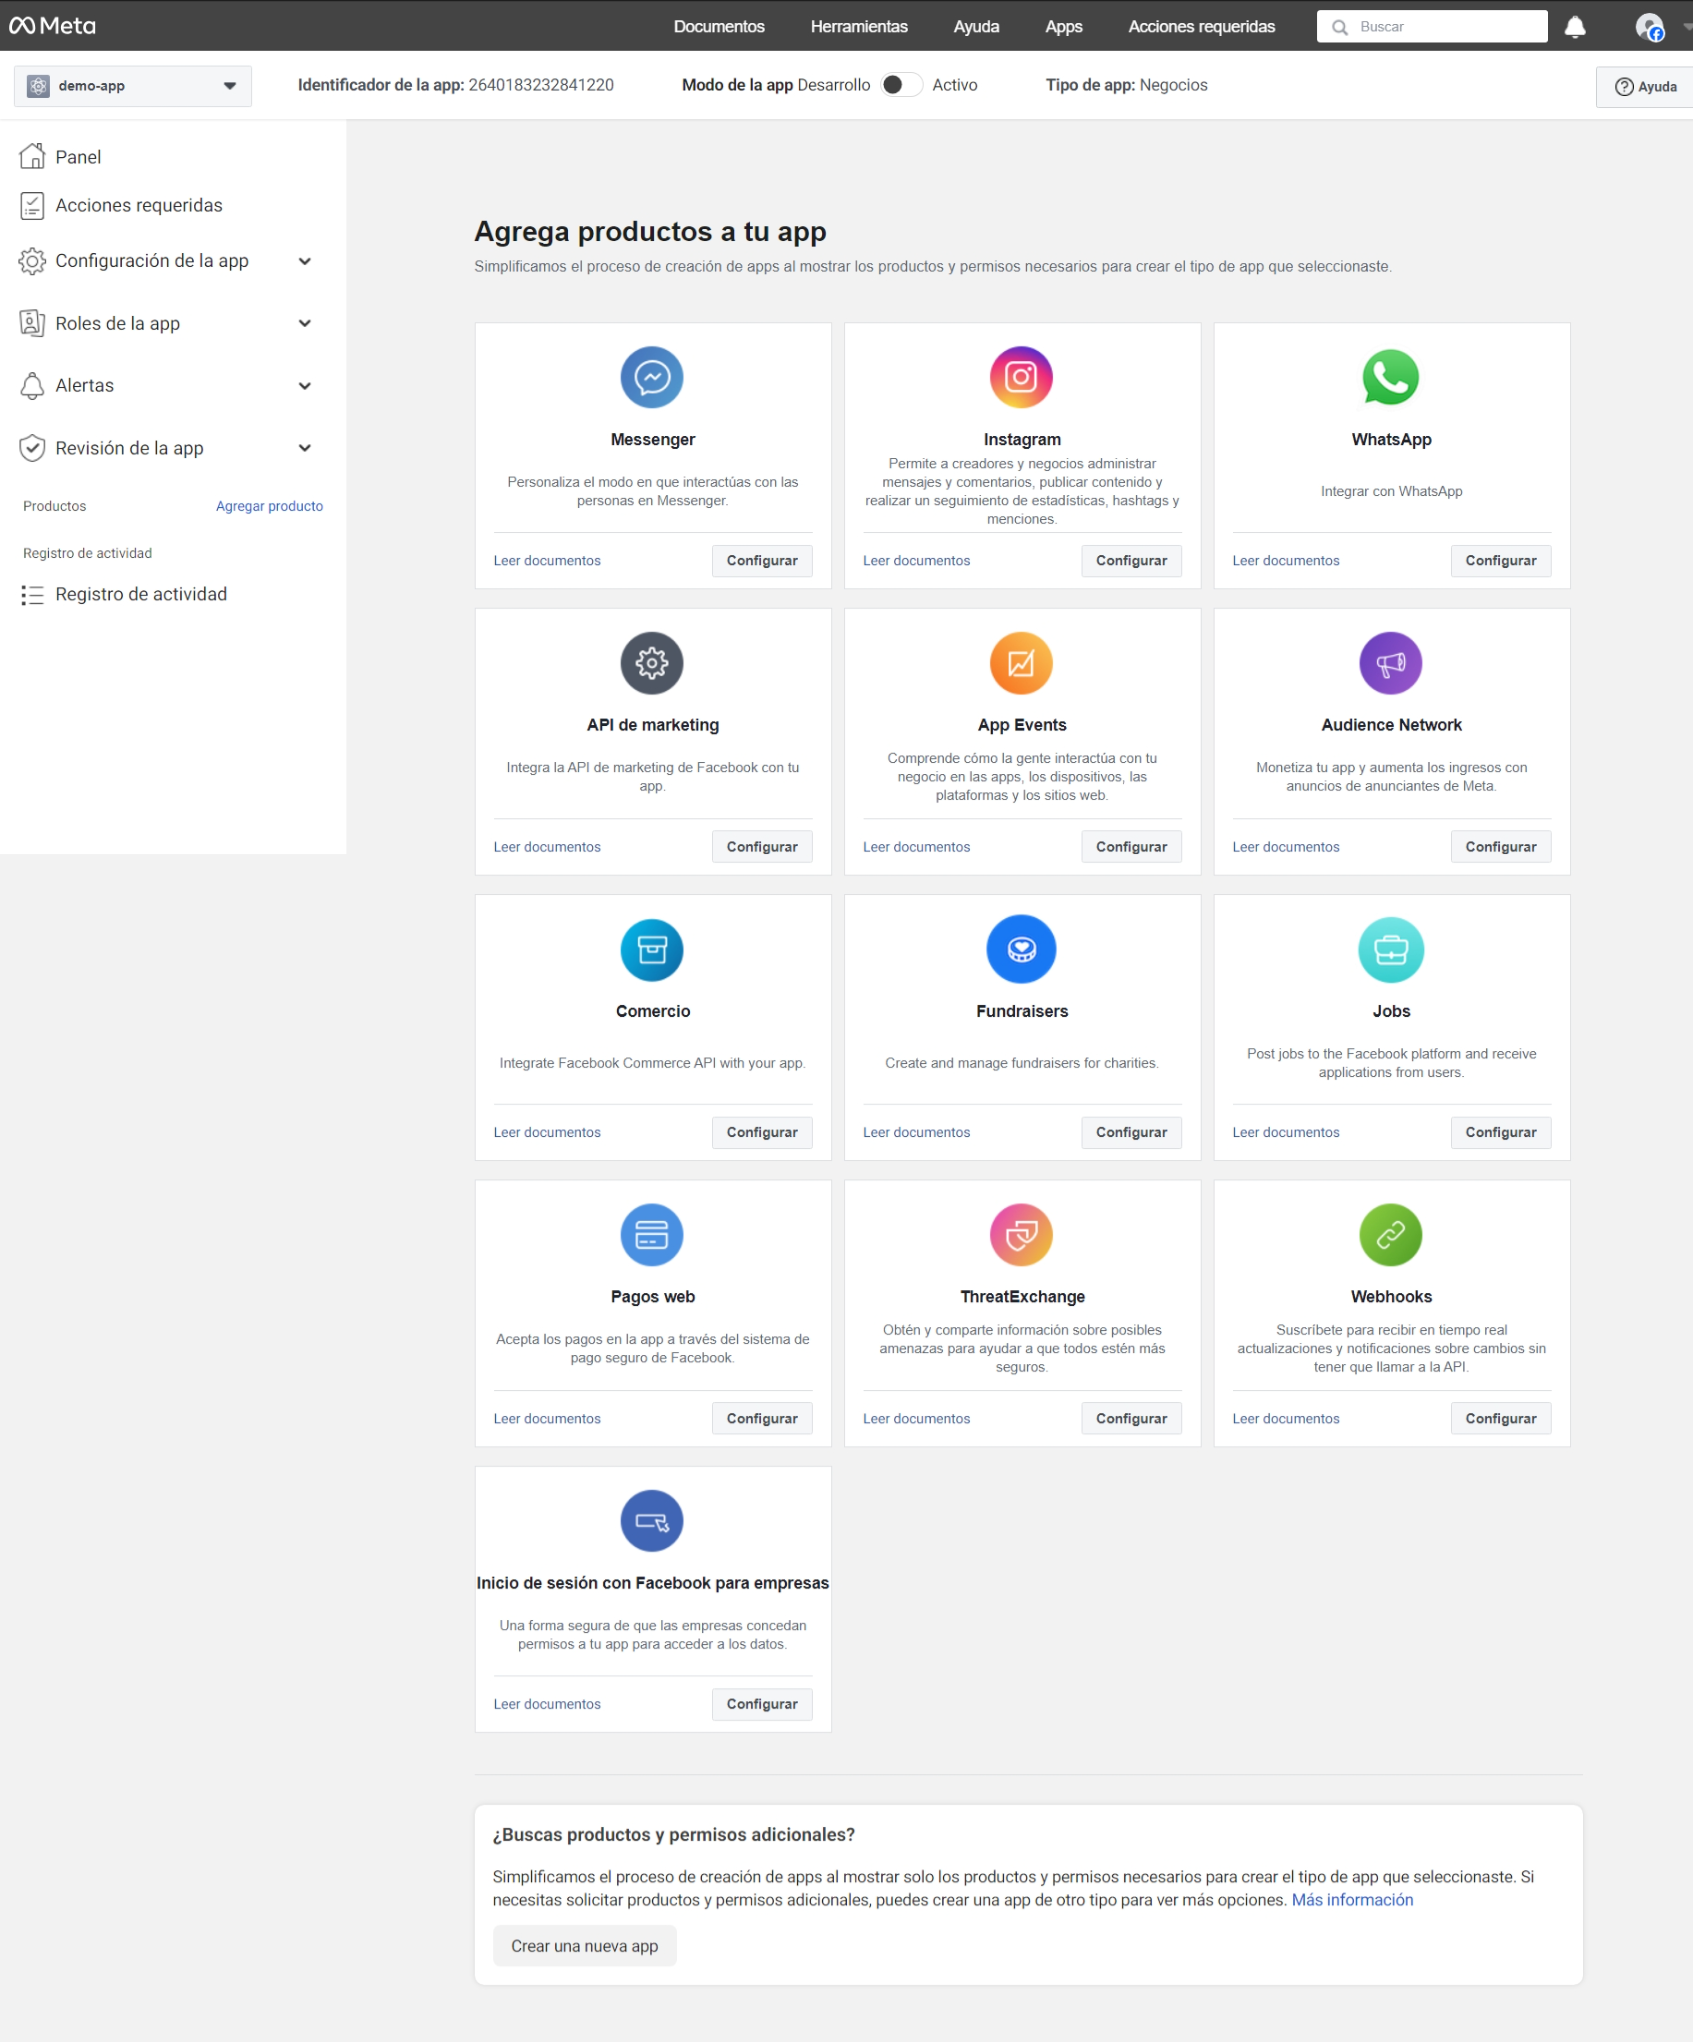 If you have a Meta Business Account (MBA), you will be prompted to attach it when you add the WhatsApp product to your app. If you don't have an MBA, you'll need to follow instructions to help you create one. Once you attach the MBA to your app, you'll be ready to start testing.
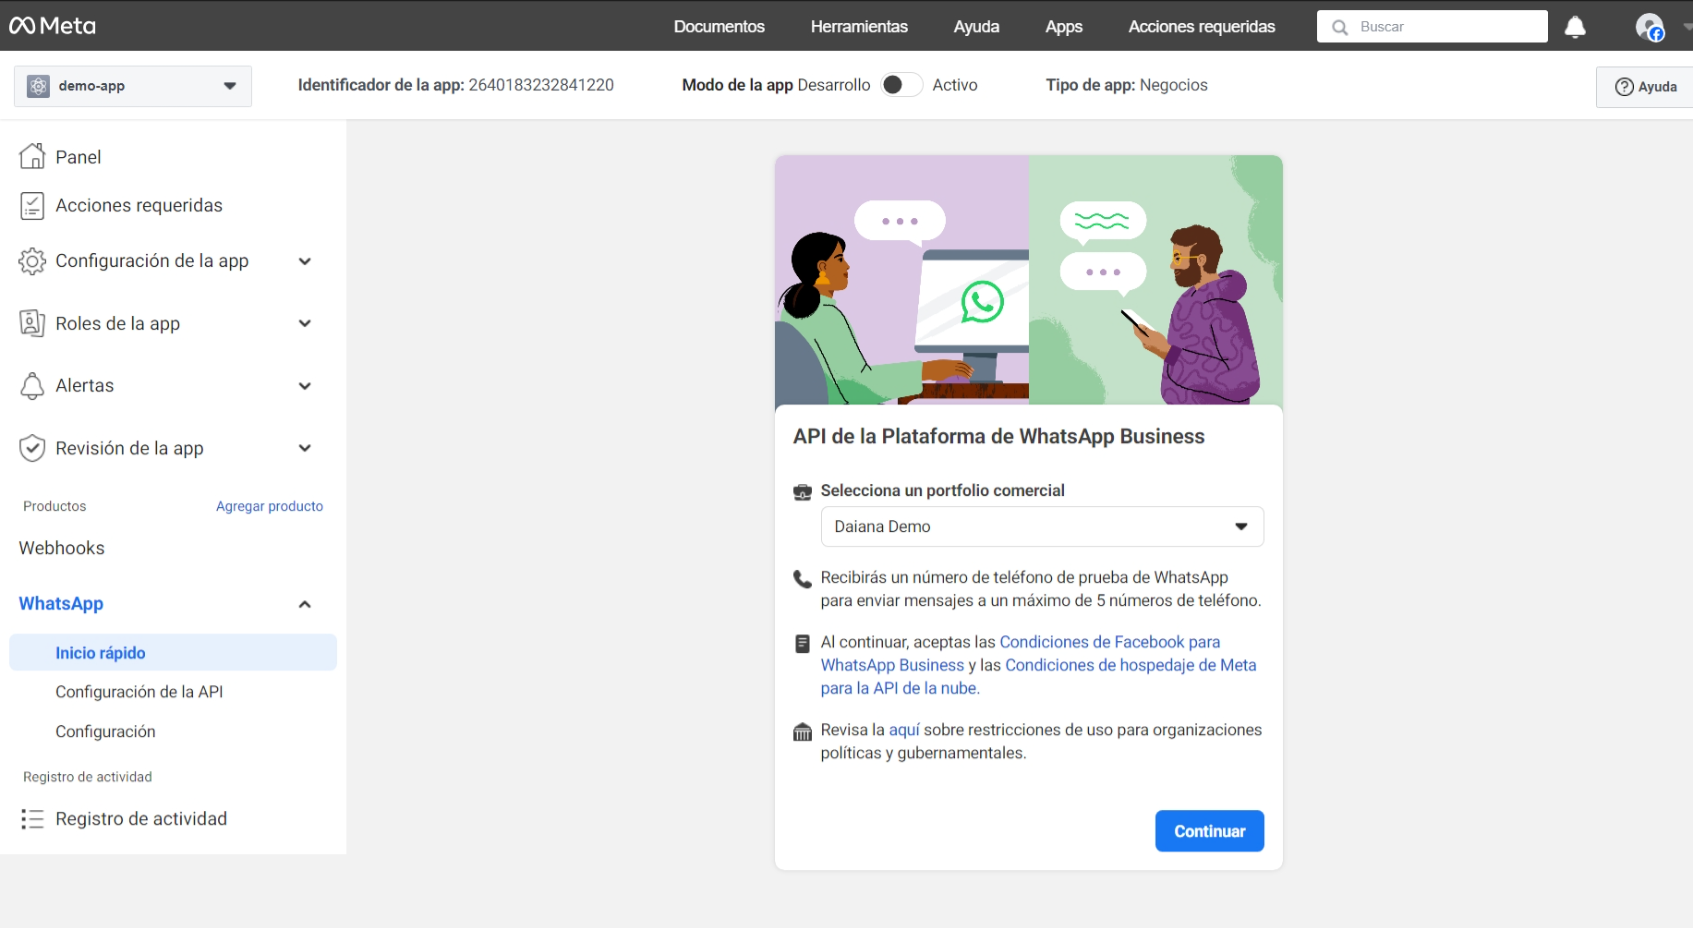
b. Select Continue
If you have a Meta Business Account (MBA), you will be prompted to attach it when you add the WhatsApp product to your app. If you don't have an MBA, you'll need to follow instructions to help you create one. Once you attach the MBA to your app, you'll be ready to start testing.
b. Select Continue
c. Click Get Started with the API

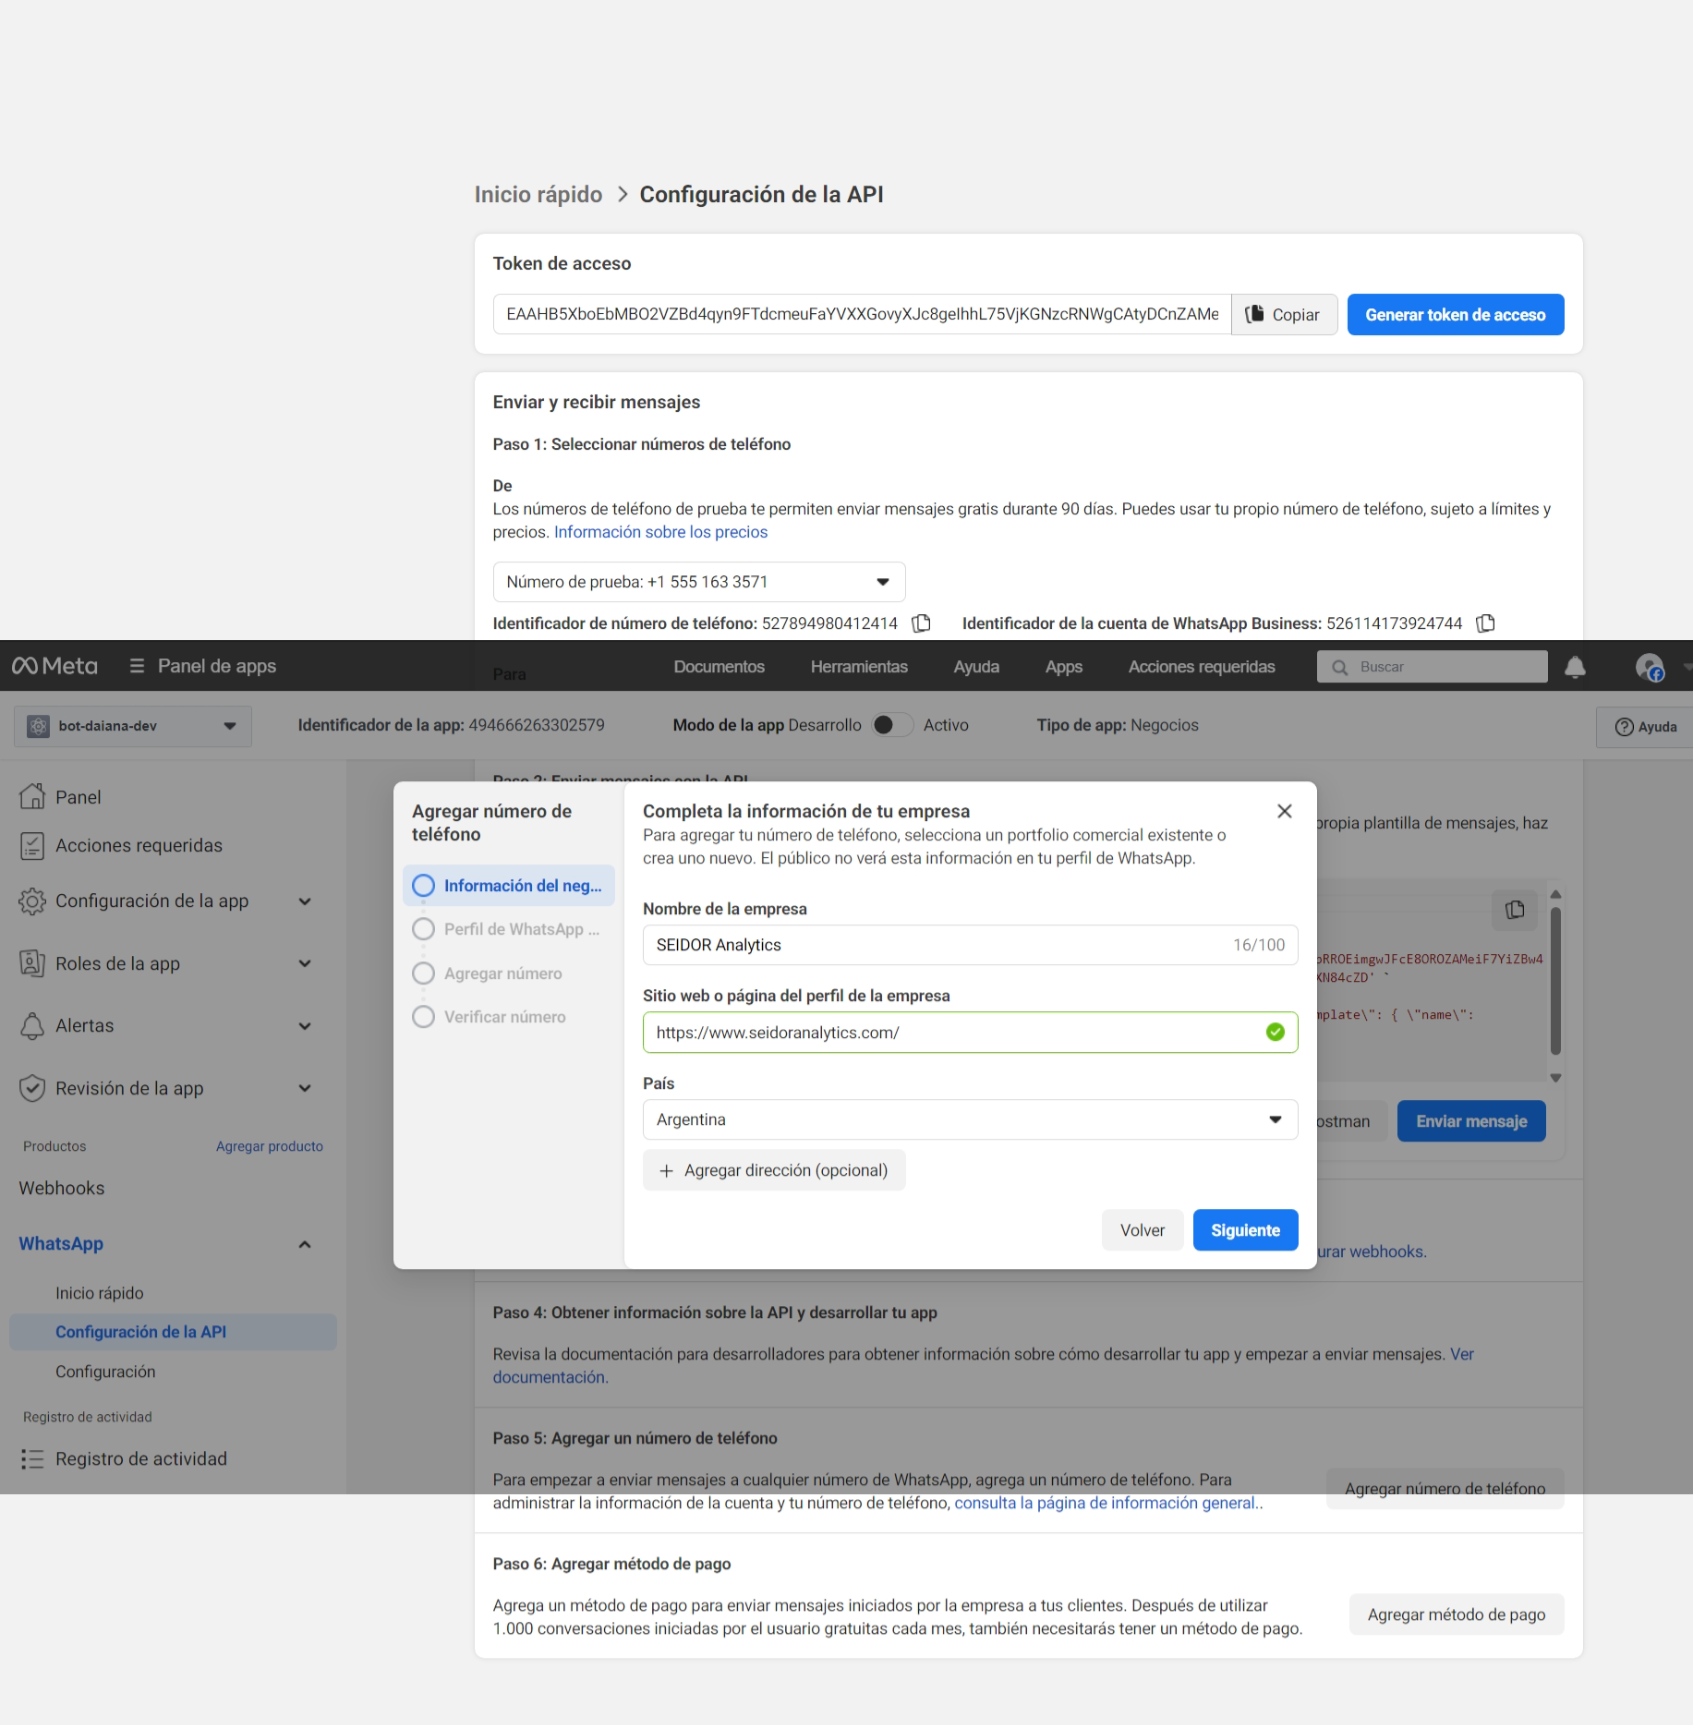
d. Click "Generate access token" and follow the steps to log in and obtain a temporary token.
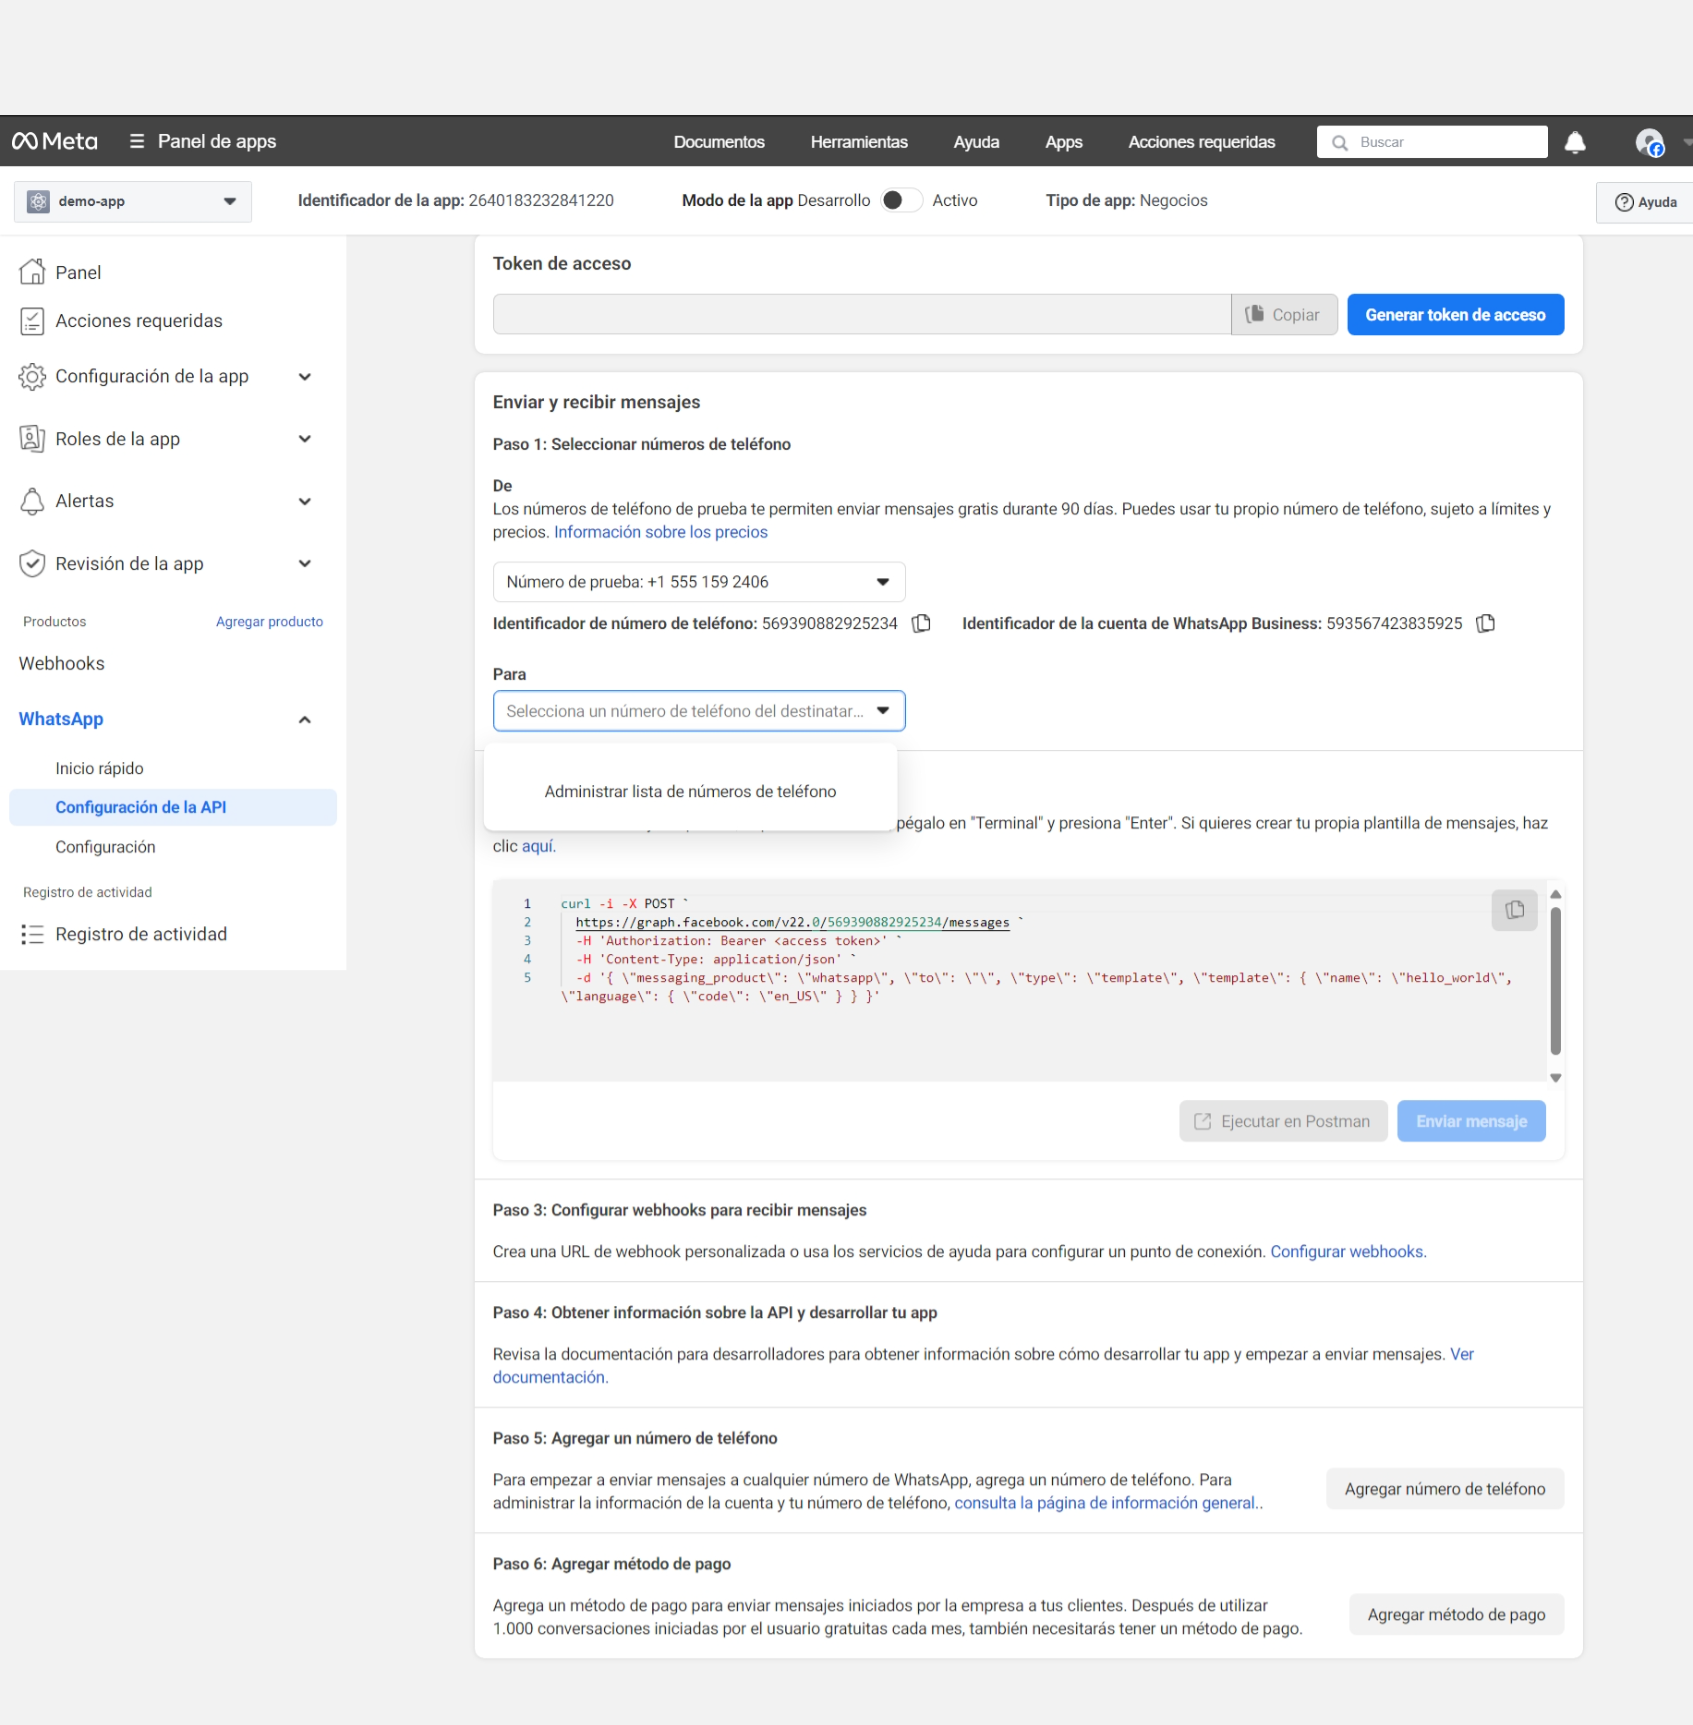
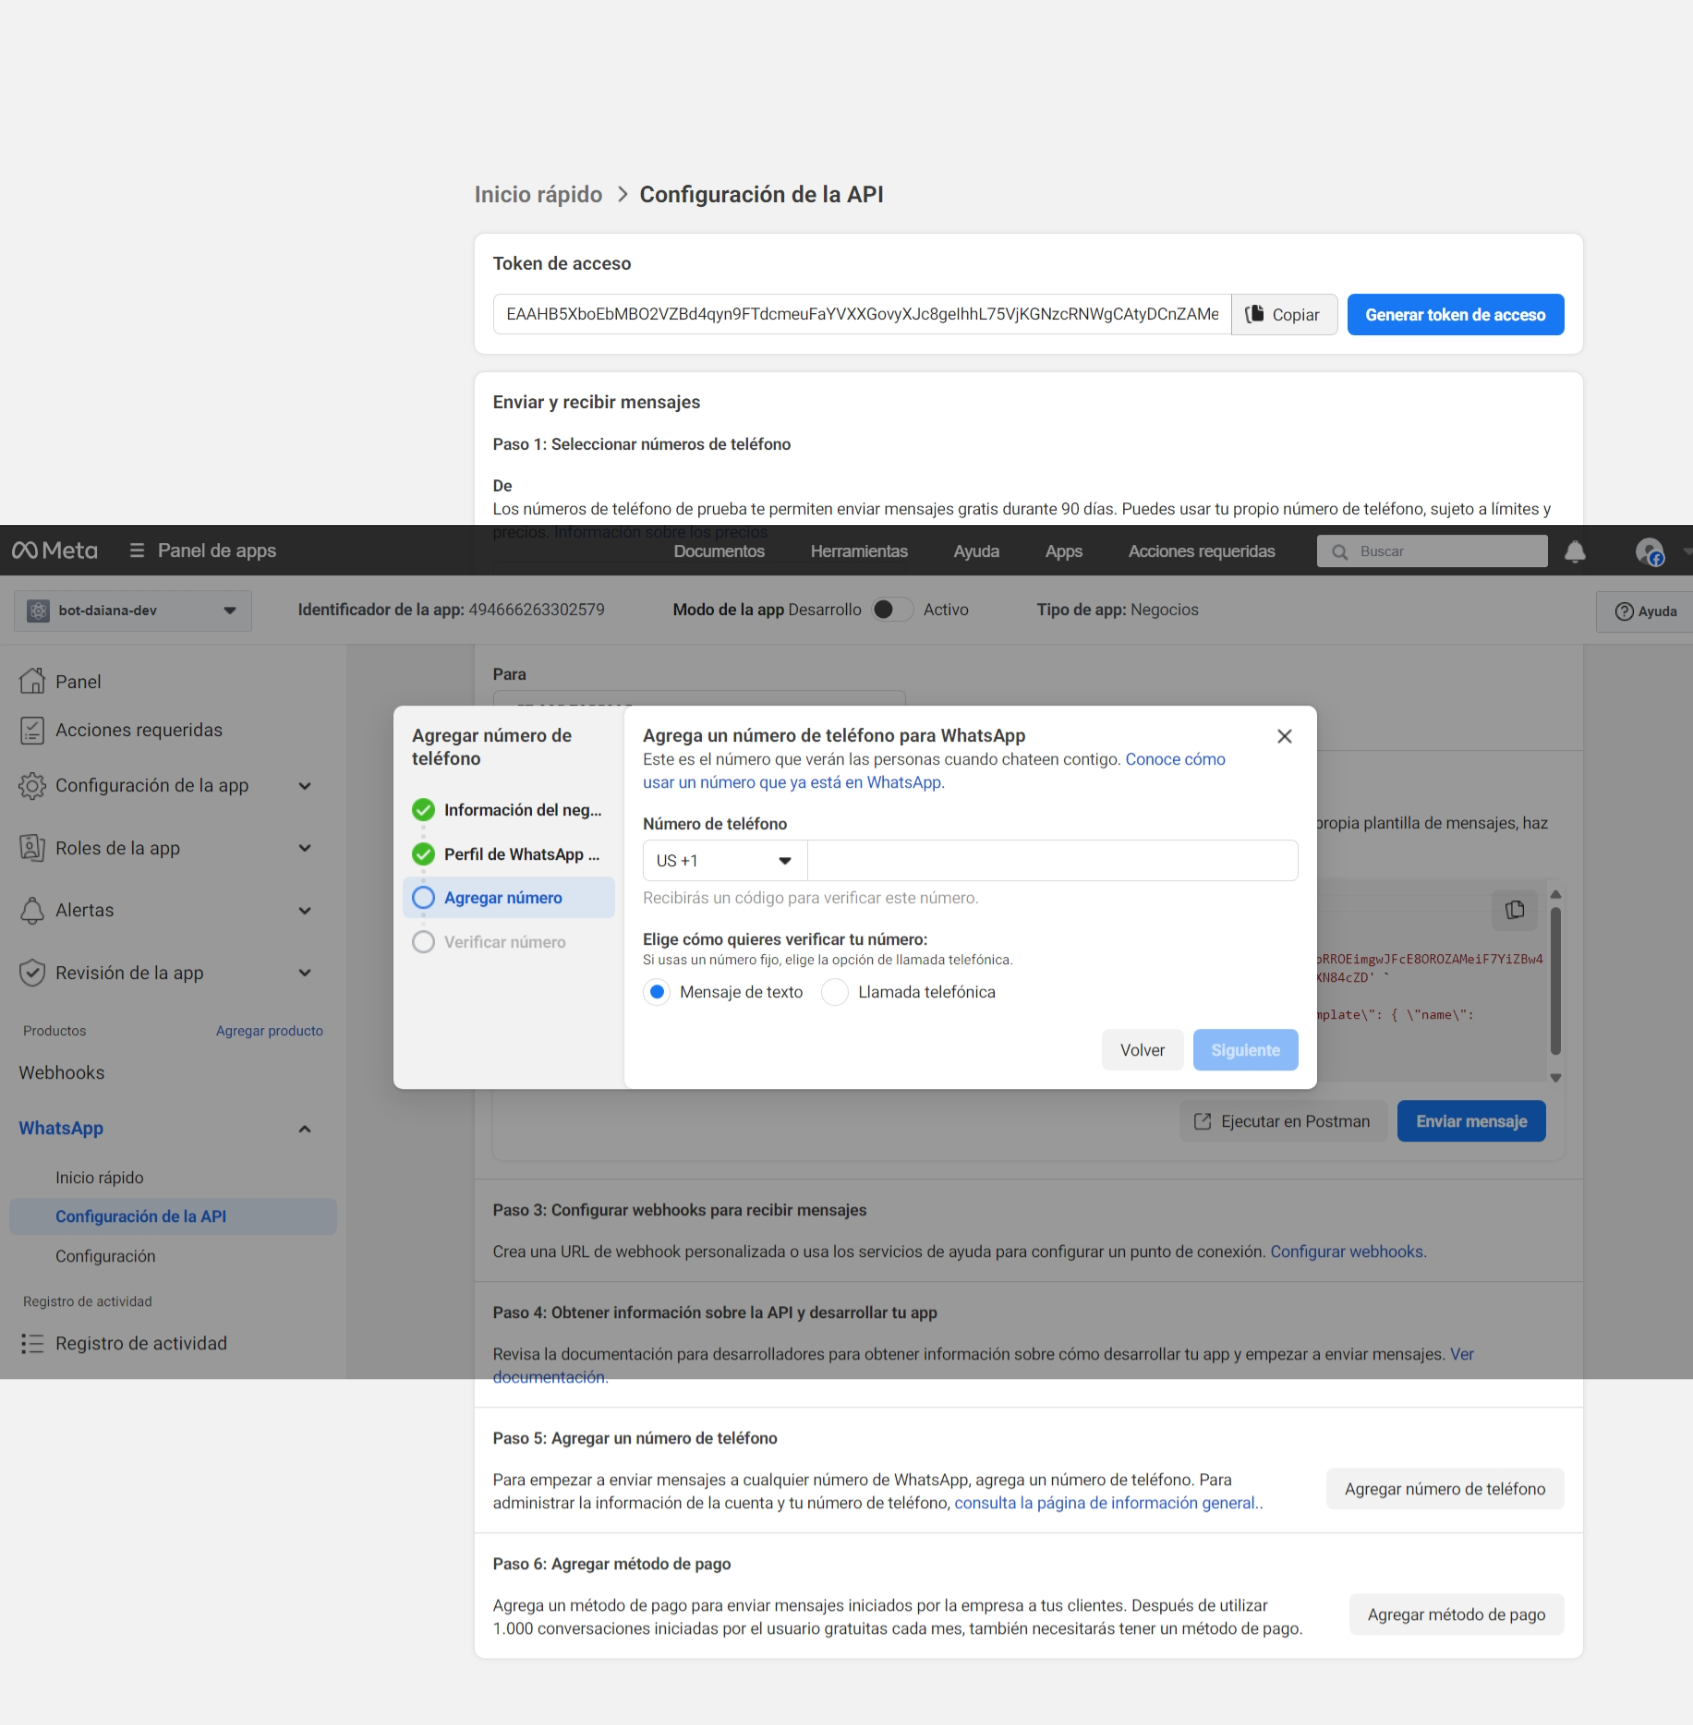
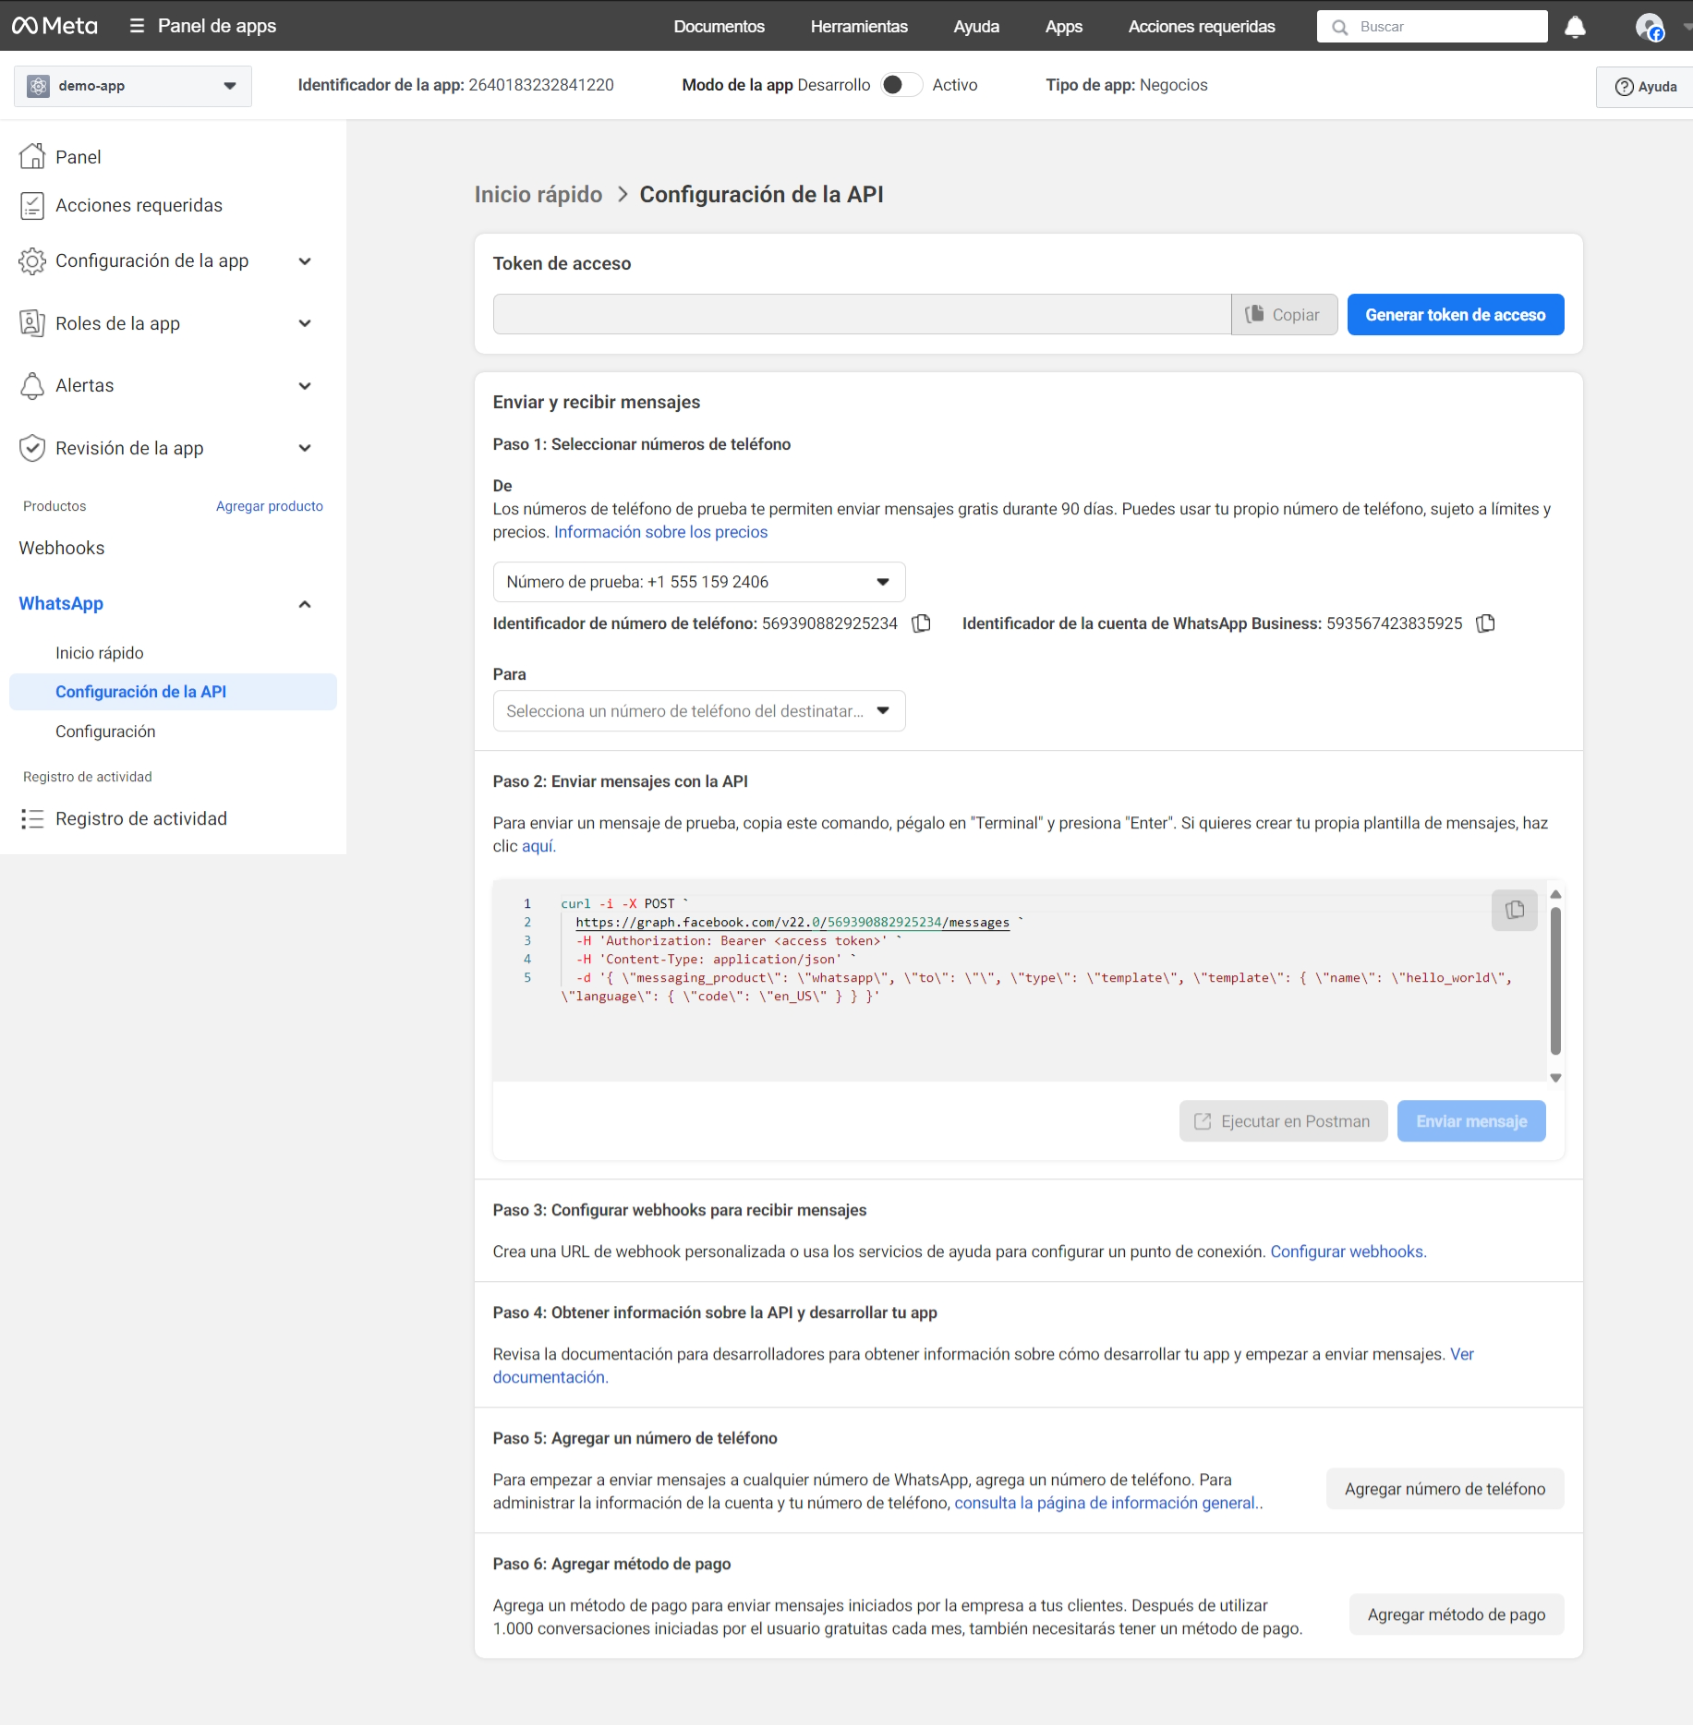 e. Add a phone number to test the connection with the server, and follow the steps in the images.
f. Change to your country's prefix and enter the number you will use for the test.
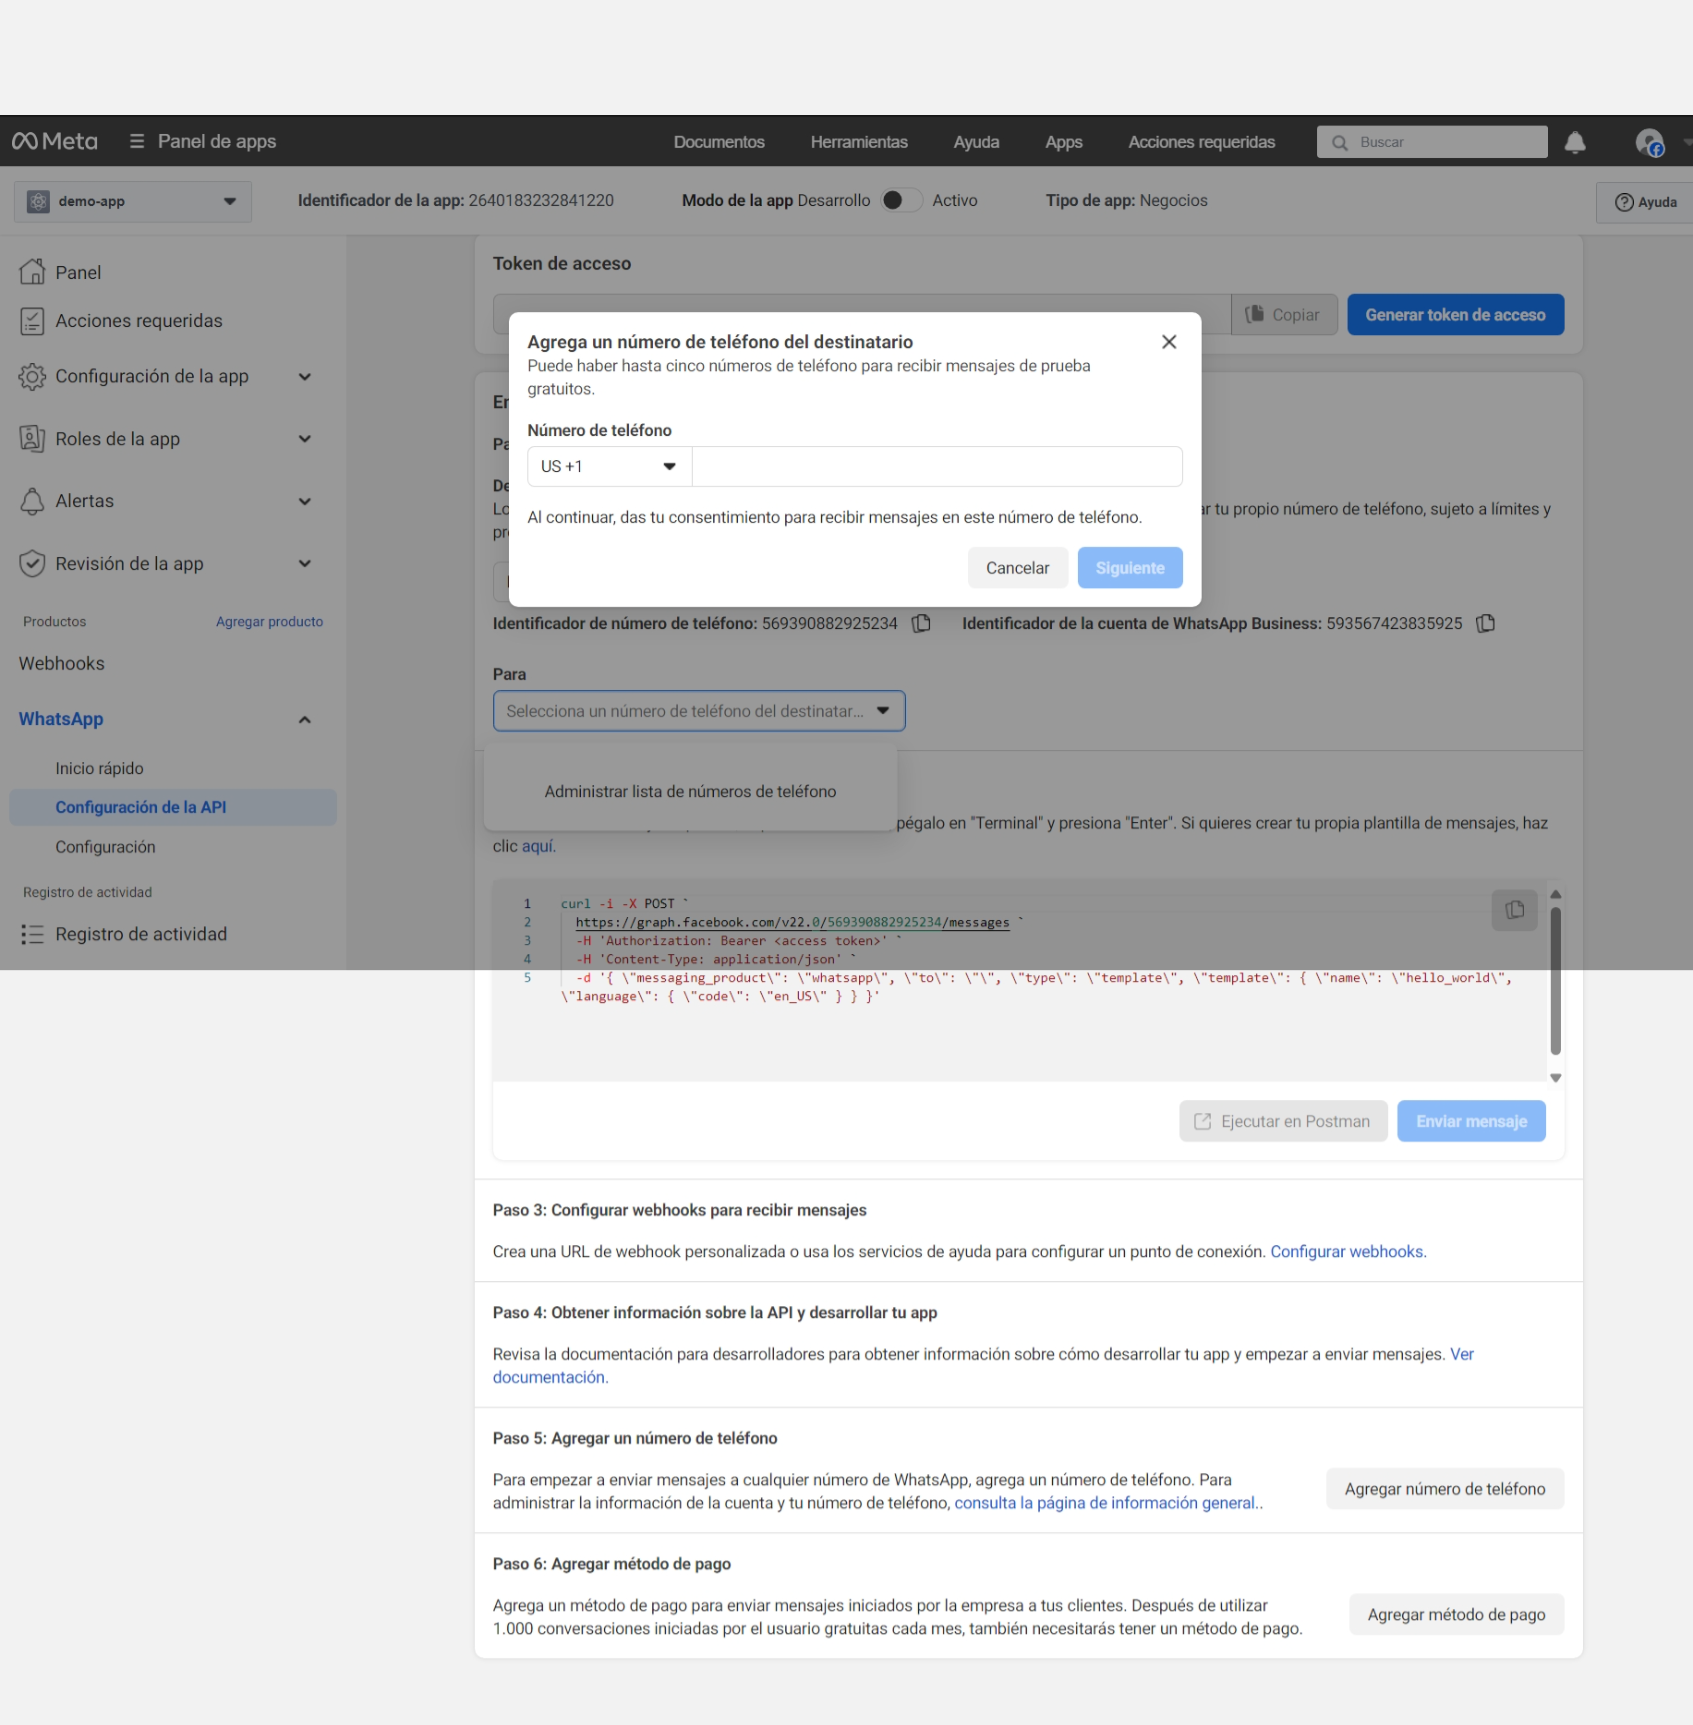
g. Enter the verification code received on your mobile.
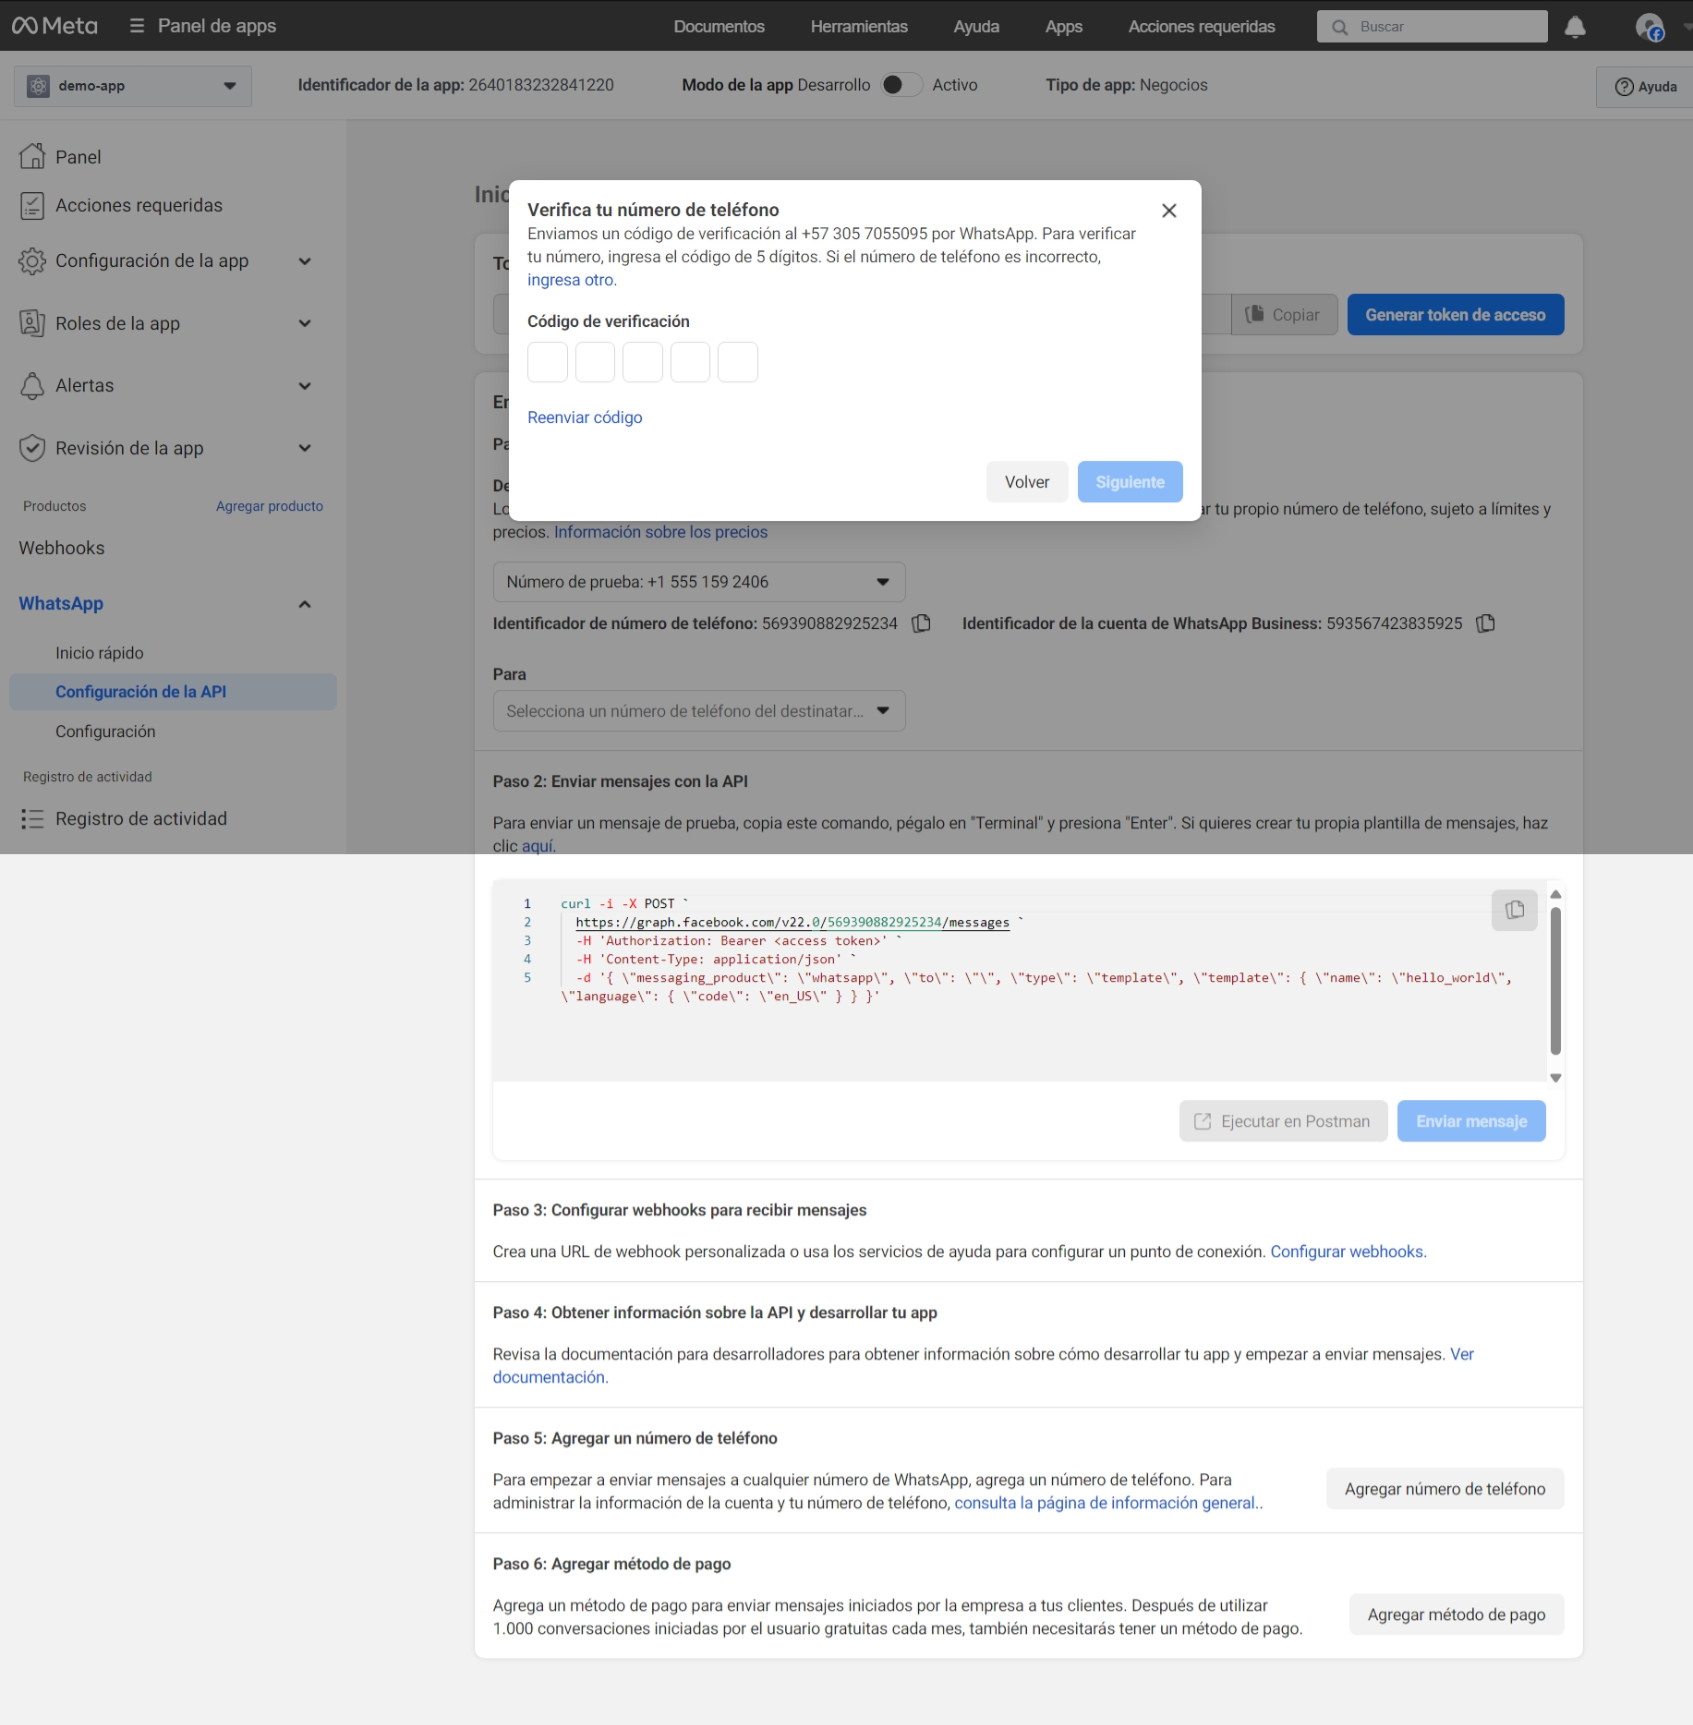
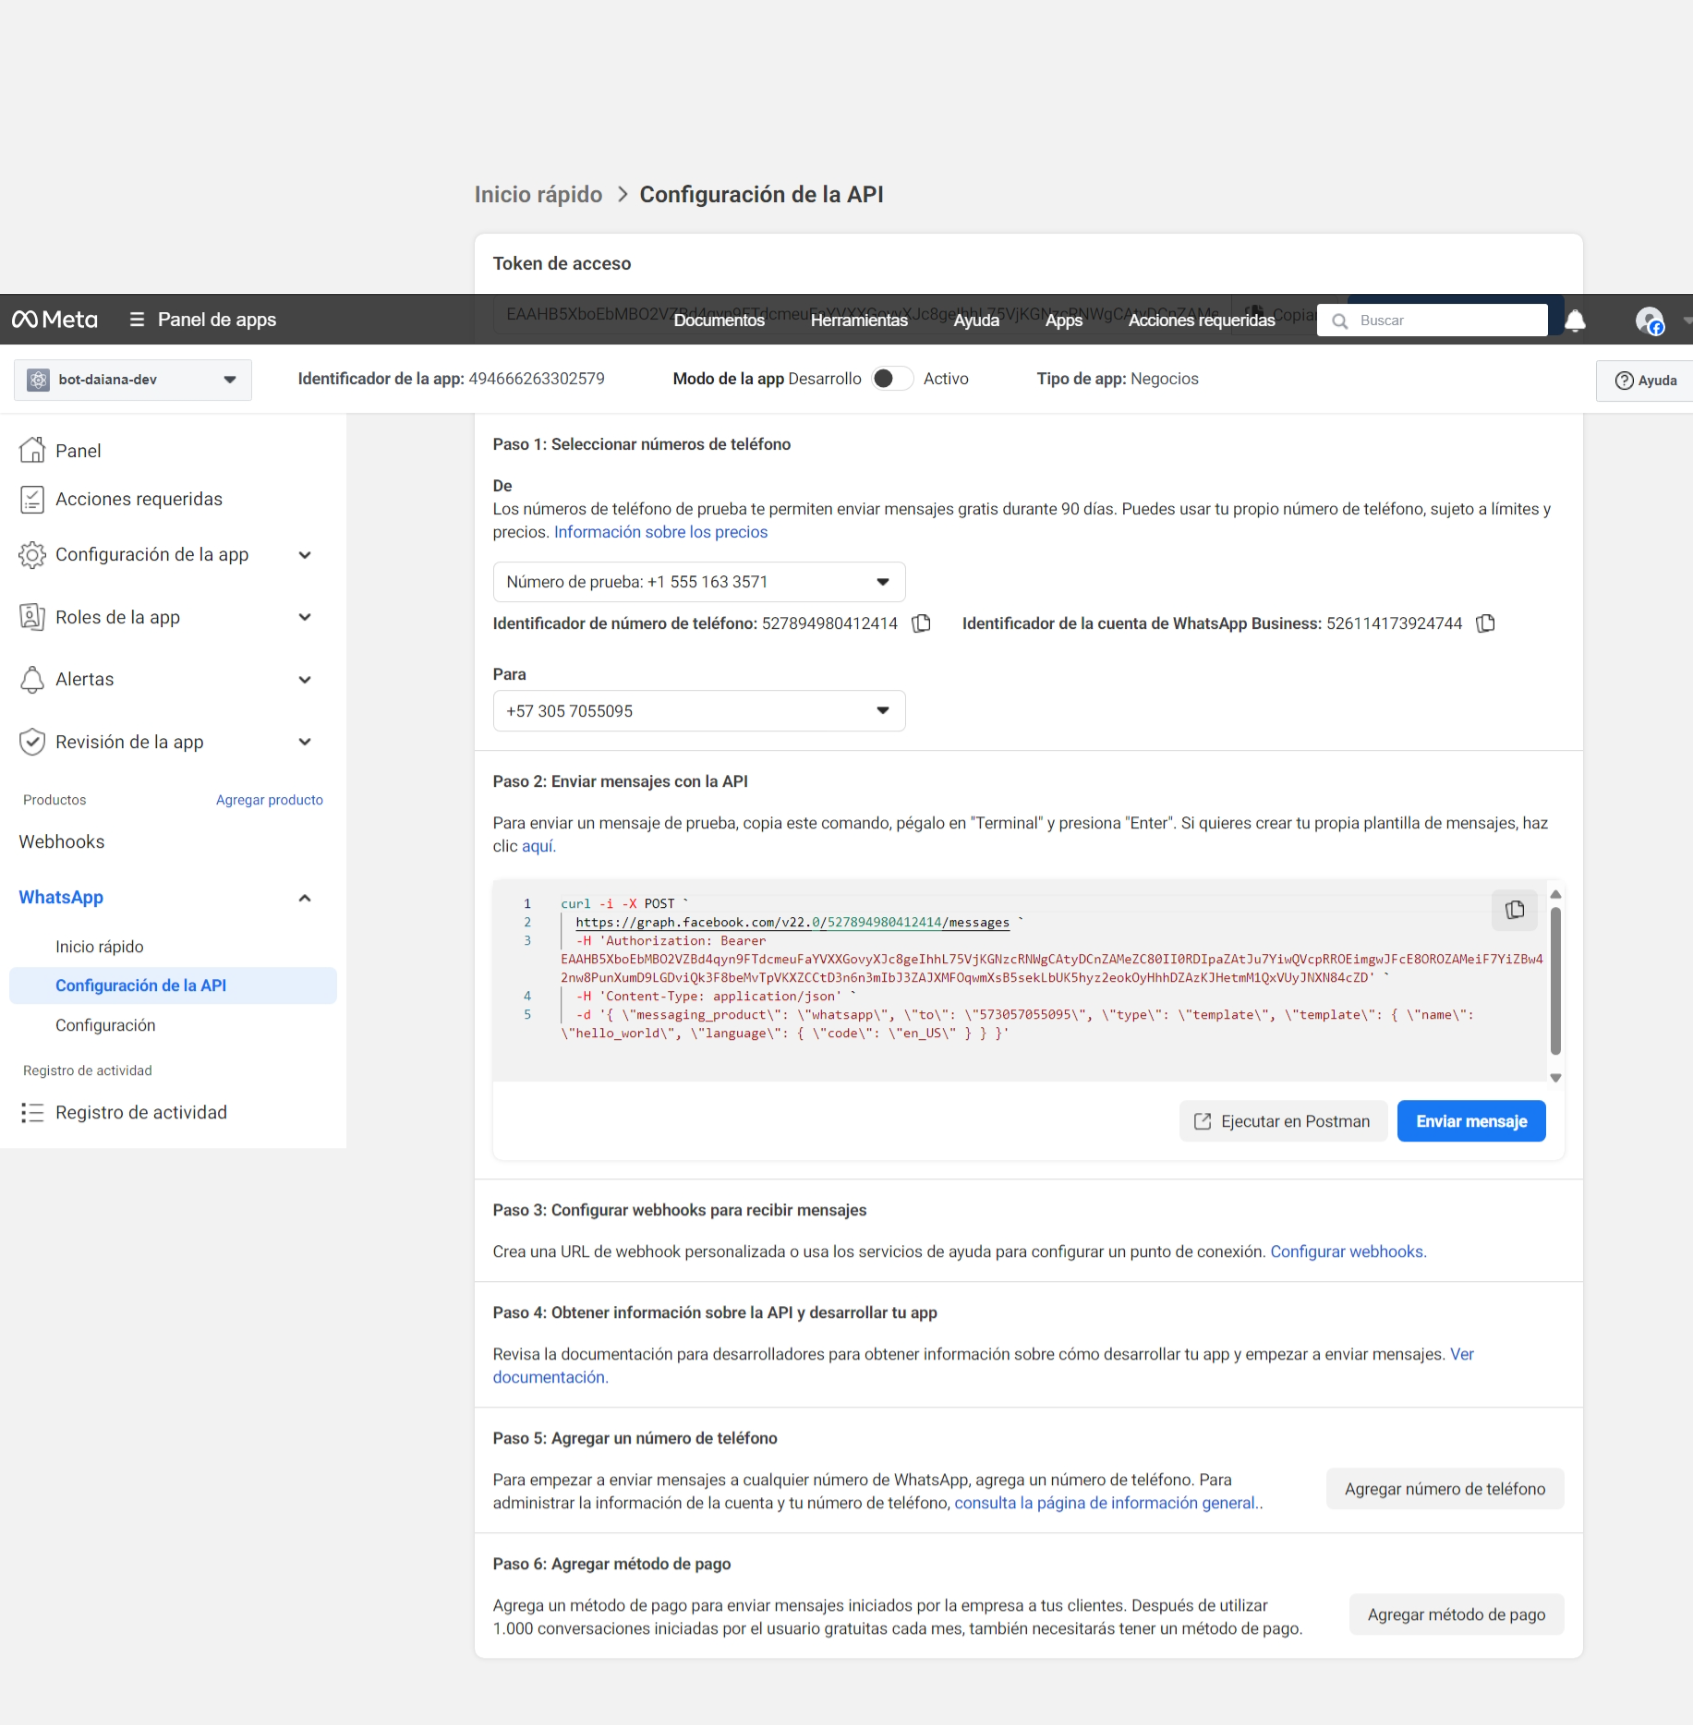
h. Click Send message, you should receive a test message on your WhatsApp.

Webhook Configuration
-
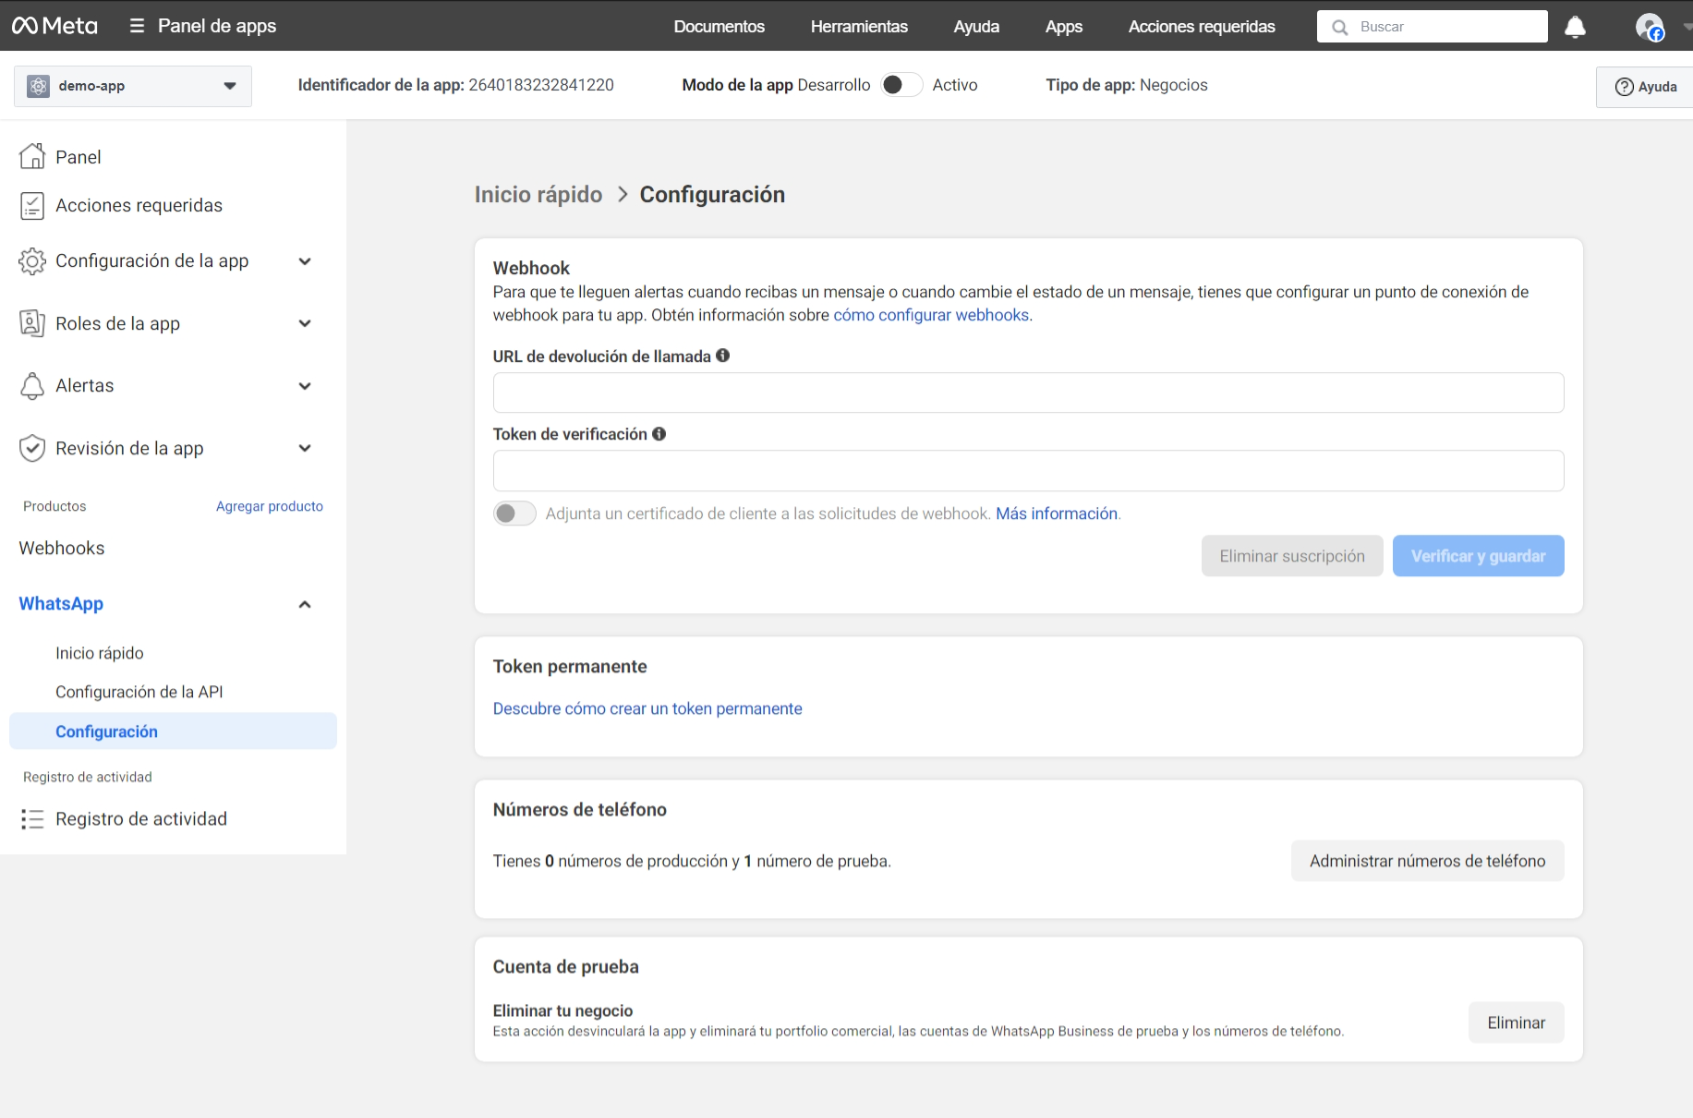
In step 3, click Configure webhooks.
-
You will see a page like this
-
It's time to generate a permanent token that you must add to the DAIANA configuration. More information click here.
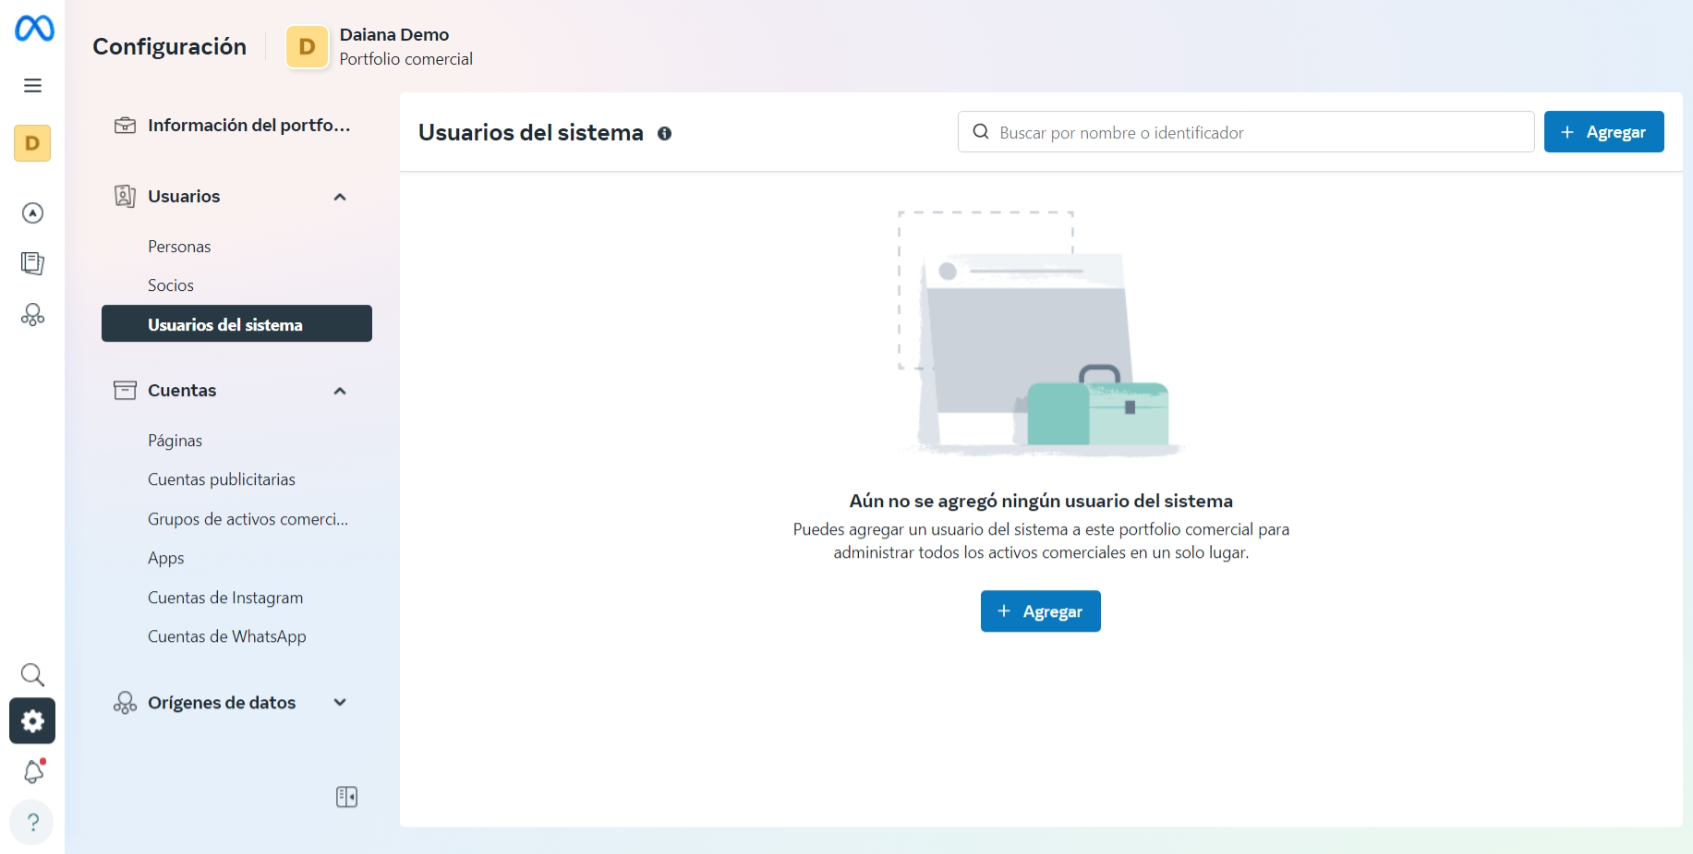
To generate a system token, access the Business Settings dashboard, select the created business, and click "System Users":
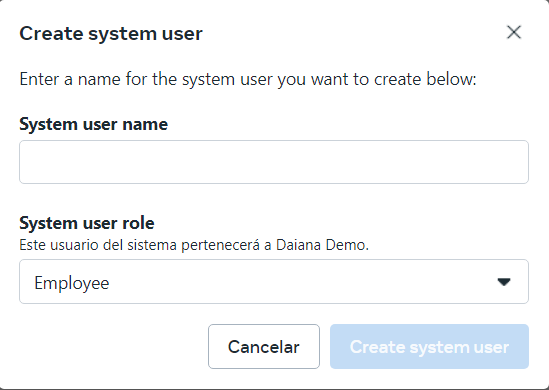
Click the "+Add" button, and when the "Create System User" window appears, enter a system user name and assign it the "Admin" or "Employee" role:
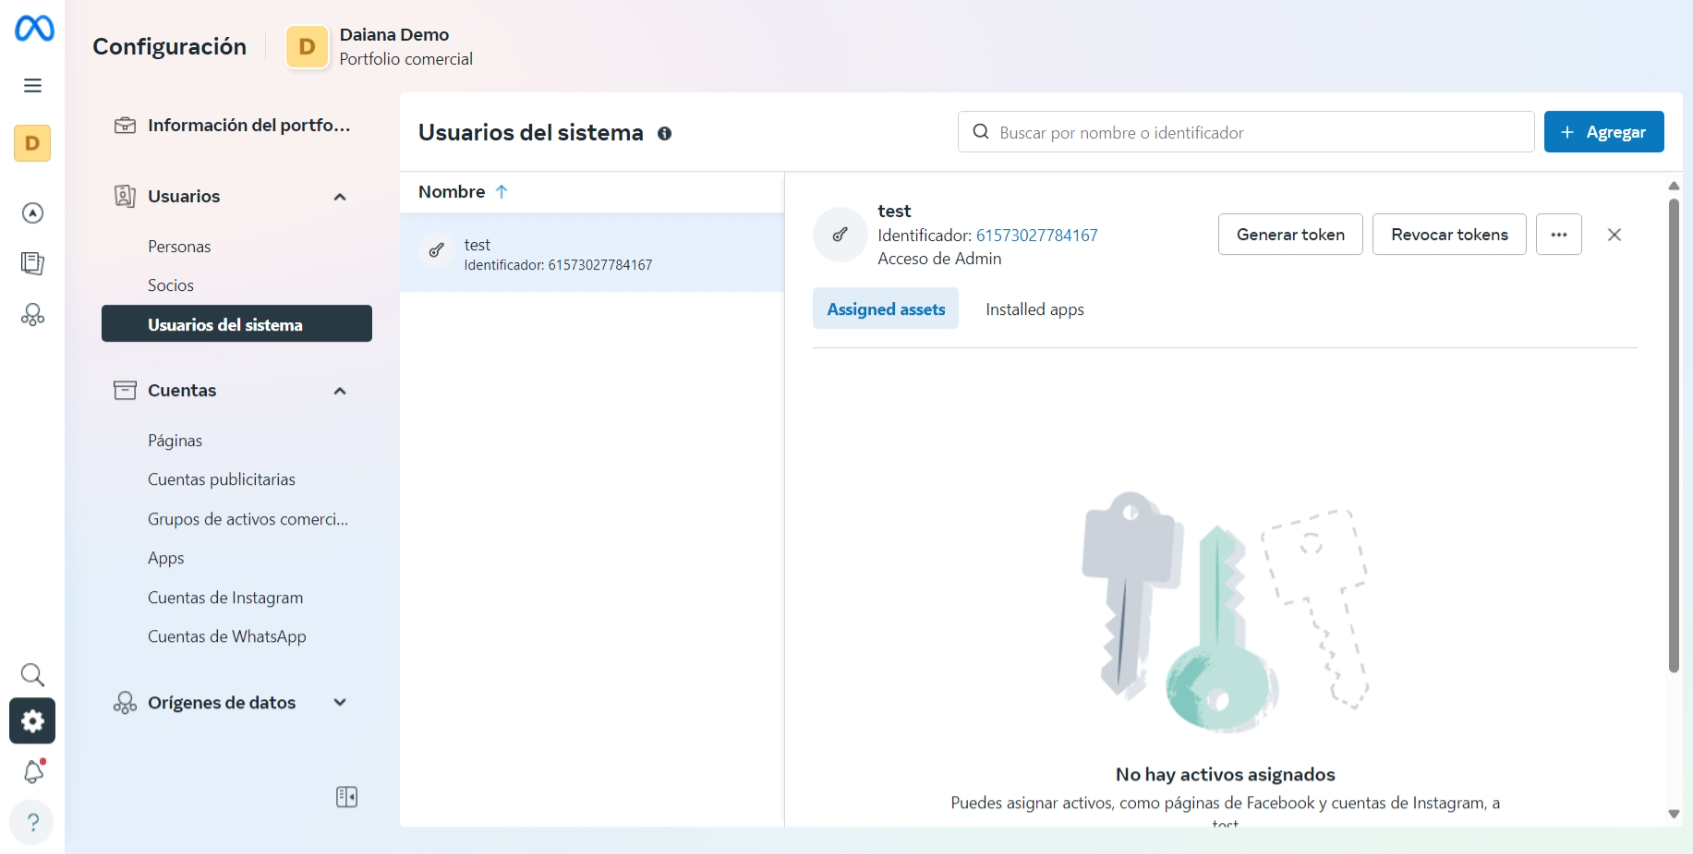
Once the system admin user has been created, it will appear in the list of system users. Click on the system user's name to display the asset assignment overlay.
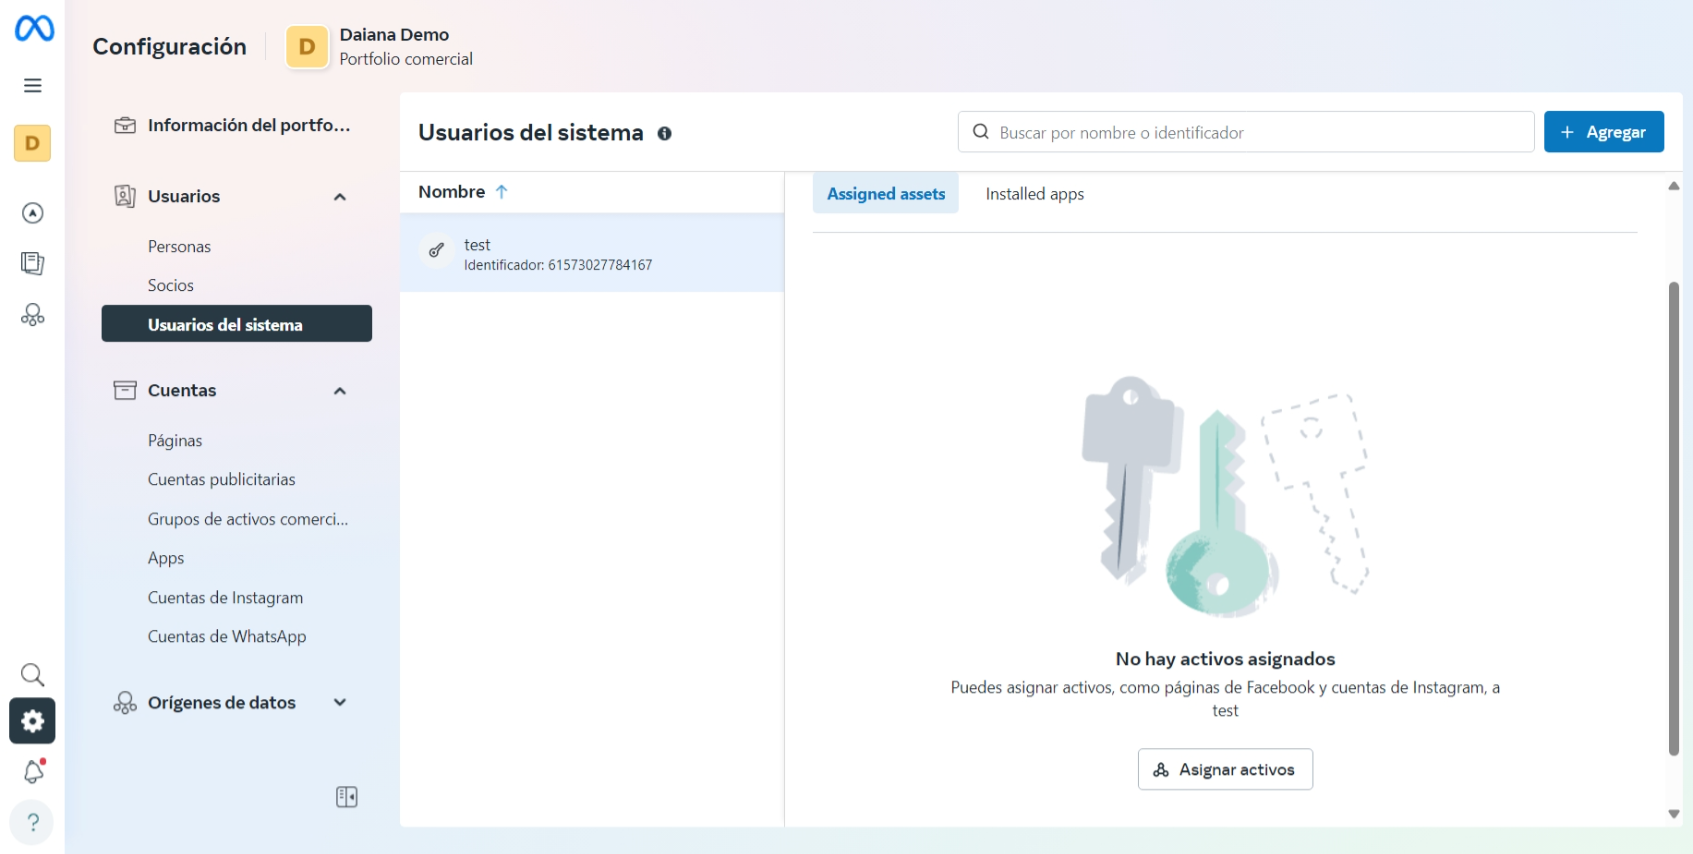
Click the "Assign Assets" button to display the Select Assets and Assign Permissions window:
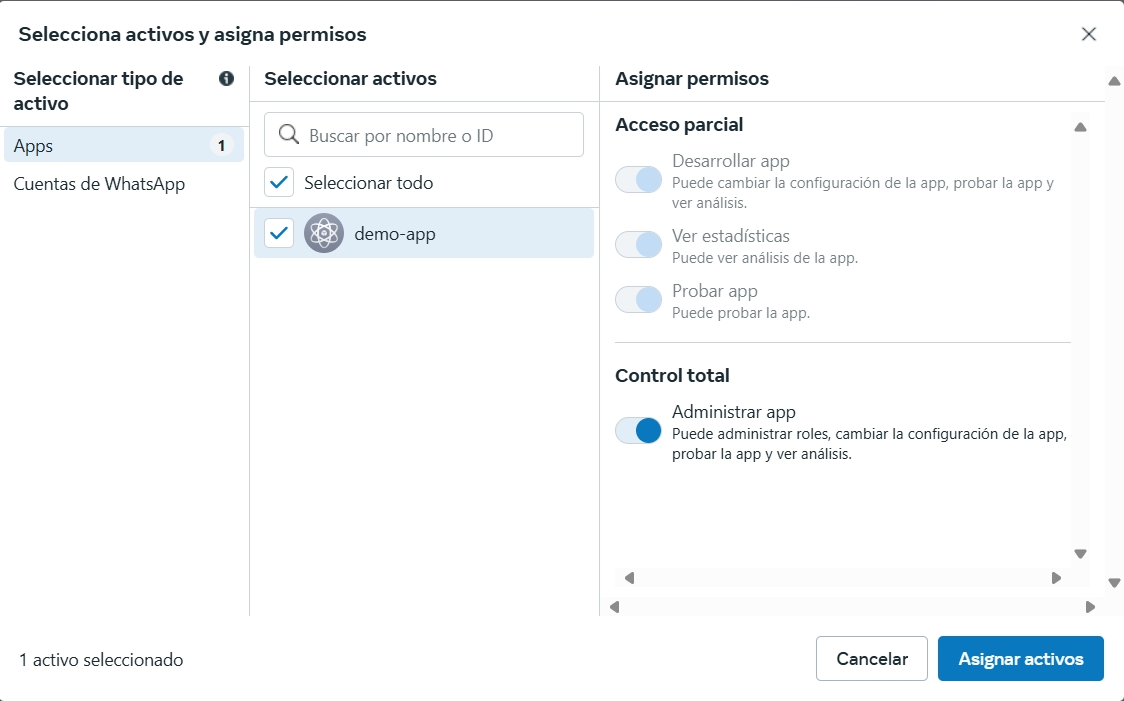
Select your app and grant your system user the Manage app permission. Then, click the "Assign Assets" button to confirm and close the window.
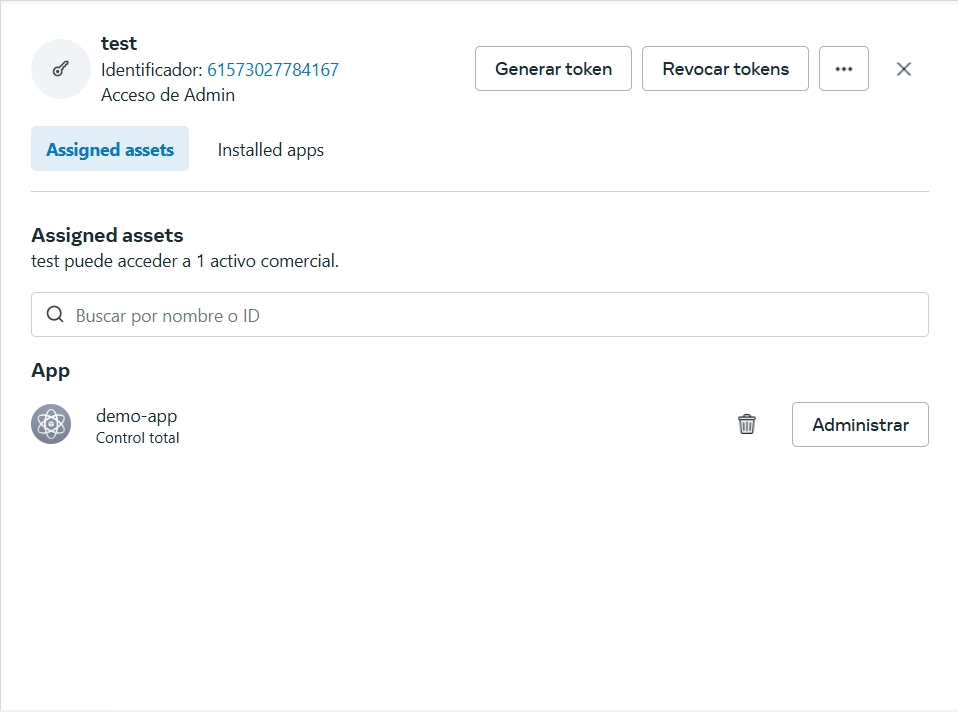
Once back in the System Users panel, reload the page to confirm that your system user has been granted "Full Control" permission for your app. It may take a while for permissions to be granted, so wait a few minutes and reload the page if your app does not appear as an assigned asset. When the asset has been assigned, it should look like this:
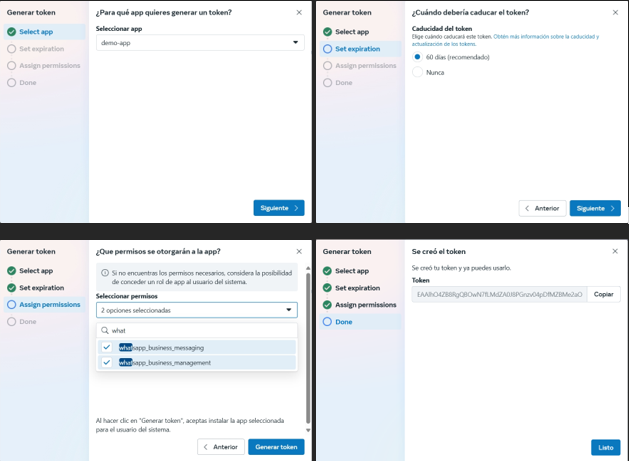
When you see that your system user has been granted full control of your app, in the asset assignment overlay, click the "Generate Token" button. In the window that appears, select your app, choose a token expiration preference, and assign your app these three Graph API permissions:
- business_management
- whatsapp_business_management
- whatsapp_business_messaging
You can search for "business" to find these permissions quickly:
-
Add your server's URL, which you will find in DAIANA's configuration (for example, https://yourdomain.com/webhook)
-
Enter the VERIFY_TOKEN defined in DAIANA's configuration
By now, you should have the three required data points in DAIANA's configuration for its operation: the phone number identifier (step 4.a), the token created earlier (steps 3.2-3), and the VERIFY_TOKEN (key of your preference) which must be the same in both. Click "Verify and Save".

- Select the events you want to receive (messages, statuses, etc.)
 Up to this point, we have only configured the development mode of the application. To move it to production, you must add a real phone number; follow the instructions in this link.
 Finally, you must change the app mode from "Development" to "Live" at the top.
